Strawberry Peach Crisp
Juicy peaches and strawberries bake down into a bubbling filling that tastes bright, jammy, and just sweet enough, while the cinnamon oat topping turns deeply golden and crisp at the…
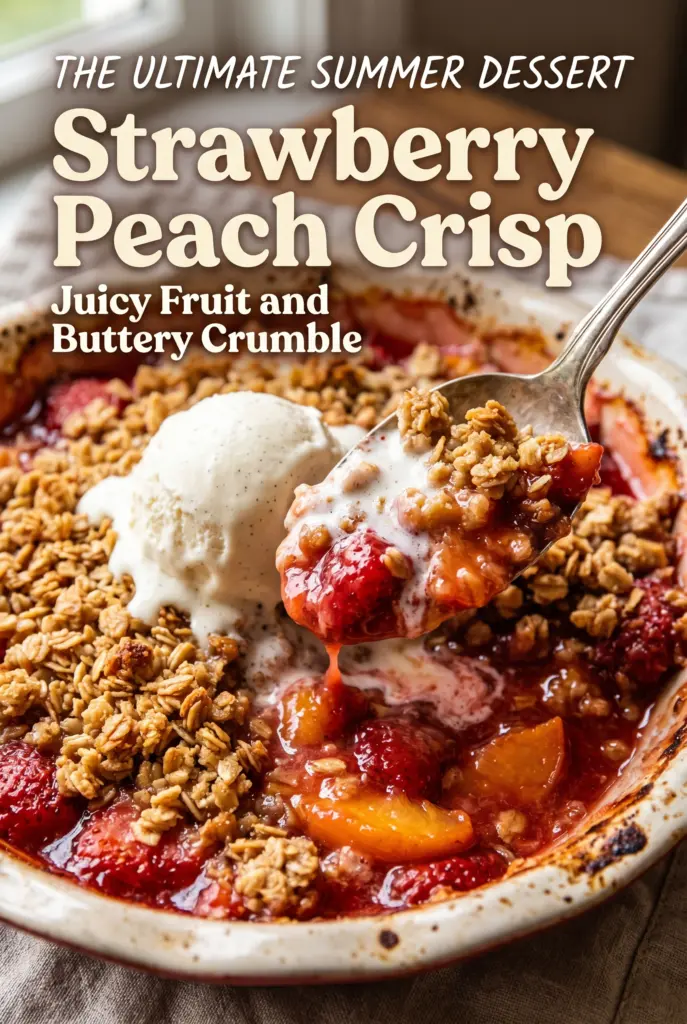
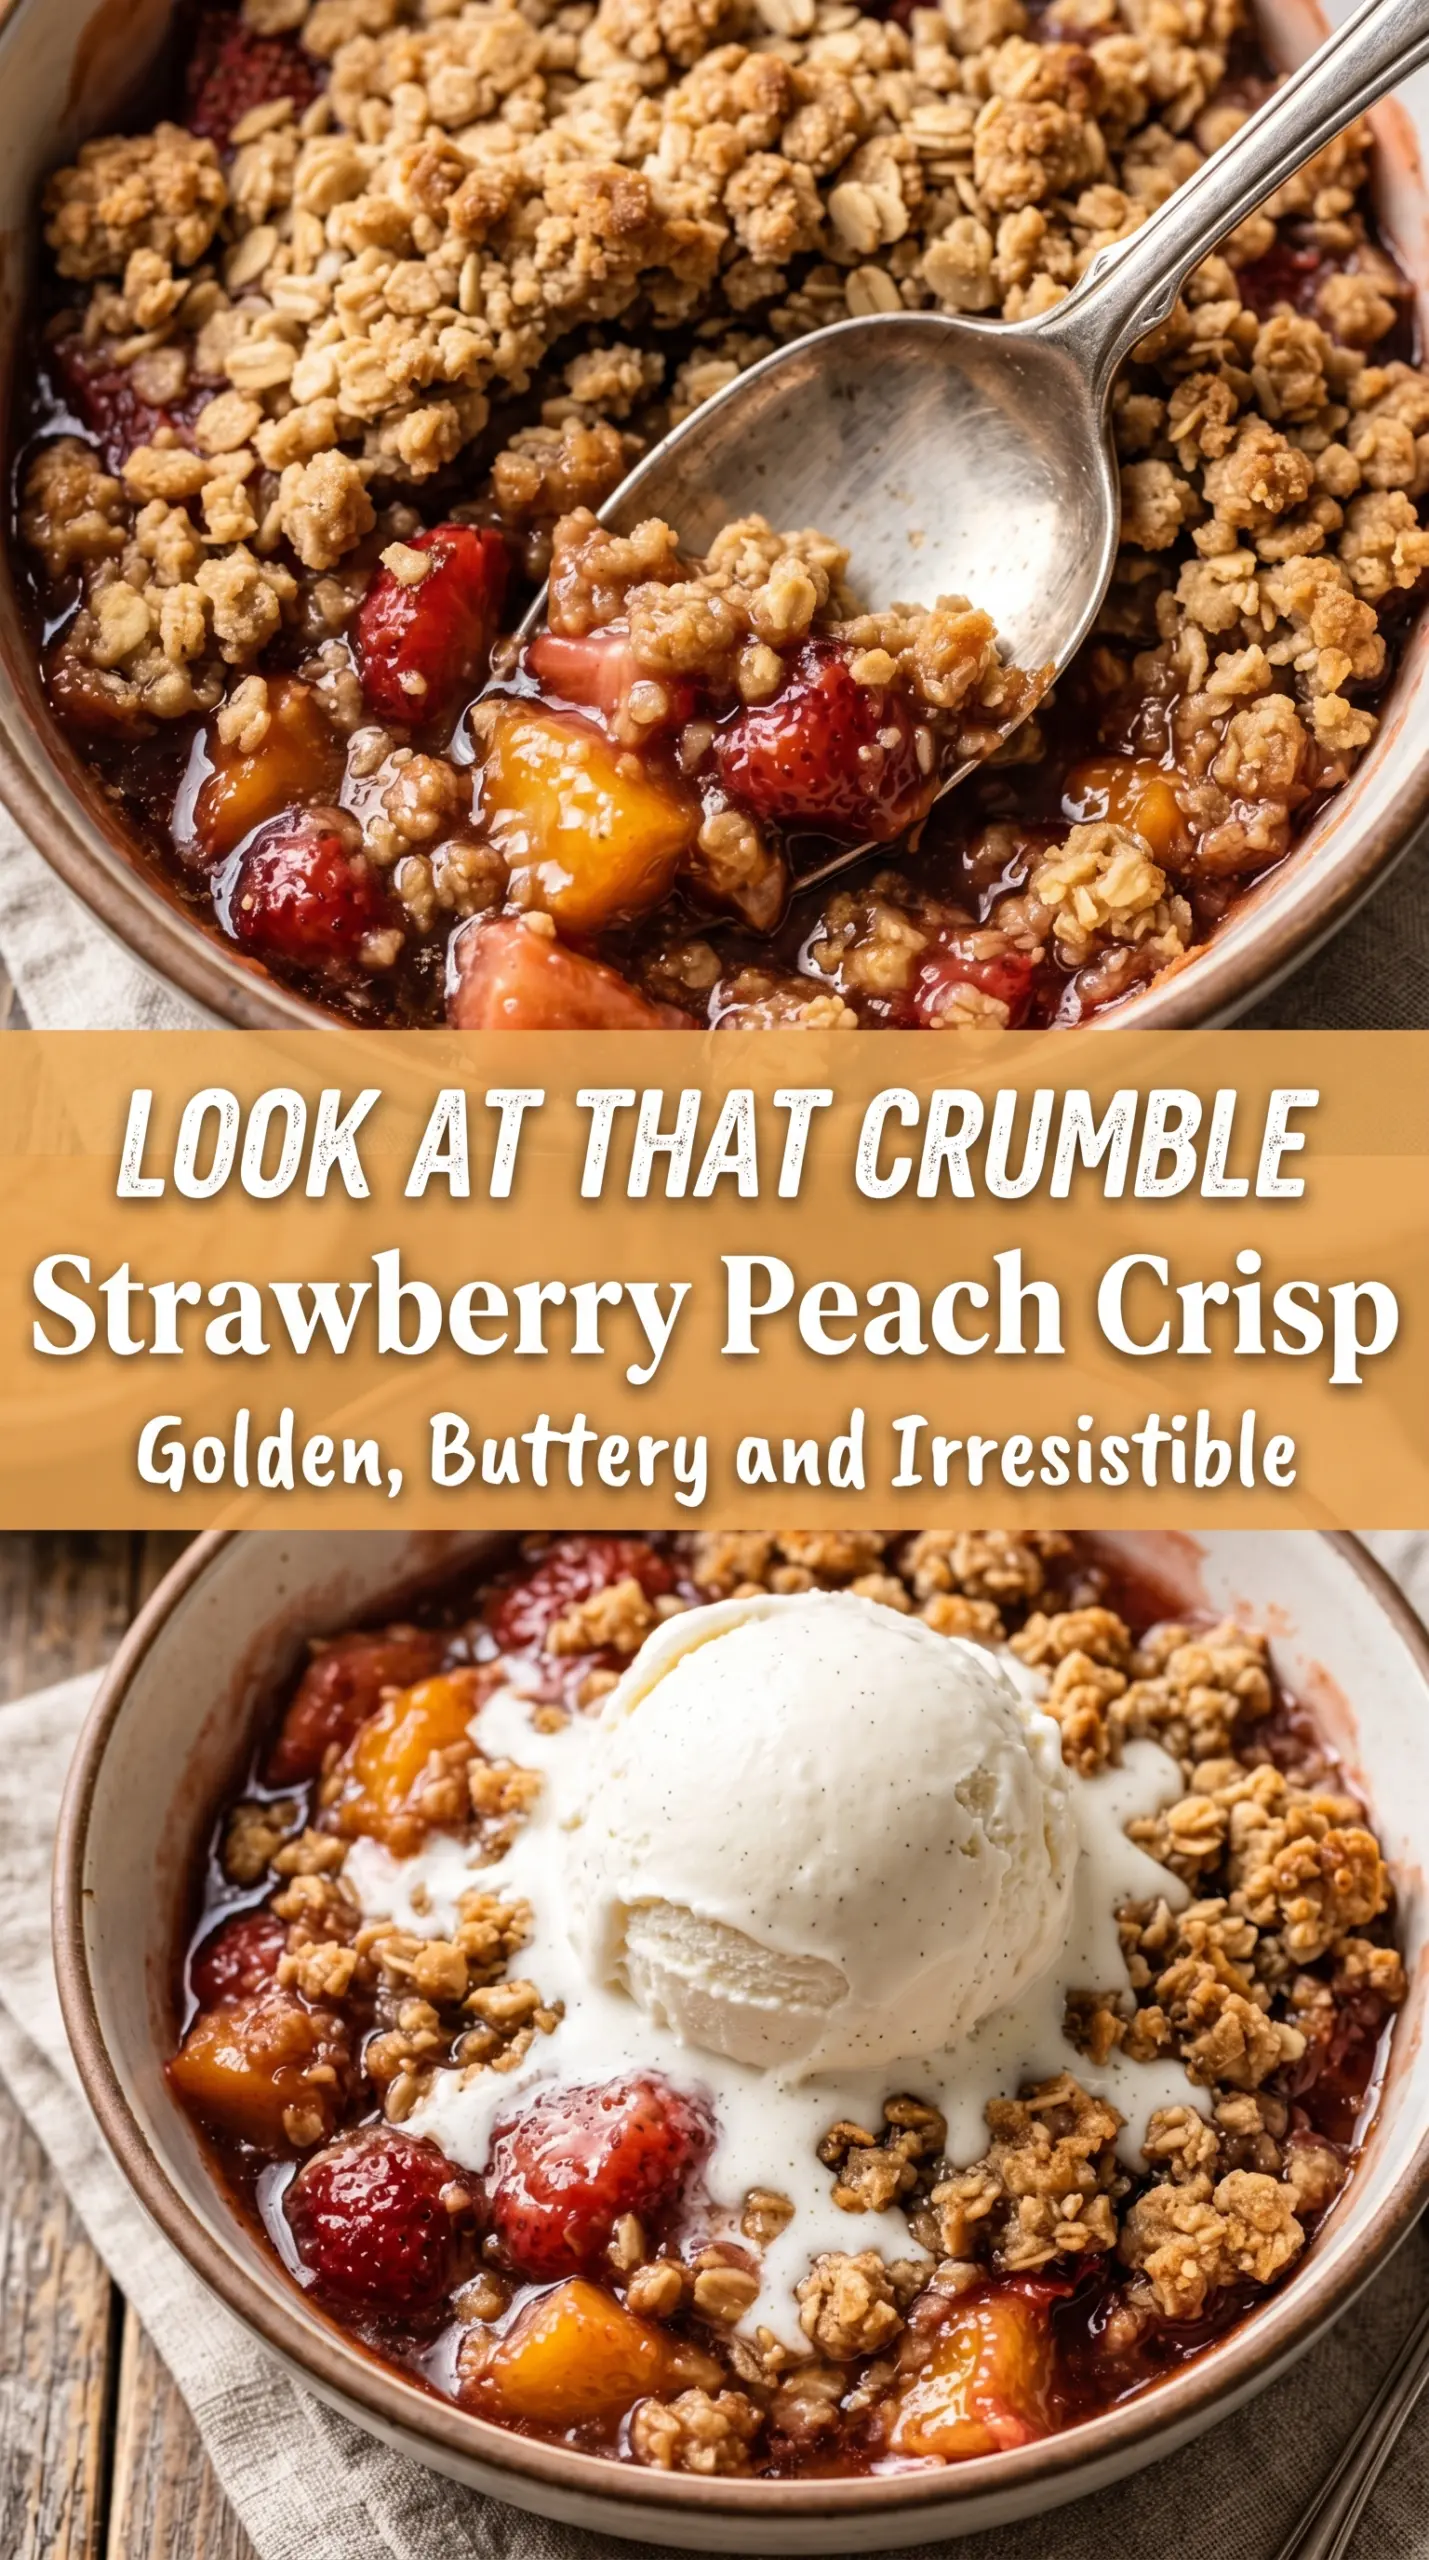
Tip: save now, cook later.Juicy peaches and strawberries bake down into a bubbling filling that tastes bright, jammy, and just sweet enough, while the cinnamon oat topping turns deeply golden and crisp at the edges. The contrast is what keeps this dessert on repeat: soft fruit underneath, buttery crunch on top, and just enough lemon to keep the whole pan tasting fresh instead of heavy.
What makes this version work is the balance of moisture and structure. Peaches release a lot of juice as they bake, so the cornstarch matters here — it thickens those juices into a spoonable sauce instead of leaving you with fruit soup at the bottom of the dish. Melted butter also gives the topping a nubby, clumpy texture that bakes into crisp clusters faster than a dry rub-in method, which is exactly what you want for a fruit dessert with a soft filling.
If you’ve ever had a crisp come out pale or runny, the notes below will help you avoid both problems. I’ve also included a few practical swaps, plus the timing detail that keeps the topping crunchy instead of soggy after it cools.
The filling set up beautifully and the topping stayed crisp even after sitting on the counter for a bit. I used ripe peaches and the strawberry flavor came through without making it watery.
Save this strawberry peach crisp for the night you want a bubbling fruit dessert with a buttery oat topping and almost no fuss.
The Reason the Filling Thickens Instead of Turning Watery
The biggest mistake with fruit crisps is skipping the thickener or pulling the pan too early. Peaches and strawberries both give off a lot of juice, and that juice needs a little help binding before it can settle into that glossy, spoonable texture. Cornstarch does that job cleanly here because it thickens at baking temperature without muddying the fruit flavor.
The other thing that matters is fruit ripeness. You want peaches that are fragrant and yielding, not rock-hard, but you don’t want them collapsing into puree before the topping has a chance to brown. Strawberries should be sliced evenly so they soften at the same rate as the peach pieces. Uneven fruit turns into uneven baking, and that’s when you get some bites that are jammy and others that are still firm.
- Peaches — Peel them if the skins are tough or fuzzy; if they’re thin and tender, you can leave them on. Slice them evenly so the pan bakes consistently.
- Strawberries — Their brightness keeps the filling from tasting one-note. If yours are large, cut them into halves or quarters so they don’t stay too chunky.
- Cornstarch — This is what turns the fruit juices into a thick, glossy filling. Arrowroot works in a pinch, but cornstarch gives the most reliable set in a fruit crisp.
- Lemon juice — It wakes up the fruit and keeps the filling from tasting flat. Bottled lemon juice can work, but fresh has a cleaner edge.
- Old-fashioned oats — These hold their shape and give the topping its craggy texture. Quick oats turn softer and less distinct.
- Brown sugar — It adds molasses depth and helps the topping brown. Light or dark brown sugar both work; dark gives a slightly richer finish.
How to Keep the Topping Crisp While the Fruit Bubbles Below
Mix the Topping Until It Looks Like Wet Sand with Clumps
Stir the oats, flour, brown sugar, cinnamon, and salt together first, then pour in the melted butter and mix until the whole bowl looks clumpy and damp. You want uneven crumbs, not a paste. If the mixture turns greasy and smooth, it will bake up dense instead of crisp. A few larger clumps are a good thing because they turn into the best crunchy bits on top.
Build the Filling Before the Fruit Starts Sweating Too Much
Combine the fruit, sugar, cornstarch, lemon juice, and vanilla in a large bowl, then move it into the baking dish right away. The sugar starts pulling juice from the fruit almost immediately, and letting it sit too long gives you extra liquid in the bowl instead of in the pan. Spread it into an even layer so the topping can bake uniformly and the center doesn’t stay underdone.
Bake Until the Edges Are Actively Bubbling
Pulling a crisp when the topping looks golden but the filling isn’t bubbling is the mistake that leaves you with runny fruit underneath. Bake until you see thick bubbles around the edges and some coming through the center. That bubbling means the cornstarch has activated and the juices have thickened. Let it sit for about 10 minutes before serving so the filling settles instead of pouring out immediately.
How to Adapt This for Different Diets and Fruit Seasons
Make It Gluten-Free
Swap the all-purpose flour for a 1:1 gluten-free baking blend. The topping will still brown and crisp, though it may be a little more delicate when scooped. Keep the oats old-fashioned, and check that they’re certified gluten-free if that matters for your kitchen.
Make It Dairy-Free
Use melted plant-based butter in the topping. Choose one that behaves like real butter when baked, not a soft spread from a tub, or the crumbs can turn oily instead of crisp. The flavor stays close, and the texture still bakes into a proper crumble.
Use Other Stone Fruit
Swap some of the peaches for nectarines, apricots, or plums if that’s what you have. Keep the total fruit amount about the same so the cornstarch ratio still works. Very juicy fruit may need an extra tablespoon of cornstarch; very firm fruit may need a few more minutes in the oven.
Storage and Reheating
- Refrigerator: Store covered for up to 4 days. The topping softens a bit in the fridge, but the flavor stays good.
- Freezer: It freezes better after baking than before. Cool completely, wrap well, and freeze for up to 2 months. Thaw overnight in the fridge before reheating.
- Reheating: Warm it in a 325°F oven until the center is hot and the topping crisps back up, usually 15 to 20 minutes for a small portion. The microwave will heat the filling, but it turns the topping soft, which is the most common letdown with leftovers.
Questions I Get Asked About This Recipe

Strawberry Peach Crisp
Ingredients
Equipment
Method
- Preheat the oven to 375°F (190°C) so it’s fully hot before baking. Place a sheet pan in the oven if you want to catch any drips from the baking dish.
- Grease a 9-inch baking dish to prevent sticking. Set it aside while you mix the fruit.
- In a large bowl, combine peaches, strawberries, granulated sugar, cornstarch, lemon juice, and vanilla extract until evenly coated. The cornstarch should look evenly distributed.
- Transfer the fruit mixture to the greased baking dish and spread it into an even layer. This helps the filling bubble uniformly.
- In a separate bowl, combine old-fashioned oats, all-purpose flour, brown sugar, cinnamon, and salt. Mix until the dry ingredients look consistent.
- Stir in the melted unsalted butter until the mixture forms crumbly clumps. If it looks dry, keep stirring until all flour is moistened.
- Sprinkle the topping evenly over the fruit so it covers the surface. Aim for an even layer for golden, crisp texture.
- Bake at 375°F (190°C) for 40–45 minutes until golden and bubbly. The center should be bubbling and the topping should look crisp.
- Cool the crisp for 10 minutes before serving to let the juices thicken slightly. You should see less active bubbling when it’s ready.
- Serve warm as-is, or with vanilla ice cream if desired. The hot fruit and cold topping create contrast.
