

Roasted Butternut Squash Soup
Roasted butternut squash soup earns its place when the squash gets deeply caramelized first. That edge of browning gives the soup a nutty, almost buttery backbone that plain simmered squash…
Tip: save now, cook later.Roasted butternut squash soup earns its place when the squash gets deeply caramelized first. That edge of browning gives the soup a nutty, almost buttery backbone that plain simmered squash just can’t match. The result is silky and thick enough to cling to a spoon, with a gentle sweetness that feels rounded instead of flat.
The trick is building flavor in layers. Roasting concentrates the squash, then the onion and garlic add savoriness, and a small amount of maple syrup nudges the sweetness without turning the bowl into dessert. Coconut milk gives the soup body and a mellow finish, while sage and nutmeg keep it tasting warm and grounded.
Below, I’ve included the little details that matter: how dark to roast the squash, when to blend for the smoothest texture, and the easiest swaps if you want to keep it dairy-free or use what’s already in your pantry.
The squash got those browned edges in the oven and the soup tasted like it had been simmering all afternoon. I loved how smooth it blended, and the maple stayed subtle instead of making it too sweet.
Save this roasted butternut squash soup for the nights when you want a silky, cozy bowl with deep roasted flavor and almost no cleanup.
The Reason Roasting the Squash Changes Everything
The biggest mistake with squash soup is treating the squash like it’s just a vegetable to soften. Once it only gets steamed or simmered, you end up with a pale, one-note puree. Roasting at a high temperature pulls water out, concentrates the flavor, and gives you those browned, almost nutty bits that taste like actual depth.
This matters even more here because the rest of the ingredients are quiet. Onion, garlic, sage, nutmeg, and broth all support the squash; none of them are strong enough to hide bland squash. If the roasting step is rushed, the soup will still blend smoothly, but it won’t taste layered.
- Look for color, not just softness. The cubes should be caramelized at the edges and tender enough to collapse under a fork.
- Don’t crowd the pan. If the squash is piled up, it steams instead of browns. Use two pans if you need to.
- Roast a little longer than you think. A deeper amber color gives the soup its best flavor.
What Each Ingredient Is Actually Doing in This Bowl

- Butternut squash — This is the whole point of the soup, so use a squash that feels heavy for its size with firm flesh. Pre-cut squash works in a pinch, but fresh-cut cubes usually roast better because they aren’t sitting around drying out.
- Olive oil — It helps the squash brown and keeps the puree from tasting thin. Any neutral oil works, but olive oil adds a little roundness that fits the soup.
- Vegetable broth — Use one with good flavor because the broth becomes the liquid base. If yours tastes weak, the soup will taste weak too, since there aren’t many ingredients to cover it up.
- Coconut milk or heavy cream — Coconut milk keeps the soup dairy-free and adds silkiness without tasting like dessert once it’s mixed with sage and nutmeg. Heavy cream makes the finish a little richer and more traditional.
- Maple syrup — This is not here to sweeten the soup aggressively. It rounds out the roasted squash and helps the savory spices taste fuller.
- Ground sage and nutmeg — Sage gives the soup its earthy, autumn-y backbone, and nutmeg adds warmth in the background. Fresh sage can work for garnish, but for the soup itself, dried ground sage is easier to distribute evenly.
The Order That Gives You a Silky, Not Grainy, Soup
Roasting Until the Squash Starts to Brown
Toss the squash with oil, salt, and pepper, then spread it out in a single layer. Roast it at 425°F until the edges are browned and the centers are fork-tender. If the squash is only softened, the soup will taste flat and watery; the browning is where the flavor lives.
Cooking the Onion and Garlic Without Burning Them
Start the onion in the pot until it turns soft and translucent, then add the garlic for just a minute. Garlic burns fast, and burned garlic will make the whole pot taste harsh. You want the smell to turn fragrant and mellow, not sharp or bitter.
Blending for the Right Texture
Add the roasted squash, broth, sage, and nutmeg, then blend until completely smooth. An immersion blender works well, but a countertop blender gives you the silkiest finish if you work in batches and vent the lid carefully. If the soup seems thick, loosen it with a splash of broth instead of water so the flavor stays full.
Finishing With Coconut Milk and Maple
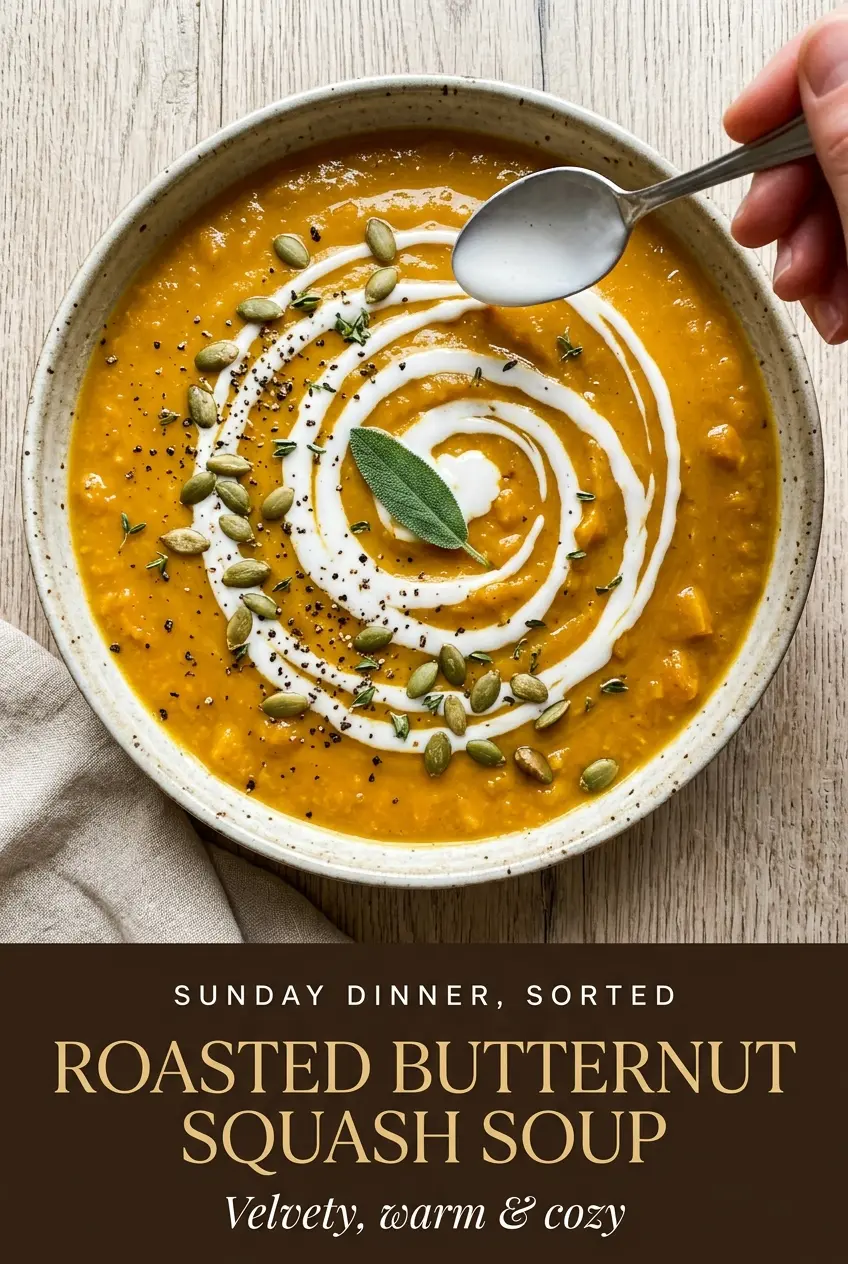
Stir in the coconut milk and maple syrup after the soup is blended and hot, then taste and adjust the salt. Adding them at the end keeps the dairy or coconut from cooking down too hard and lets you control the final sweetness. Top with pepitas and sage while the soup is hot so the garnish stays crisp and fragrant.
Three Ways to Make This Soup Fit What You Have
Dairy-Free and Still Creamy
Use the coconut milk version and don’t skip the roasting step. Coconut milk gives the soup a rich finish without needing cream, and once the sage and nutmeg go in, the coconut flavor fades into the background instead of taking over.
If You Want a More Savory Bowl
Leave out the maple syrup and add a pinch more salt at the end. You’ll get a less sweet soup with a deeper roasted edge, which is nice if you’re serving it alongside grilled cheese or a hearty salad.
Making It Ahead for Easy Lunches
This soup holds up well in the fridge and tastes even better the next day after the spices settle in. If you’re planning ahead, blend it fully before storing so you can reheat it gently without having to break down any chunks later.
Use Heavy Cream Instead of Coconut Milk
Heavy cream gives the soup a classic, velvety finish with a little more richness and no coconut note at all. Stir it in off the heat or over low heat so it stays smooth and doesn’t separate.
Storage and Reheating
- Refrigerator: Store in an airtight container for up to 4 days. It may thicken as it sits, which is normal for a blended squash soup.
- Freezer: It freezes well for up to 3 months. Leave a little space at the top of the container because the soup will expand as it freezes.
- Reheating: Warm it gently on the stove over medium-low heat, stirring often. High heat can make the coconut milk or cream separate and can dull the roasted flavor, so don’t rush it.
Answers to the Questions Worth Asking
Roasted Butternut Squash Soup
Ingredients
Equipment
Method
- Preheat the oven to 425°F. Toss the squash cubes with 1 tablespoon olive oil, salt, and black pepper, then spread on a baking sheet in a single layer with cut sides down where possible.
- Roast for 30-35 minutes, flipping halfway, until deeply caramelized and fork-tender, with browned edges visible.
- Heat the remaining 1 tablespoon olive oil in a large pot over medium heat. Add the chopped onion and cook until soft, about 5 minutes, until translucent around the edges.
- Add the minced garlic and cook until fragrant, about 1 minute, stirring so it doesn’t brown.
- Add the roasted squash, vegetable broth, ground sage, and nutmeg, then bring to a simmer. Cook for 10 minutes, bubbling gently and letting flavors meld.
- Blend with an immersion blender (or in batches in a countertop blender) until completely smooth and silky, with no visible squash chunks.
- Stir in the coconut milk and maple syrup, then season to taste so the flavor is warm and balanced.
- Ladle the soup into bowls. Top with toasted pepitas and fresh sage leaves so the garnish stays crisp and fragrant.
