
Patriotic Ice Cream Sandwiches
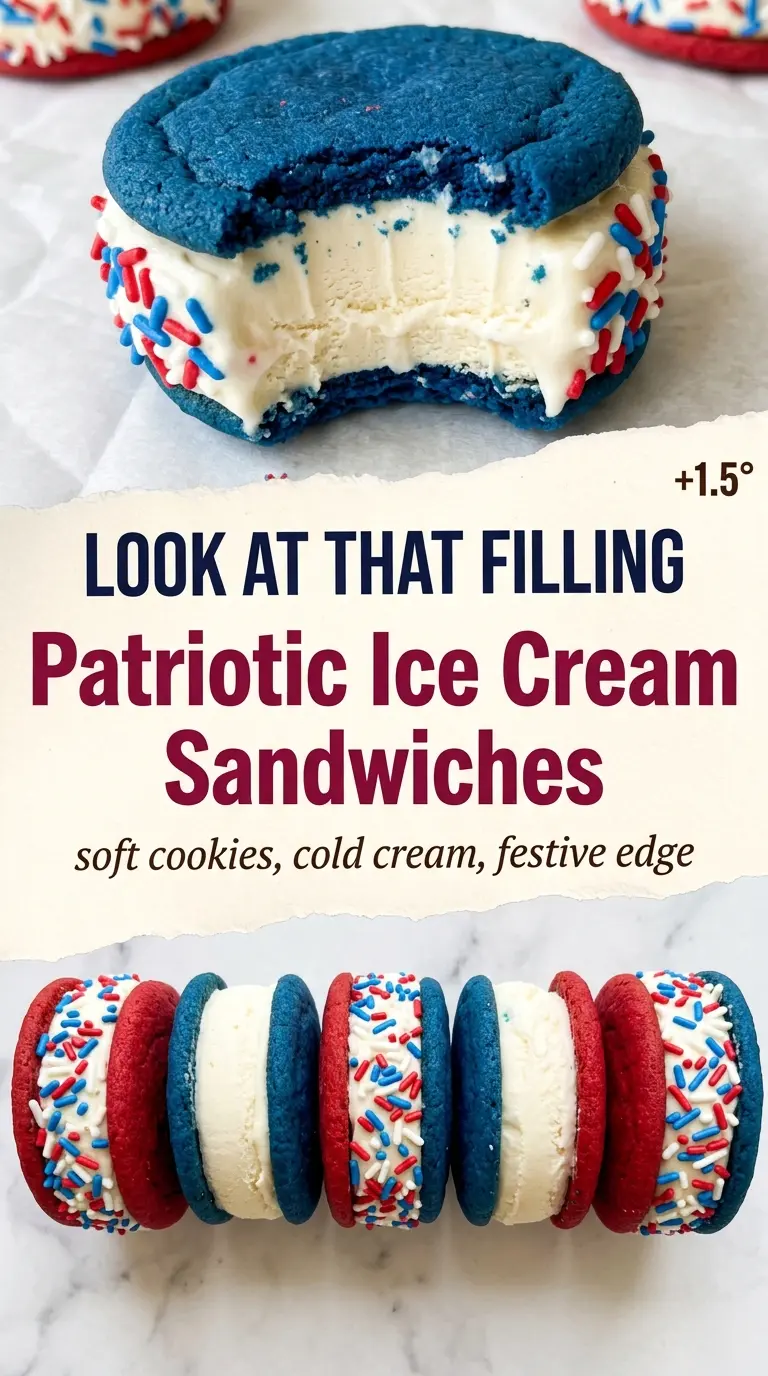
Patriotic Ice Cream Sandwiches hit that perfect middle ground between nostalgic and festive: soft, chewy cookies with a cold, creamy center that holds together just long enough for the first…
Tip: save now, cook later.Patriotic Ice Cream Sandwiches hit that perfect middle ground between nostalgic and festive: soft, chewy cookies with a cold, creamy center that holds together just long enough for the first bite. The red velvet and blue velvet cookies bake up tender with a faint cocoa note, which gives the vanilla and strawberry ice cream a little more depth than a plain sugar cookie ever could. They look like a celebration before they even leave the tray, and they taste like one, too.
The trick is keeping the cookies soft and slightly underbaked so they stay bendable after freezing. That matters here. If the cookies bake too long, they turn brittle and crack when you press in the ice cream. The other thing worth paying attention to is the ice cream texture: it should be softened just enough to scoop, but not melted. That’s what gives you clean edges and a sandwich that freezes into a neat, sturdy stack instead of a sliding mess.
Below, I’ll walk you through the cookie texture to look for, how to keep the colors bold instead of muddy, and the fastest way to assemble these before the ice cream starts fighting back.
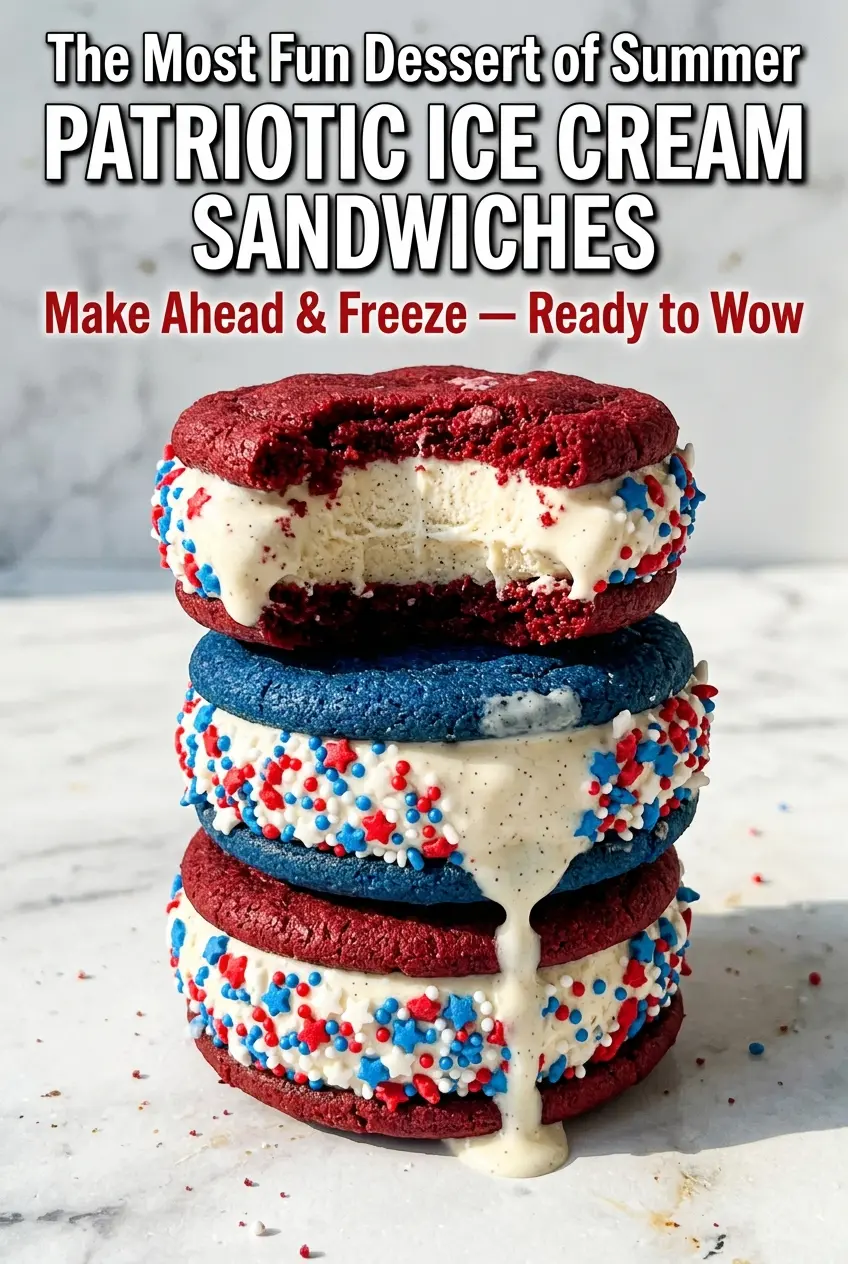
The cookies stayed soft even after freezing, and the ice cream layer set up perfectly. I used strawberry swirl on one batch and the color combo looked so good on the platter.
These Patriotic Ice Cream Sandwiches are the kind of make-ahead treat that freezes firm, slices clean, and steals the dessert table.
Why the Cookies Need to Stay Soft Before They Meet the Ice Cream
The biggest mistake with ice cream sandwiches is treating the cookie like it needs to be fully finished in the same way you’d want a standalone cookie. It doesn’t. These need to be soft enough to bend slightly when frozen, which is why the bake stops when the centers still look a little underdone. That last bit of carryover heat finishes them without drying them out.
The cocoa in the dough isn’t just for flavor; it also helps the cookies read like velvet instead of plain dyed dough. But the color only stays vivid if you use gel food coloring. Liquid coloring weakens the dough and gives you pale cookies that bake up flat. For the same reason, don’t overmix once the flour goes in. Tough cookies crack when you press in cold ice cream, and these need to stay tender.
- Butter — Softened butter creams with the sugar and traps air, which gives the cookies their lighter, chewy texture. Cold butter won’t whip properly, and melted butter spreads too fast.
- Gel food coloring — This is where the red and blue velvet look comes from. Gel gives you strong color without thinning the dough, which matters a lot for keeping the cookie shape.
- Buttermilk — The small amount adds tang and softens the crumb. If you don’t have it, use regular milk mixed with 1/2 teaspoon vinegar or lemon juice and let it sit for a minute before adding.
- Mini white chocolate chips or sprinkles — These are for the edges, not the filling, and they add texture and a festive finish. Sprinkles give the cleanest visual effect, while white chocolate chips add a little crunch.
Building the Sandwiches Before the Ice Cream Melts
The red and blue doughs are made the same way, so the real goal is keeping them from spreading differently. If one batch feels softer, chill both doughs for 15 to 20 minutes before scooping. That helps the cookies bake up in the same size, which makes matching pairs much easier later.
Use a 2-tablespoon scoop if you can. It keeps the sandwiches consistent and prevents one side from bulging past the other when you press them together. Let the cookies cool completely before assembly. If they’re still warm, the ice cream will melt around the edges and slip out before you can roll the sides in sprinkles.
- All-purpose flour — This gives the cookies enough structure to hold the ice cream without turning cakey. A cup-for-cup gluten-free blend can work if it includes xanthan gum, but the texture will be slightly more delicate.
- Unsweetened cocoa powder — Just enough cocoa gives the cookies that velvet taste without making them taste like brownies. Natural cocoa is fine here; Dutch-process will make the color a little darker and the flavor smoother.
- Vanilla bean ice cream — A good vanilla ice cream matters because it’s the main creamy note against the cocoa cookies. If you use a light or airy ice cream, it can freeze too hard and lose that plush center.
- Strawberry ice cream or strawberry swirl — This adds the fruity contrast that makes the color scheme taste as good as it looks. Swirl varieties are easier to spread, while straight strawberry ice cream gives a stronger berry flavor.
The Part Where Texture Decides Whether They Hold Together
Mix the Dough Just Until It Comes Together
Cream the butter and sugar until the mixture looks pale and fluffy, then stop and add the egg, vanilla, and coloring. Once the flour goes in, mix only until the dough turns uniform. If you keep going, the cookies bake up tougher and less bendable, which is the one thing you don’t want in a sandwich cookie that needs to survive the freezer.
Bake for the Edges, Not the Center
Pull the trays when the edges look set and the centers still look a touch soft. They’ll finish on the hot pan, and that slight underbake is what keeps the cookies chewy after freezing. If they brown too much around the edges, they’ll crack when you bite into them later.
Assemble Fast, Then Freeze Hard
Work with softened ice cream in a bowl and scoop it onto the flat side of one cookie, then top it with the matching cookie and press gently. Don’t mash down hard or the filling squeezes out unevenly. Once the sides are rolled in sprinkles, move the sandwiches straight to the freezer so the shape sets before the ice cream has time to slump.
Make It With One Color Scheme
If you only want red cookies or only blue cookies, double one dough and skip the other. The flavor stays the same, but the final sandwiches look less dramatic. This is the easiest way to cut the work in half for a smaller batch.
Gluten-Free Version
Use a 1:1 gluten-free flour blend with xanthan gum and let the dough rest for 10 minutes before scooping. That pause hydrates the flour and keeps the cookies from spreading too thin, though they’ll still be a little more fragile than the original.
Dairy-Free Swap
Use plant-based butter, dairy-free ice cream, and a non-dairy milk plus a splash of vinegar in place of the buttermilk. The cookies will still bake up chewy, but the flavor will be a little less rich and the filling will soften faster, so keep the sandwiches frozen until the last minute.
Storage and Reheating
- Refrigerator: Not a good option for these; the cookies soften too fast and the ice cream melts.
- Freezer: Wrap each sandwich individually in plastic wrap and freeze for up to 1 week. After that, the cookies start to dry out and the ice cream can pick up freezer flavor.
- Reheating: Don’t reheat these. Let them sit at room temperature for 2 to 3 minutes before serving so the cookie edges soften just enough to bite cleanly.
Questions I Get Asked About This Recipe
Patriotic Ice Cream Sandwiches
Ingredients
Equipment
Method
- Preheat your oven to 350°F (175°C) and line two baking sheets with parchment paper.
- Whisk all-purpose flour, unsweetened cocoa powder, baking soda, and salt for the red velvet cookies in a medium bowl, then set aside.
- Beat softened unsalted butter and granulated sugar in a large bowl until light and fluffy, about 2–3 minutes.
- Add the large egg and vanilla extract and beat until combined.
- Mix in red gel food coloring and buttermilk until the batter turns a deep, vivid red.
- Gradually fold the dry ingredients into the wet ingredients just until a soft dough forms, taking care not to overmix.
- Repeat the scoop-and-flatten step by portioning 2-tablespoon balls of red dough onto the baking sheets, spacing them about 2 inches apart.
- Flatten each portion slightly with your palm.
- Bake for 9–11 minutes, until edges are set but centers look slightly underdone.
- Let the cookies cool completely on the baking sheets, then transfer to a wire rack and cool for at least 30 minutes before assembling.
- Repeat the dough process for blue cookies using the same dry ingredients, softened unsalted butter, granulated sugar, large egg, vanilla extract, royal blue gel food coloring, and buttermilk.
- Scoop 2-tablespoon balls of blue dough onto prepared baking sheets, spacing them 2 inches apart, and flatten slightly.
- Bake for 9–11 minutes at 350°F (175°C), until edges are set but centers look slightly underdone.
- Cool the blue cookies completely on the baking sheets, then transfer to a wire rack and cool for at least 30 minutes before assembling.
- Line a baking sheet or cutting board with parchment paper.
- Match cookies by size and pair one red cookie with one blue cookie for each sandwich.
- Scoop a generous mound of slightly softened vanilla bean ice cream onto the flat side of one cookie.
- Press the second cookie gently on top until the ice cream reaches the edges.
- Roll the exposed ice cream edges through red, white, and blue sprinkles until fully coated.
- If using mini white chocolate chips for edge coating, press them onto the sprinkles-covered edges immediately after rolling.
- Place the assembled sandwiches on the parchment-lined tray and freeze for at least 2 hours, or overnight, until completely firm.
- Serve straight from the freezer and store wrapped individually in plastic wrap for up to 1 week.
