
Juicy Garlic Butter Baked Chicken Breast
Juicy chicken breast doesn’t have to mean bland chicken breast, and this garlic butter version proves it fast. The butter keeps the meat from drying out in the oven, the…
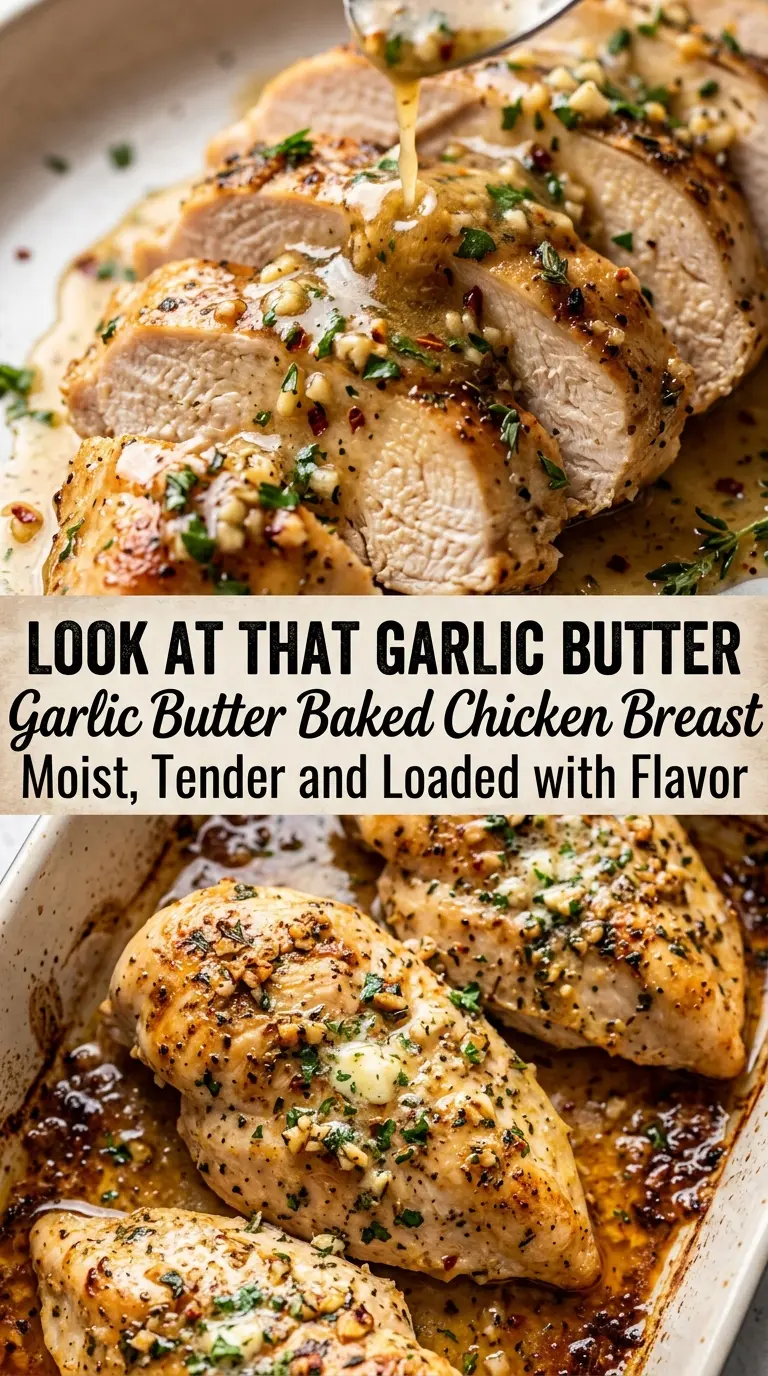
Tip: save now, cook later.Juicy chicken breast doesn’t have to mean bland chicken breast, and this garlic butter version proves it fast. The butter keeps the meat from drying out in the oven, the garlic and paprika build a deep savory coating, and the lemon juice brightens everything just enough to keep it from tasting heavy. The result is tender, well-seasoned chicken with pan juices you’ll want to spoon over every bite.
The part that matters most is how the chicken is handled before it goes into the oven. Patting the breasts dry helps the butter cling, and baking at a hot 400°F gives the outside enough heat to pick up color without overcooking the center. I also like to use melted butter instead of olive oil here, because butter carries the garlic and spices into every crevice and gives the pan juices a richer finish.
Below, I’ve included the little details that keep the chicken juicy instead of stringy, plus a few easy swaps if you need to work with what’s already in your kitchen.
The garlic butter soaked right into the chicken and the pan juices were perfect over rice. I pulled mine at 165°F and it stayed tender instead of dry.
Juicy Garlic Butter Baked Chicken Breast with rich pan juices is the kind of dinner worth pinning for busy nights.
The Trick to Keeping Baked Chicken Breast Juicy Instead of Dry
Chicken breast dries out when it spends too long in the oven or when the surface starts cooking before the center has a chance to catch up. The fix here is a hot oven, evenly sized breasts, and a stop-at-165°F approach. If one breast is much thicker than the others, pound it lightly or slice it horizontally so everything finishes at the same time.
The other mistake is cutting too soon. The juices need a few minutes to settle back into the meat after baking. If you slice immediately, they end up on the board instead of in the chicken, and that’s usually the difference between succulent and stringy.
What Each Ingredient Is Actually Doing in This Dish
- Chicken breasts — Boneless, skinless breasts work best here because they bake quickly and soak up the butter mixture well. If yours are very large, split them lengthwise for more even cooking and a shorter bake time.
- Butter — This is the backbone of the recipe. Melted butter carries the garlic and spices evenly over the surface and creates the rich pan juices that spoon over the finished chicken. Olive oil will work in a pinch, but it won’t give the same round, savory finish.
- Garlic — Fresh minced garlic matters here. Jarred garlic is convenient, but it can taste flat and sometimes bitter after baking. Mince it finely so it disperses through the butter instead of clumping in one spot.
- Paprika and Italian seasoning — Paprika gives the chicken a warm color and mild depth, while the Italian seasoning brings herbs into the background without overpowering the butter. If your seasoning blend is salt-heavy, reduce the added salt a little.
- Lemon juice — Just a tablespoon keeps the butter from tasting heavy and helps sharpen the garlic. Don’t add much more than that or the sauce can start tasting more sharp than balanced.
- Fresh parsley — This is a finishing touch, not a main flavor. It brightens the look and adds a fresh note at the end, so don’t cook it into the butter mixture.
How I Bake the Chicken So It Stays Tender All the Way Through
Getting the Oven Hot Before the Chicken Goes In
Set the oven to 400°F and let it fully preheat before the chicken enters. A hot oven starts the cooking process quickly, which helps the outside season the meat without forcing it to sit in the heat too long. If the oven is still climbing when the chicken goes in, the edges cook slowly and the centers usually overrun while you’re waiting for the middle to catch up.
Coating the Chicken Evenly
Place the chicken in a lightly greased baking dish, then brush on the garlic butter from end to end. The surface should look glossy and fully covered, with no dry patches hiding in the middle. If the butter pools only at the bottom of the pan, the chicken will bake but won’t carry the same flavor on the outside.
Watching for the Right Doneness
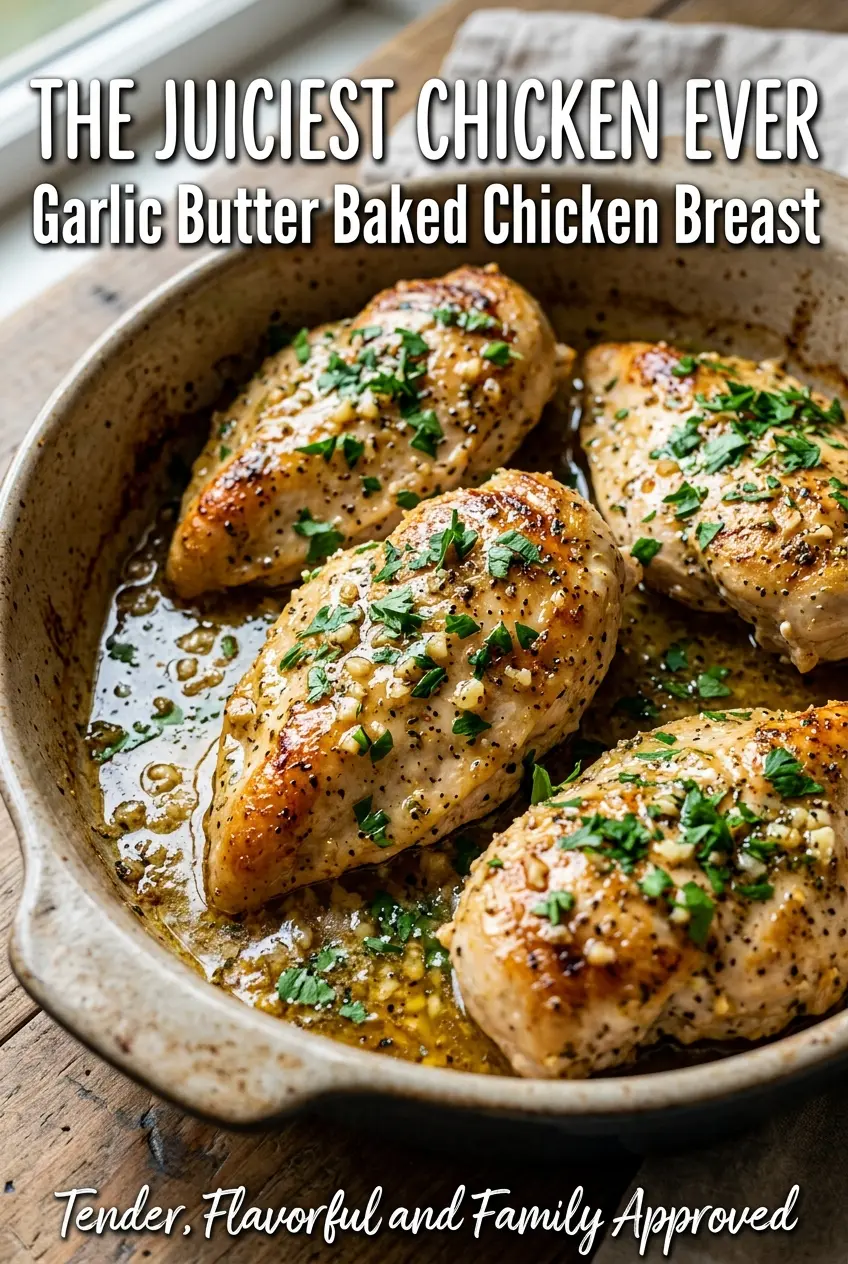
Bake the chicken for 22 to 26 minutes, depending on thickness, and check the center with an instant-read thermometer. Pull it when it reaches 165°F. The surface should look opaque and lightly bronzed, and the juices in the pan will be bubbling around the edges. If you keep going until the chicken looks deeply browned, it usually means the meat is already past its best texture.
Letting the Juices Settle Back In
Rest the chicken for a few minutes before serving, then spoon the pan juices over the top. That short pause keeps the juices from running out the second you cut in. If the breasts are sliced immediately, the texture turns drier even when the chicken was cooked perfectly.
Three Smart Ways to Adapt This Garlic Butter Chicken Breast
Dairy-Free Version
Swap the butter for olive oil or a good dairy-free butter alternative. Olive oil gives a lighter finish and won’t create the same rich pan juices, while dairy-free butter keeps more of the original texture and flavor. Either way, keep the garlic and seasoning amounts the same so the chicken still tastes fully seasoned.
Low-Carb Dinner Plate
Serve it with roasted broccoli, cauliflower mash, or a simple salad instead of starch. The chicken itself already fits a low-carb meal, so this change is mostly about the sides. The pan juices work especially well over vegetables because they carry enough fat and seasoning to tie the whole plate together.
Using Chicken Thighs Instead
Bone-in or boneless thighs both work, but they need a longer bake time and a little more browning to render properly. Thighs stay juicy more easily than breasts, so they’re forgiving if you’re worried about overcooking. The flavor becomes a little richer, and the garlic butter tastes deeper against the darker meat.
Storage and Reheating
- Refrigerator: Store in an airtight container for up to 4 days. The chicken stays tender, though the garlic butter sauce thickens as it chills.
- Freezer: It freezes well for up to 2 months. Slice the chicken first and freeze it with a little of the pan juice so it doesn’t dry out when thawed.
- Reheating: Warm gently in a covered skillet over low heat with a splash of water or broth, or use the oven at 300°F until just heated through. High heat is the fastest way to turn leftover chicken breast dry and rubbery.
Questions I Get Asked About This Garlic Butter Chicken Breast
Juicy Garlic Butter Baked Chicken Breast
Ingredients
Equipment
Method
- Preheat oven to 400°F (200°C). Set up a baking station so the chicken goes into the oven right after mixing.
- Lightly grease a baking dish. Use enough grease to prevent sticking where the butter sauce will pool.
- Pat chicken breasts dry with paper towels. Dry surfaces help the seasoning and garlic butter cling better.
- In a small bowl, combine melted butter, garlic, paprika, Italian seasoning, salt, black pepper, and lemon juice. Stir until the garlic and spices are evenly distributed.
- Place chicken breasts in the baking dish. Arrange them in a single layer so they cook evenly.
- Brush generously with the garlic butter mixture. Make sure each breast is coated, including the thickest parts.
- Bake for 22–26 minutes or until the internal temperature reaches 165°F (74°C). Watch for doneness in the center, not just the edges.
- Spoon pan juices over the chicken. This re-coats the top for extra juiciness right after baking.
- Garnish with fresh parsley and serve immediately. Finish while hot so the butter-garlic aroma stays prominent.
