5-Ingredient No-Bake Chocolate Cheesecake
Rich chocolate cheesecake with a cold, creamy center and an Oreo crust that snaps cleanly under the spoon has a way of disappearing faster than any baked dessert on the…
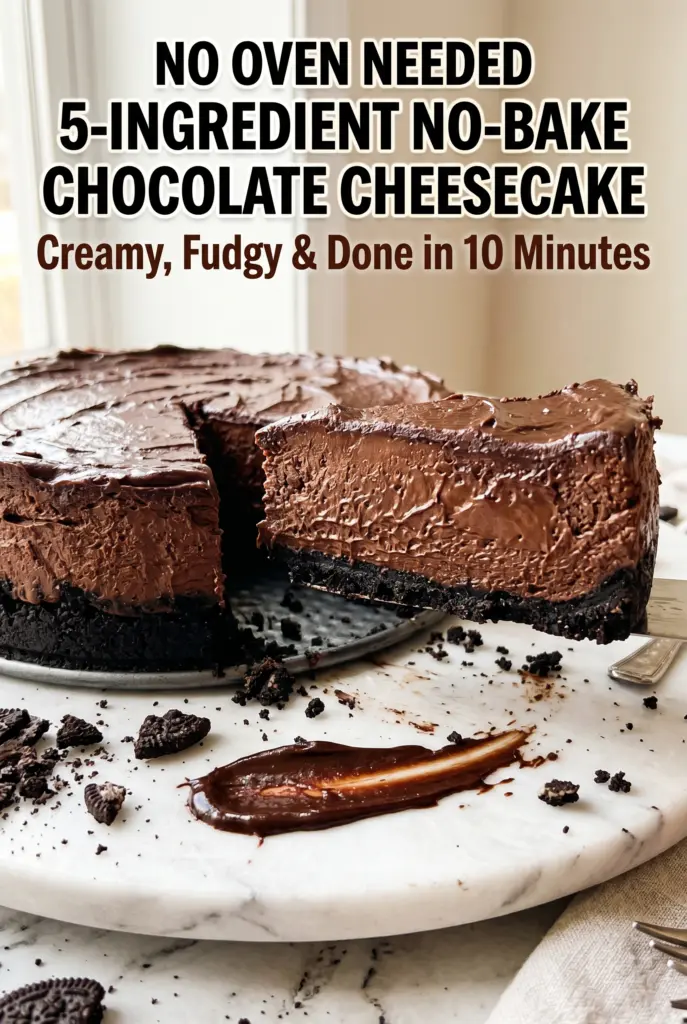
Tip: save now, cook later.Rich chocolate cheesecake with a cold, creamy center and an Oreo crust that snaps cleanly under the spoon has a way of disappearing faster than any baked dessert on the table. This version keeps all the indulgence and skips the oven, which means you get a smooth, fudgy filling without babysitting a water bath or worrying about cracks. It chills into neat slices, but it still eats like a proper dessert: dense enough to feel special, soft enough to melt on the tongue.
What makes this one work is balance. The cream cheese gives structure, the melted chocolate brings depth and body, and the whipped cream lightens everything so the filling doesn’t turn heavy or greasy. The chocolate needs to cool a bit before it goes into the cream cheese, though. If it’s too hot, it can loosen the mixture and knock the cream cheese texture off. The Oreo crust does more than add crunch; the cookie filling helps the crumbs bind without needing extra sugar.
Below, I’m walking through the part that matters most: how to keep the filling silky, how long to chill it so the slices hold, and what to change if you need a dairy-free version or want to use a different crust.
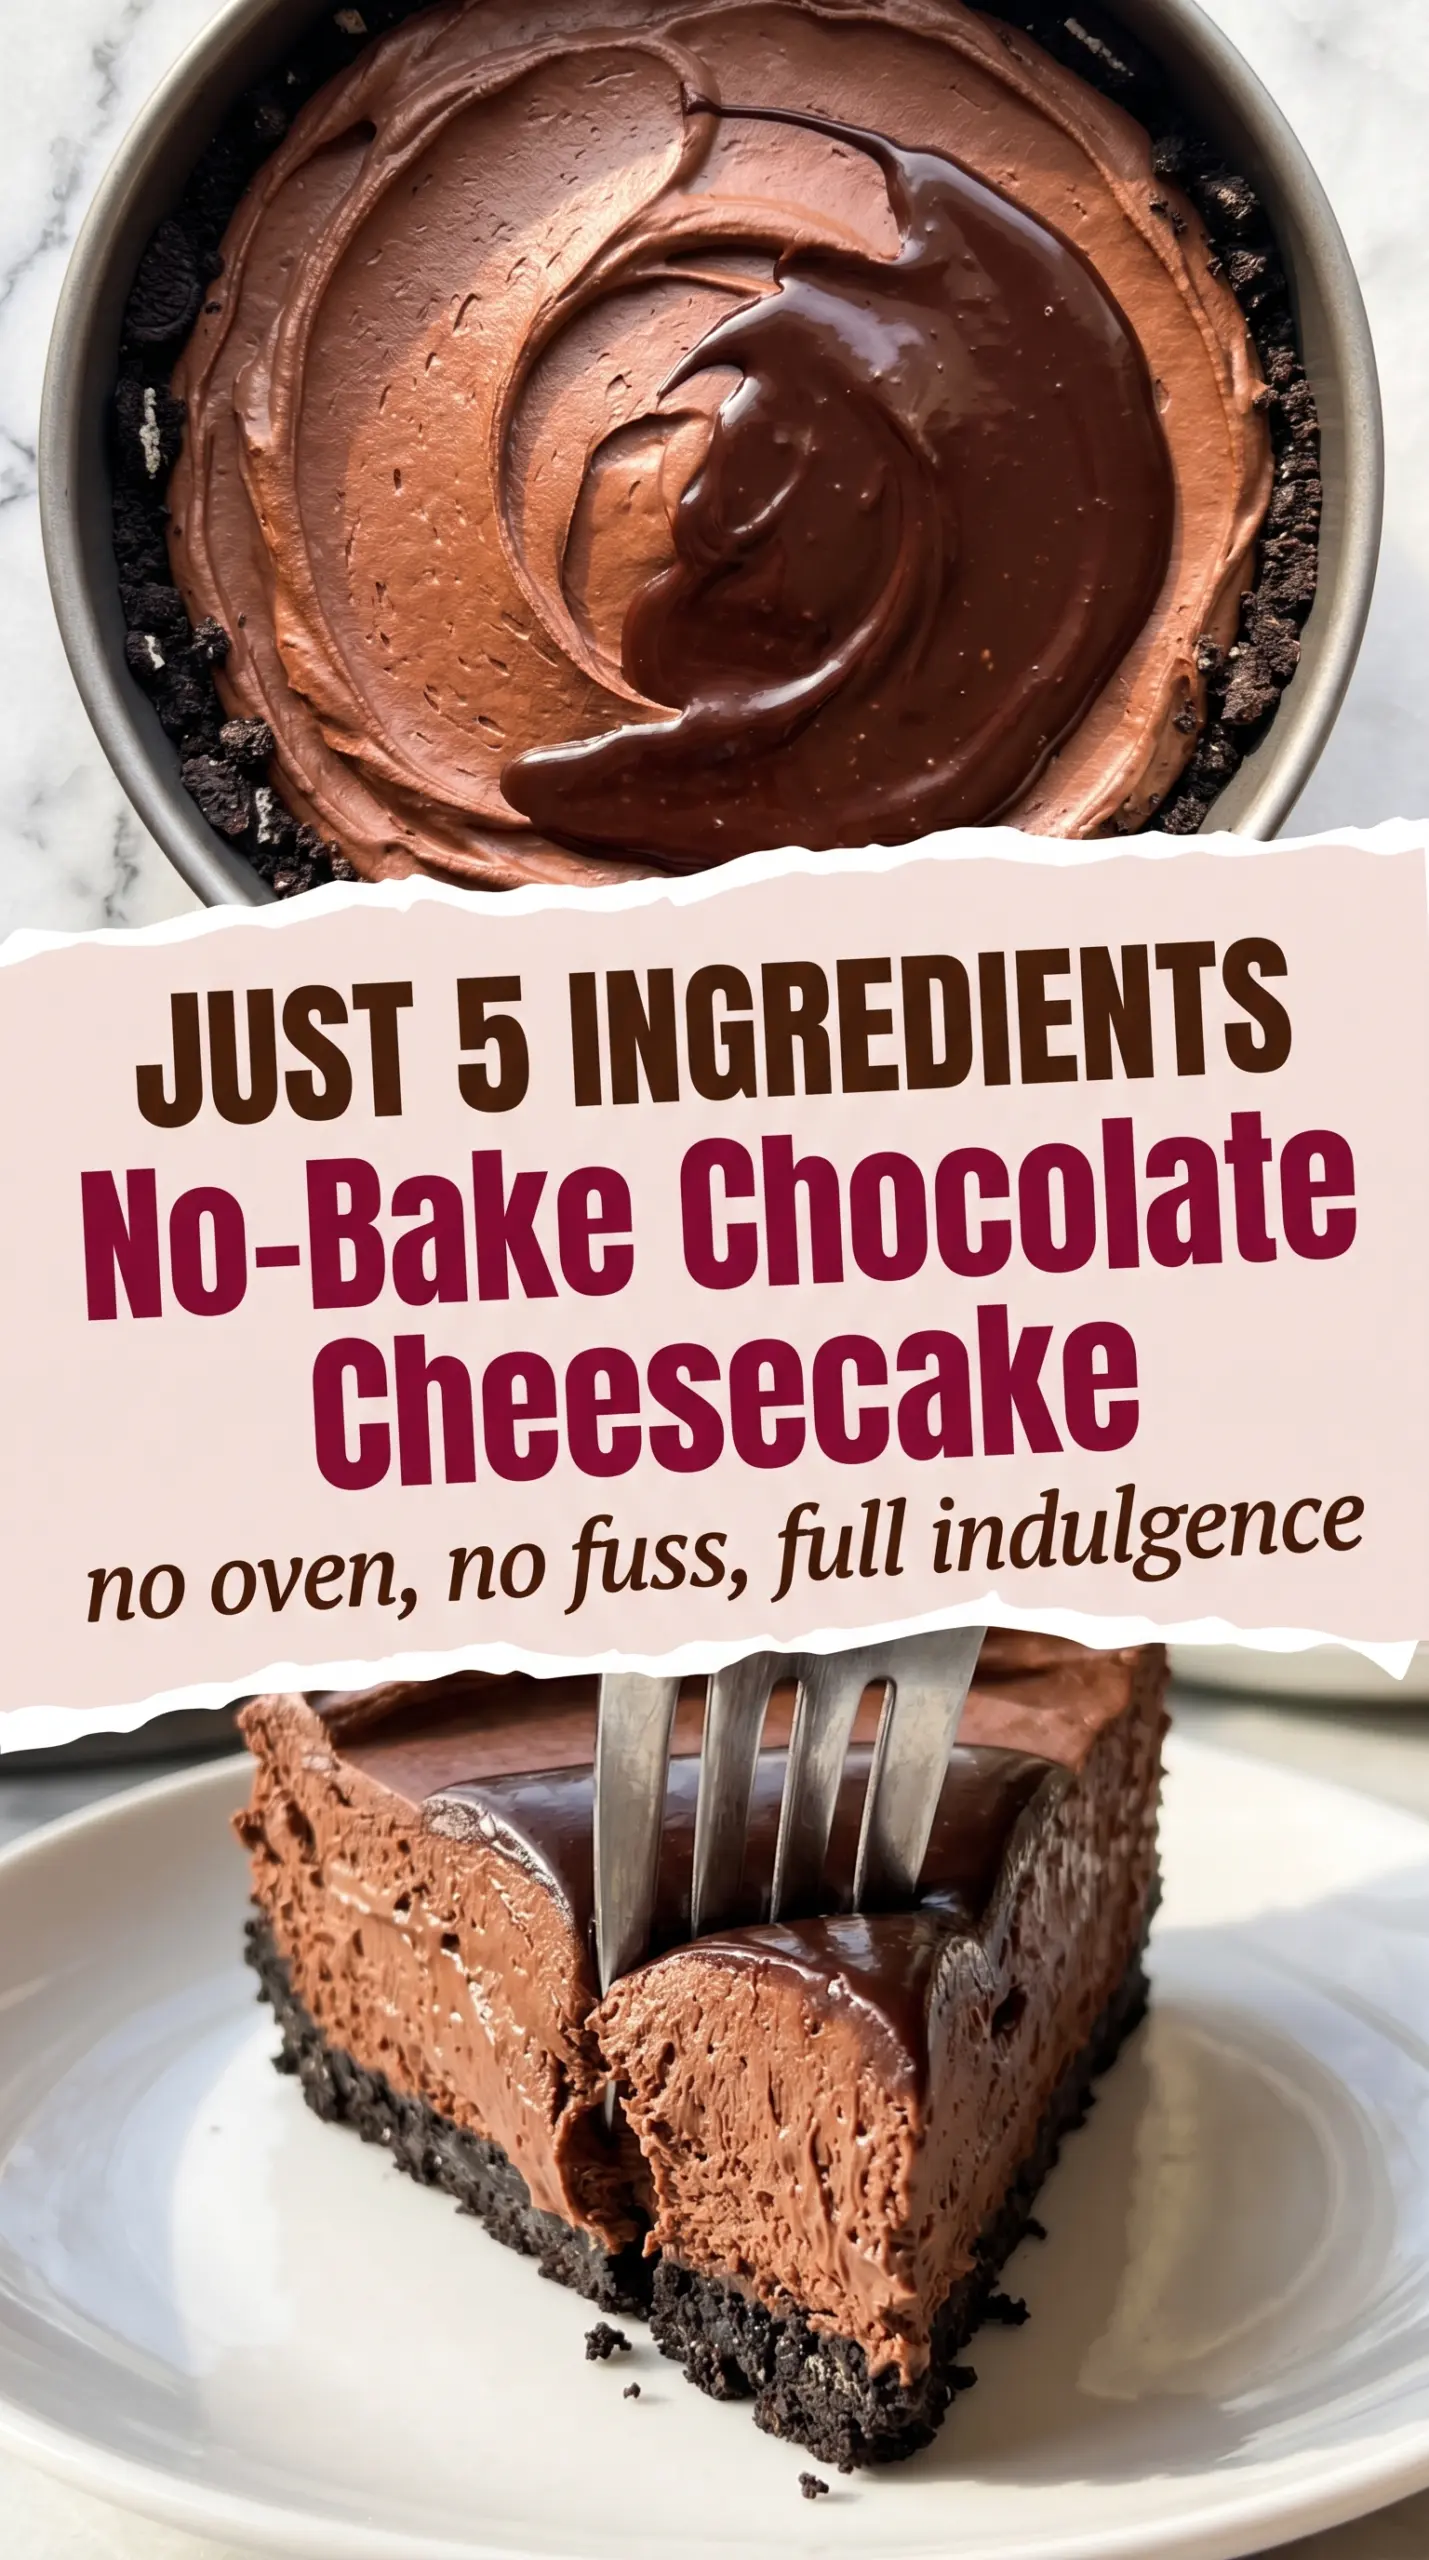
The filling set up beautifully after an overnight chill, and the Oreo crust stayed crisp instead of going soggy. I cut it with a hot knife like you said and got clean slices every time.
Save this 5-ingredient no-bake chocolate cheesecake for the nights when you want a rich dessert with an Oreo crust and zero oven time.
The Trick to a Cheesecake That Slices Cleanly Without Baking
The biggest mistake with no-bake cheesecake is treating it like a mousse. It needs enough air to stay light, but it also needs enough structure to cut cleanly. That balance comes from two places: fully softened cream cheese and properly whipped cream. If the cream cheese stays even a little lumpy, those bits never disappear later, no matter how long you mix.
Chocolate temperature matters just as much. Add it when it’s melted and smooth, but not hot enough to melt the whipped cream or turn the filling loose. The chilling time is doing real work here too. Six hours is the minimum, but overnight gives the center a firmer, cleaner set and the flavor tastes deeper once everything has had time to settle.
What Each Ingredient Is Actually Doing in This Dessert
- Oreo cookie crumbs — These give you both the crust and the built-in chocolate flavor. The filling in the cookies helps the crumbs hold together, so you don’t need extra sugar or another binder. If you swap in plain chocolate wafers, the crust will be less sweet and a little drier, so you may need a touch more butter.
- Unsalted butter — Butter is what turns loose crumbs into a crust that packs and slices well. Melted and mixed evenly, it gives the base enough fat to stay intact in the freezer and refrigerator. Salted butter works in a pinch, but unsalted keeps the flavor cleaner.
- Full-fat cream cheese — This is the backbone of the filling, and full-fat matters here. Low-fat cream cheese tends to taste thinner and can make the texture less stable. Soften it all the way to room temperature before beating, or you’ll end up chasing little lumps around the bowl.
- Semi-sweet chocolate chips — Chocolate is the main flavor, so use one you’d happily eat on its own. Semi-sweet keeps the cheesecake rich without pushing it into cloying territory. If you use dark chocolate, the result will be firmer and less sweet; milk chocolate will make it softer and sweeter.
- Heavy whipping cream — This is what lightens the filling and gives it that mousse-like lift. It has to be cold so it whips up with enough structure to fold into the chocolate base. Don’t substitute half-and-half here; it won’t hold the air you need.
Building the Filling Without Losing the Texture
Mix the Crust Until It Holds, Not Until It Becomes Paste
The crust should look like damp sand and clump when you squeeze it. If it looks greasy or wet, there’s too much butter; if it won’t hold together at all, the crumbs are still too dry. Press it firmly into the pan so it compacts into one even layer. Loose crumbs fall apart when you slice the cheesecake later.
Beat the Cream Cheese Until It’s Completely Smooth
This is where the texture gets decided. Beat the softened cream cheese first, before anything else goes in, until it looks fluffy and no longer dense. If you see tiny lumps now, they will still be there in the finished filling. Scrape the bowl well so the edges don’t stay cold and streaky.
Fold in the Whipped Cream, Don’t Stir It In
Once the whipped cream is at stiff peaks, fold it into the chocolate mixture in three additions. Wide, slow folds keep the air in the mixture and give you that creamy sliceable set. If you stir hard or beat it again at this stage, the filling loses body and turns heavier than it should. Spoon it into the crust right away and smooth the top before chilling.
Dairy-Free Swap With Coconut Cream
Use a dairy-free cream cheese and swap the heavy cream for well-chilled coconut cream, whipped to stiff peaks. The cheesecake will still set, but the flavor will pick up a light coconut note and the texture will be a touch softer than the original. Use a dairy-free sandwich cookie for the crust if you need the whole dessert to stay dairy-free.
Gluten-Free Crust That Still Holds Together
Use certified gluten-free chocolate sandwich cookies in place of Oreos. The method stays the same, and the crust sets just as well as long as you pack it tightly into the pan. Check the cookie label carefully, since some chocolate sandwich cookies still contain wheat even when they look similar.
A Darker, Less Sweet Chocolate Version
Swap the semi-sweet chips for 60 to 70 percent dark chocolate. The filling sets a little firmer and tastes more grown-up, with less sweetness from the filling itself. If you go much darker than that, the cheesecake can taste a little sharp unless you add a spoonful of powdered sugar.
Storage and Reheating
- Refrigerator: Store covered for up to 5 days. The crust softens a little over time, but the filling stays creamy.
- Freezer: This freezes well. Chill until firm, wrap slices tightly, and freeze for up to 2 months. Thaw in the refrigerator so the filling doesn’t weep.
- Reheating: No reheating needed. Serve straight from the fridge for the cleanest texture, and don’t leave it at room temperature too long or the filling will start to slump.
Questions I Get Asked About This Recipe

5-Ingredient No-Bake Chocolate Cheesecake
Ingredients
Equipment
Method
- Crush the Oreo cookies into fine crumbs until no large chunks remain, using a food processor or rolling in a sealed zip-lock bag.
- Mix Oreo crumbs with melted unsalted butter until evenly coated and the mixture holds together when pressed.
- Press the crumb mixture firmly and evenly into the bottom of a 9-inch springform pan using the back of a spoon or a flat-bottomed glass, then place in the freezer for 15 minutes to set.
- Melt the semi-sweet chocolate chips in a microwave-safe bowl using 30-second intervals, stirring between each, until smooth, then cool slightly so it is pourable but not hot.
- Beat softened full-fat cream cheese with an electric mixer on medium speed for 2–3 minutes until completely smooth and fluffy with no lumps.
- Pour in the melted chocolate and beat on medium until fully incorporated and the mixture looks glossy and uniform.
- In a separate cold bowl, whip the heavy whipping cream on high speed until stiff peaks form, about 2–3 minutes.
- Gently fold the whipped cream into the chocolate cream cheese mixture in three additions, using wide, slow folds to preserve the airiness.
- Spoon the filling onto the chilled crust and smooth the top with an offset spatula, leaving a slight swirl or rustic surface.
- Cover with plastic wrap and refrigerate for at least 6 hours, or overnight, until fully set and sliceable.
- Run a warm knife around the edge of the springform pan before releasing, then slice with a hot knife and wipe clean between cuts.
- Serve chilled, with shaved chocolate, extra crushed Oreos, or a drizzle of warm ganache if desired.
