
Sticky Oven-Baked BBQ Chicken Drumsticks
Sticky, smoky barbecue chicken drumsticks come out of the oven with bronzed skin, a lacquered glaze, and meat that pulls cleanly from the bone. The best part is that you…
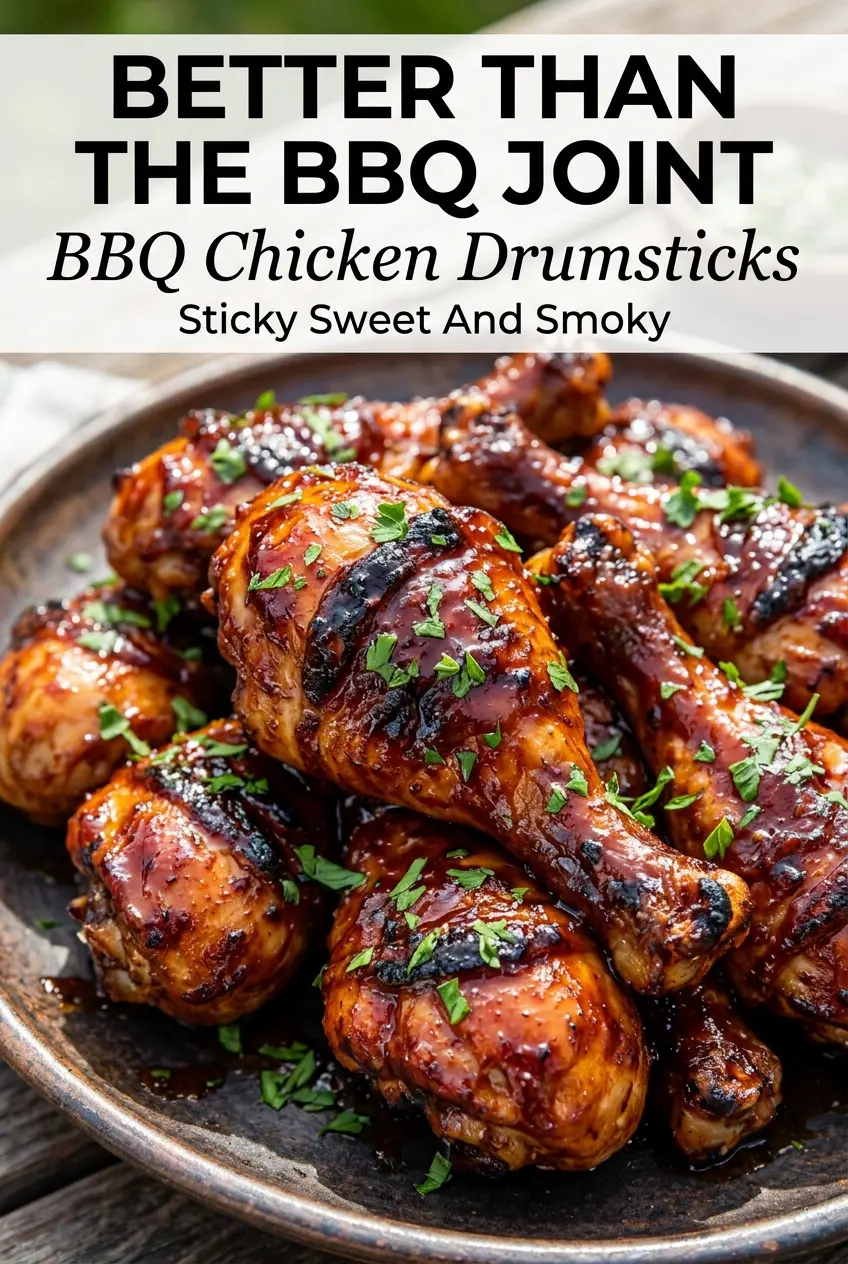
Tip: save now, cook later.Sticky, smoky barbecue chicken drumsticks come out of the oven with bronzed skin, a lacquered glaze, and meat that pulls cleanly from the bone. The best part is that you get that cookout-style finish without firing up the grill, and the sauce clings in a way that makes every bite taste like it spent hours outside over coals.
What makes this version work is the two-part approach. First, the drumsticks roast uncovered on a rack so the skin can dry out and tighten instead of steaming in their own juices. Then the barbecue sauce gets mixed with honey, Worcestershire, and a little apple cider vinegar, which gives it the sweet-salty tang needed to caramelize without tasting flat or clingy in the wrong way.
If you’ve ever had baked barbecue chicken turn watery or pale, the fix is mostly about airflow and timing. The rack matters, the first bake matters, and the sauce goes on late enough to reduce instead of burn. Below, I’ve included the ingredient notes and the small details that keep the glaze sticky instead of scorched.
The glaze thickened up beautifully and the drumsticks came out sticky without being burned. I followed the rack method and the skin stayed on the crisp side even after the second sauce brush.
Save these sticky oven-baked BBQ chicken drumsticks for the nights when you want a glossy, oven-caramelized dinner without standing over a grill.

The Reason the Skin Stays Sticky Instead of Soggy
Most baked barbecue chicken fails in the same two places: the chicken sits in moisture, or the sauce goes on too early and turns greasy before it has a chance to caramelize. Drumsticks have enough fat to stay juicy, but they still need dry heat to let the skin tighten. That’s why the rack matters here. It lifts the chicken so hot air can move all around it instead of trapping steam underneath.
The second mistake is rushing the sauce. Barbecue sauce already has sugar in it, and honey adds even more, so brushing it on from the start usually gives you a dark, sticky mess before the chicken is fully cooked. The first 30 minutes in the oven are about setting the skin and cooking the meat through. The sauce belongs in the last stretch, when it can reduce into a glossy coat instead of burning on contact.
- Chicken drumsticks — Drumsticks stay moist in the oven better than lean cuts, and the bone helps protect them from drying out. If you swap in thighs, use a similar method, but expect a slightly faster finish.
- BBQ sauce — Use a sauce you like on its own, because the flavor concentrates as it bakes. A thinner, sweeter sauce caramelizes nicely; a very thick one can scorch faster.
- Honey — This gives the glaze that sticky finish that clings to the skin. Maple syrup can work in a pinch, but the result is less classic and a little looser.
- Apple cider vinegar — The small amount sharpens the sauce and keeps the sweetness from taking over. If you don’t have it, use lemon juice, but add it sparingly so the sauce doesn’t taste thin.
- Smoked paprika — This adds a grilled, smoky note that makes oven-baked chicken taste closer to barbecue. Regular paprika works, but you’ll lose some depth.
The Three Oven Passes That Build the Glaze
Drying and seasoning the drumsticks
Pat the drumsticks dry before you season them. That step sounds minor, but wet skin turns soft in the oven and keeps the spices from sticking evenly. Once the oil and spices go on, the chicken should look lightly coated, not wet or pasty. If the seasoning clumps, the drumsticks were still damp.
Roasting on the rack first
Line the baking sheet with foil, set a wire rack on top, and arrange the chicken with a little space between each piece. Crowding traps steam and gives you pale skin instead of bronzed skin. After about 30 minutes at 425°F, the drumsticks should be mostly cooked through and starting to color at the edges. That first roast is what gives the final glaze a surface to cling to.
Brushing on the sauce in layers
Mix the barbecue sauce, honey, Worcestershire, and vinegar while the chicken roasts. Brush on a generous layer, return the pan to the oven, then brush again near the end. The sauce should bubble and tighten into a shiny coat, not run off in thin streaks. If it starts darkening too quickly, the oven is running hot and the pan should move to a lower rack for the last few minutes.
How to Adapt These BBQ Drumsticks Without Losing the Sticky Finish
Make it gluten-free with one label check
The recipe is naturally close to gluten-free, but Worcestershire sauce can vary by brand. Use a certified gluten-free Worcestershire and a barbecue sauce with no wheat-based thickeners, and the rest of the method stays exactly the same.
Swap in chicken thighs for a meatier bite
Bone-in thighs work well here and give you even more juicy texture, but they usually need a little longer in the oven. Keep the same sauce timing, then bake until the thickest part reaches temperature and the skin has taken on a deep brown gloss.
Use a low-sugar barbecue sauce for a lighter glaze
A low-sugar sauce will still caramelize, just a little less aggressively. That means you get a deeper savory finish and a glaze that’s less sticky-sweet, which is useful if your usual sauce tends to burn fast.
Turn it into a dairy-free dinner plate with simple sides
The drumsticks themselves are dairy-free as written, so the main adjustment is what you serve beside them. Pair them with slaw, roasted potatoes, or corn, and you’ve got a complete meal without changing a thing in the oven.
Storage and Reheating
- Refrigerator: Store leftovers in an airtight container for up to 4 days. The skin softens as it sits, but the meat stays juicy.
- Freezer: These freeze well for up to 2 months. Wrap them tightly and freeze with a little extra sauce if you want the best texture after thawing.
- Reheating: Reheat in a 350°F oven, covered loosely with foil at first, then uncover for the last few minutes so the glaze can set again. The microwave works in a pinch, but it softens the skin and can make the sauce separate.
Answers to the Questions Worth Asking
Sticky Oven-Baked BBQ Chicken Drumsticks
Ingredients
Equipment
Method
- Preheat oven to 425°F (220°C). Set up for roasting so the chicken starts hot for better browning.
- Line a baking sheet with foil and place a wire rack on top. This keeps the drumsticks elevated for crisped, evenly cooked skin.
- Pat drumsticks dry with paper towels. Dry skin helps the seasoning cling and the glaze caramelize.
- Toss chicken with olive oil, salt, black pepper, garlic powder, onion powder, smoked paprika, and chili powder. Coat every drumstick so the flavor bakes in.
- Arrange drumsticks on the wire rack. Leave space between pieces for airflow and even cooking.
- Bake for 30 minutes. Look for the skin to darken and the chicken to be partway cooked through.
- Meanwhile, combine BBQ sauce, honey, Worcestershire sauce, and apple cider vinegar in a bowl. Stir until glossy and evenly mixed.
- Remove chicken and brush generously with BBQ sauce mixture. Add an even layer so it turns sticky as it heats.
- Return to oven for 15 minutes. Watch for bubbles and the first caramelized shine on the glaze.
- Brush with additional sauce. Add a second coat to thicken and intensify the sticky finish.
- Bake another 10–15 minutes until sticky, caramelized, and cooked through. The glaze should look tacky and lacquered, and the chicken should be fully cooked.
- Garnish with parsley and serve. Add a fresh green finish right before eating.
