
No-Bake Chocolate Truffles with Oreos
Oreos and cream cheese turn into a fudgy truffle center that tastes far fancier than the effort it takes. Once the cookies are ground fine and mixed with softened cream…
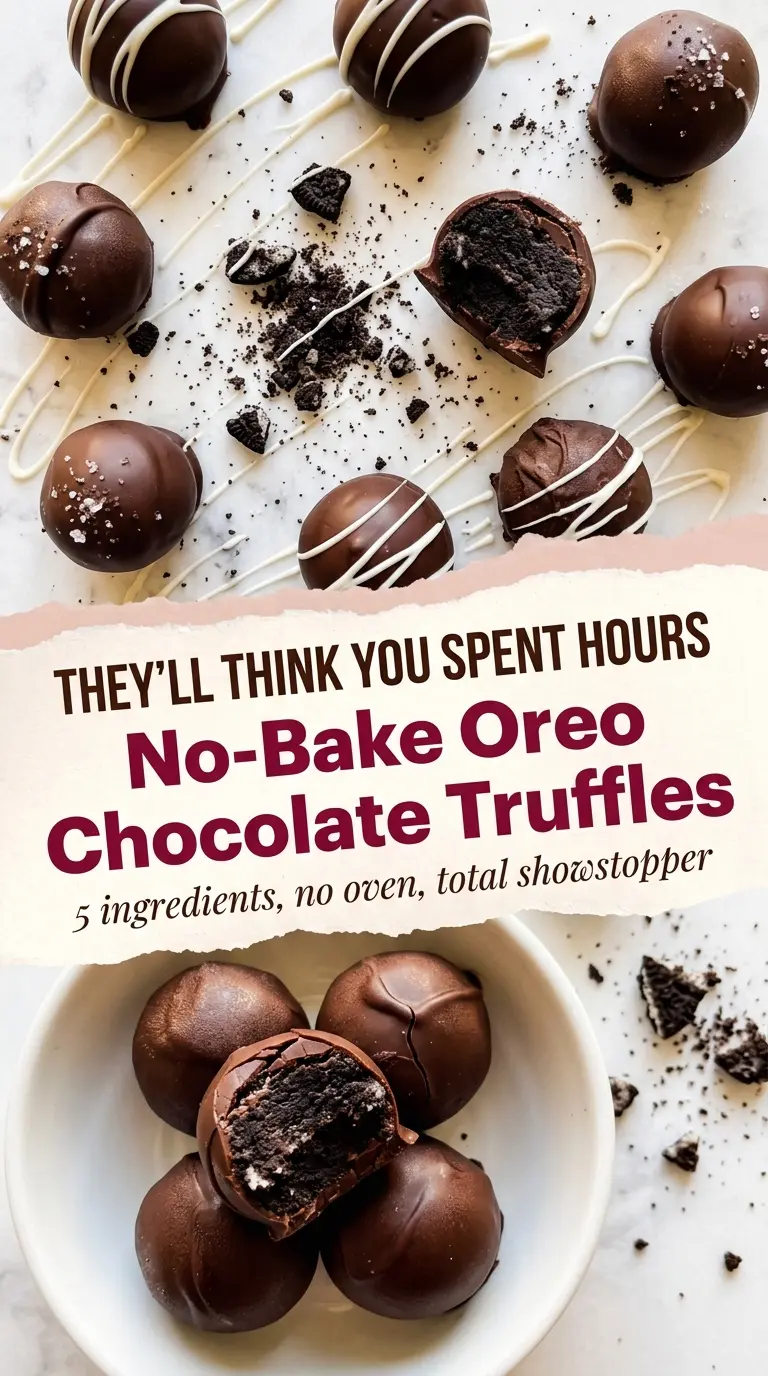
Tip: save now, cook later.Oreos and cream cheese turn into a fudgy truffle center that tastes far fancier than the effort it takes. Once the cookies are ground fine and mixed with softened cream cheese, the filling rolls into smooth little balls that hold their shape without any baking at all. Dipped in dark chocolate or finished with a white chocolate drizzle, they set up with a crisp shell and a soft, brownie-like middle.
The part that makes these work is the texture of the Oreo crumbs and the temperature of the filling. You want the cookies crushed all the way down so the mixture blends into a paste instead of staying sandy. Softened cream cheese helps the filling come together without overmixing, and chilling the truffles before dipping keeps the coating clean instead of streaky or slumping off the sides.
Below, I’ll walk through the easiest way to get a smooth coating, the best way to keep the truffles from sticking to your hands, and a few swaps that still keep the texture right.
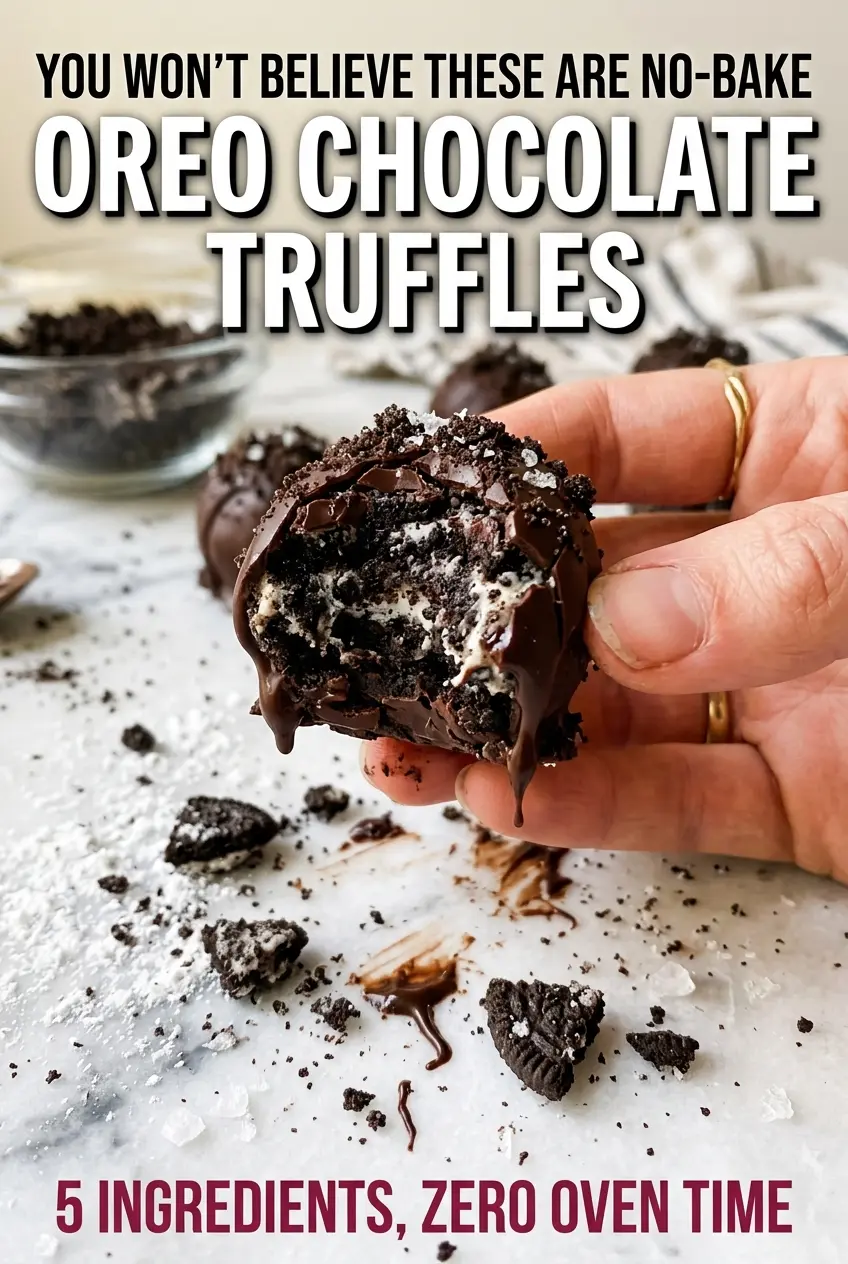
I chilled the truffle balls a full hour before dipping and the chocolate coating went on smooth with no crumbs breaking off. The Oreo center stayed soft and fudgy, and the sprinkle of flaky salt on top made them taste even richer.
These Oreo truffles set up with that perfect fudgy center and glossy chocolate shell, and they’re even easier to dip after a solid chill.
The Real Reason Oreo Truffles Go Grainy or Won’t Dip Cleanly
The filling for Oreo truffles fails in two predictable ways: the crumbs are too coarse, or the mixture is too warm. Coarse crumbs leave you with a lumpy center that cracks when you roll it. A warm filling softens fast, which makes the balls sticky and turns dipping into a mess.
The fix is straightforward. Crush the cookies until they look like dark sand, then mix until the cream cheese disappears into a thick, uniform dough. After that, chill the truffles until they feel firm all the way through. If they’re still soft in the center, the chocolate coating will slide around before it sets.
- Fine Oreo crumbs — This matters more than almost anything else in the recipe. A few tiny flecks are fine, but large chunks keep the filling from rolling smoothly. If you don’t have a food processor, seal the cookies in a sturdy bag and crush them with a rolling pin until no pieces larger than a pea remain.
- Softened cream cheese — Cold cream cheese won’t blend evenly and you’ll end up overworking the filling. Let it sit at room temperature until it yields easily to a spoon. That’s enough to bring the mixture together without making it greasy.
- Chocolate coating — Melting wafers are the easiest route because they set quickly and stay smooth. If you use chocolate chips, a little coconut oil helps thin the coating so it drapes instead of clumping. You don’t need much; too much will keep the shell from setting firmly.
- White chocolate drizzle — Optional, but it adds contrast and gives the truffles a polished finish. Melt it separately so it stays fluid. If it seizes, it usually got too hot too fast.
Rolling, Chilling, and Dipping Without Losing the Shape
Making the Filling Uniform
Pulse the Oreos until the crumbs are completely fine, then mix them with the cream cheese and vanilla until the mixture looks like dark cookie dough. Stop as soon as it holds together. If you keep mixing after that, the filling can warm up and get softer than you want.
Shaping the Truffles
Scoop tablespoon-sized portions and roll them between your palms until they’re smooth. If the mixture sticks, chill it for 10 minutes and try again rather than adding more crumbs, which can make the centers dry and dense. A parchment-lined sheet keeps them from flattening as they wait for the fridge.
Setting Up for the Chocolate Coat
Chill the balls until they’re firm enough to handle without smearing. That cold center is what helps the chocolate set fast and evenly. If the truffles are room temperature, the coating takes longer to harden and the balls can start sliding off the fork during dipping.
Getting a Clean Dip
Melt the chocolate in short bursts and stir between each round until it’s smooth and glossy. Dip one truffle at a time, let the excess drip off, then set it back on the parchment. Add toppings immediately, before the shell starts to firm up. If the chocolate thickens as you work, warm it for a few seconds and stir again.
Three Ways to Change the Finish Without Breaking the Texture
Dairy-Free Version
Use a dairy-free cream cheese and a dairy-free chocolate coating. The texture stays close to the original, though the filling can be a touch softer, so give it extra chill time before rolling and dipping. This works best if you keep the coating thick and let each truffle set fully in the fridge.
Gluten-Free Oreo Truffles
Use certified gluten-free sandwich cookies in the same amount. The method doesn’t change, and the result is still rich and fudgy. Just check the cookie brand you choose, because the filling texture can vary a little from one to the next.
Less Sweet Dark Chocolate Finish
Skip the white chocolate drizzle and use a darker coating with a higher cacao percentage. That gives the truffles a sharper edge that balances the Oreo filling nicely. The shell will also set a little firmer, which makes them easier to stack for gifting.
Storage and Reheating
- Refrigerator: Store in an airtight container for up to 10 days. They stay firm and fudgy, though the chocolate shell can pick up a little condensation if you move them straight from the fridge to a warm room.
- Freezer: They freeze well for up to 2 months. Freeze in a single layer first, then transfer to a container with parchment between layers so the coating doesn’t scuff.
- Reheating: These don’t need reheating. Let frozen truffles thaw in the refrigerator for a few hours, not on the counter, so the centers don’t soften too fast and sweat under the coating.
Answers to the Questions Worth Asking
No-Bake Chocolate Truffles with Oreos
Ingredients
Equipment
Method
- Pulse Oreo cookies in a food processor until they become fine, uniform crumbs with no large chunks remaining.
- Transfer the crumbs to a mixing bowl and add softened cream cheese and vanilla extract, then mix until the mixture holds together like dough.
- Scoop tablespoon-sized portions and roll between your palms into smooth balls, then place them on a parchment-lined baking sheet.
- Refrigerate the truffle balls for at least 30 minutes until firm and cold, which makes coating easier.
- Melt dark chocolate chips in a microwave-safe bowl using 30-second intervals, stirring between each, until fully smooth.
- Stir in coconut oil if using to thin the coating, then keep the chocolate warm and fluid for dipping.
- Dip each chilled truffle into the melted chocolate using a fork or dipping tool, letting excess drip off, and return to the parchment-lined sheet.
- Immediately top each truffle with crushed Oreo crumbs, flaky sea salt, or your chosen topping before the chocolate sets.
- If adding a white chocolate drizzle, melt the white chocolate separately and drizzle over the set truffles using a spoon or piping bag.
- Refrigerate for another 20–30 minutes until the coating is fully set, then serve cold or at room temperature.
