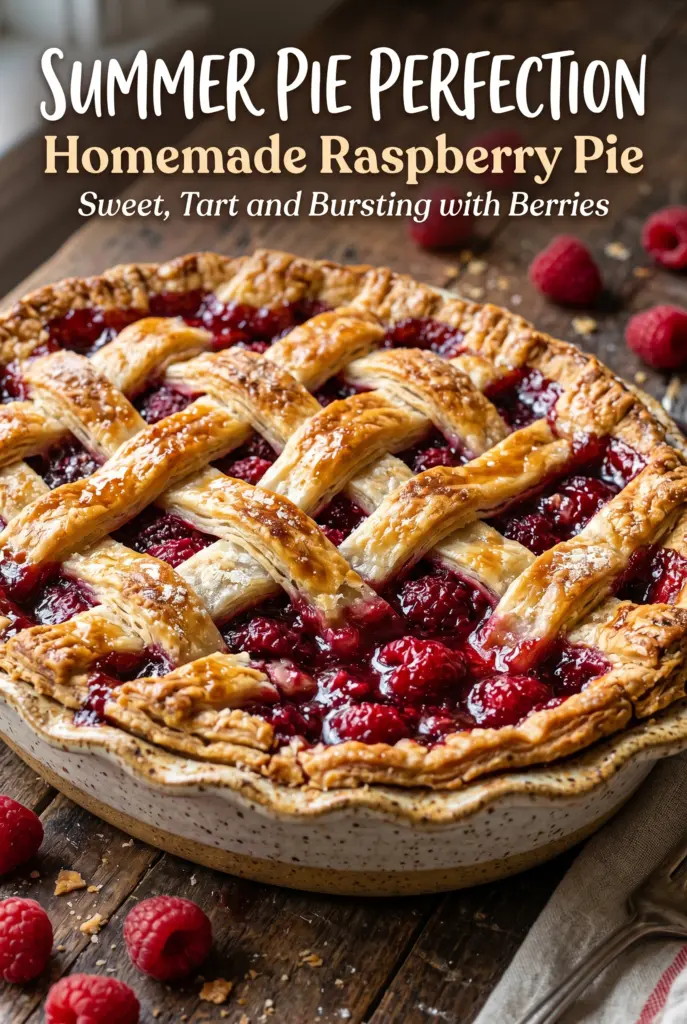
Homemade Raspberry Pie
Juicy raspberries baked under a flaky, golden crust turn into the kind of pie people go back for before the first slice has even been served. The filling lands somewhere…
Tip: save now, cook later.Juicy raspberries baked under a flaky, golden crust turn into the kind of pie people go back for before the first slice has even been served. The filling lands somewhere between bright and jammy, with enough thickening to hold its shape while still tasting like real fruit instead of candy. That balance is what makes this version worth keeping around.
The trick is in how the berries are handled. Fresh raspberries bring the best flavor, but they also break down fast, so the cornstarch has to do its job without being overworked into a paste. Lemon juice sharpens the fruit, vanilla rounds out the edges, and a little salt keeps the sweetness from tasting flat. The crust matters just as much: a cold, well-sealed bottom crust keeps the juices where they belong instead of leaking all over the pan.
Below, you’ll find the timing that keeps the filling from running, plus a few practical swaps if you only have frozen berries or want a lattice top instead of a full lid.
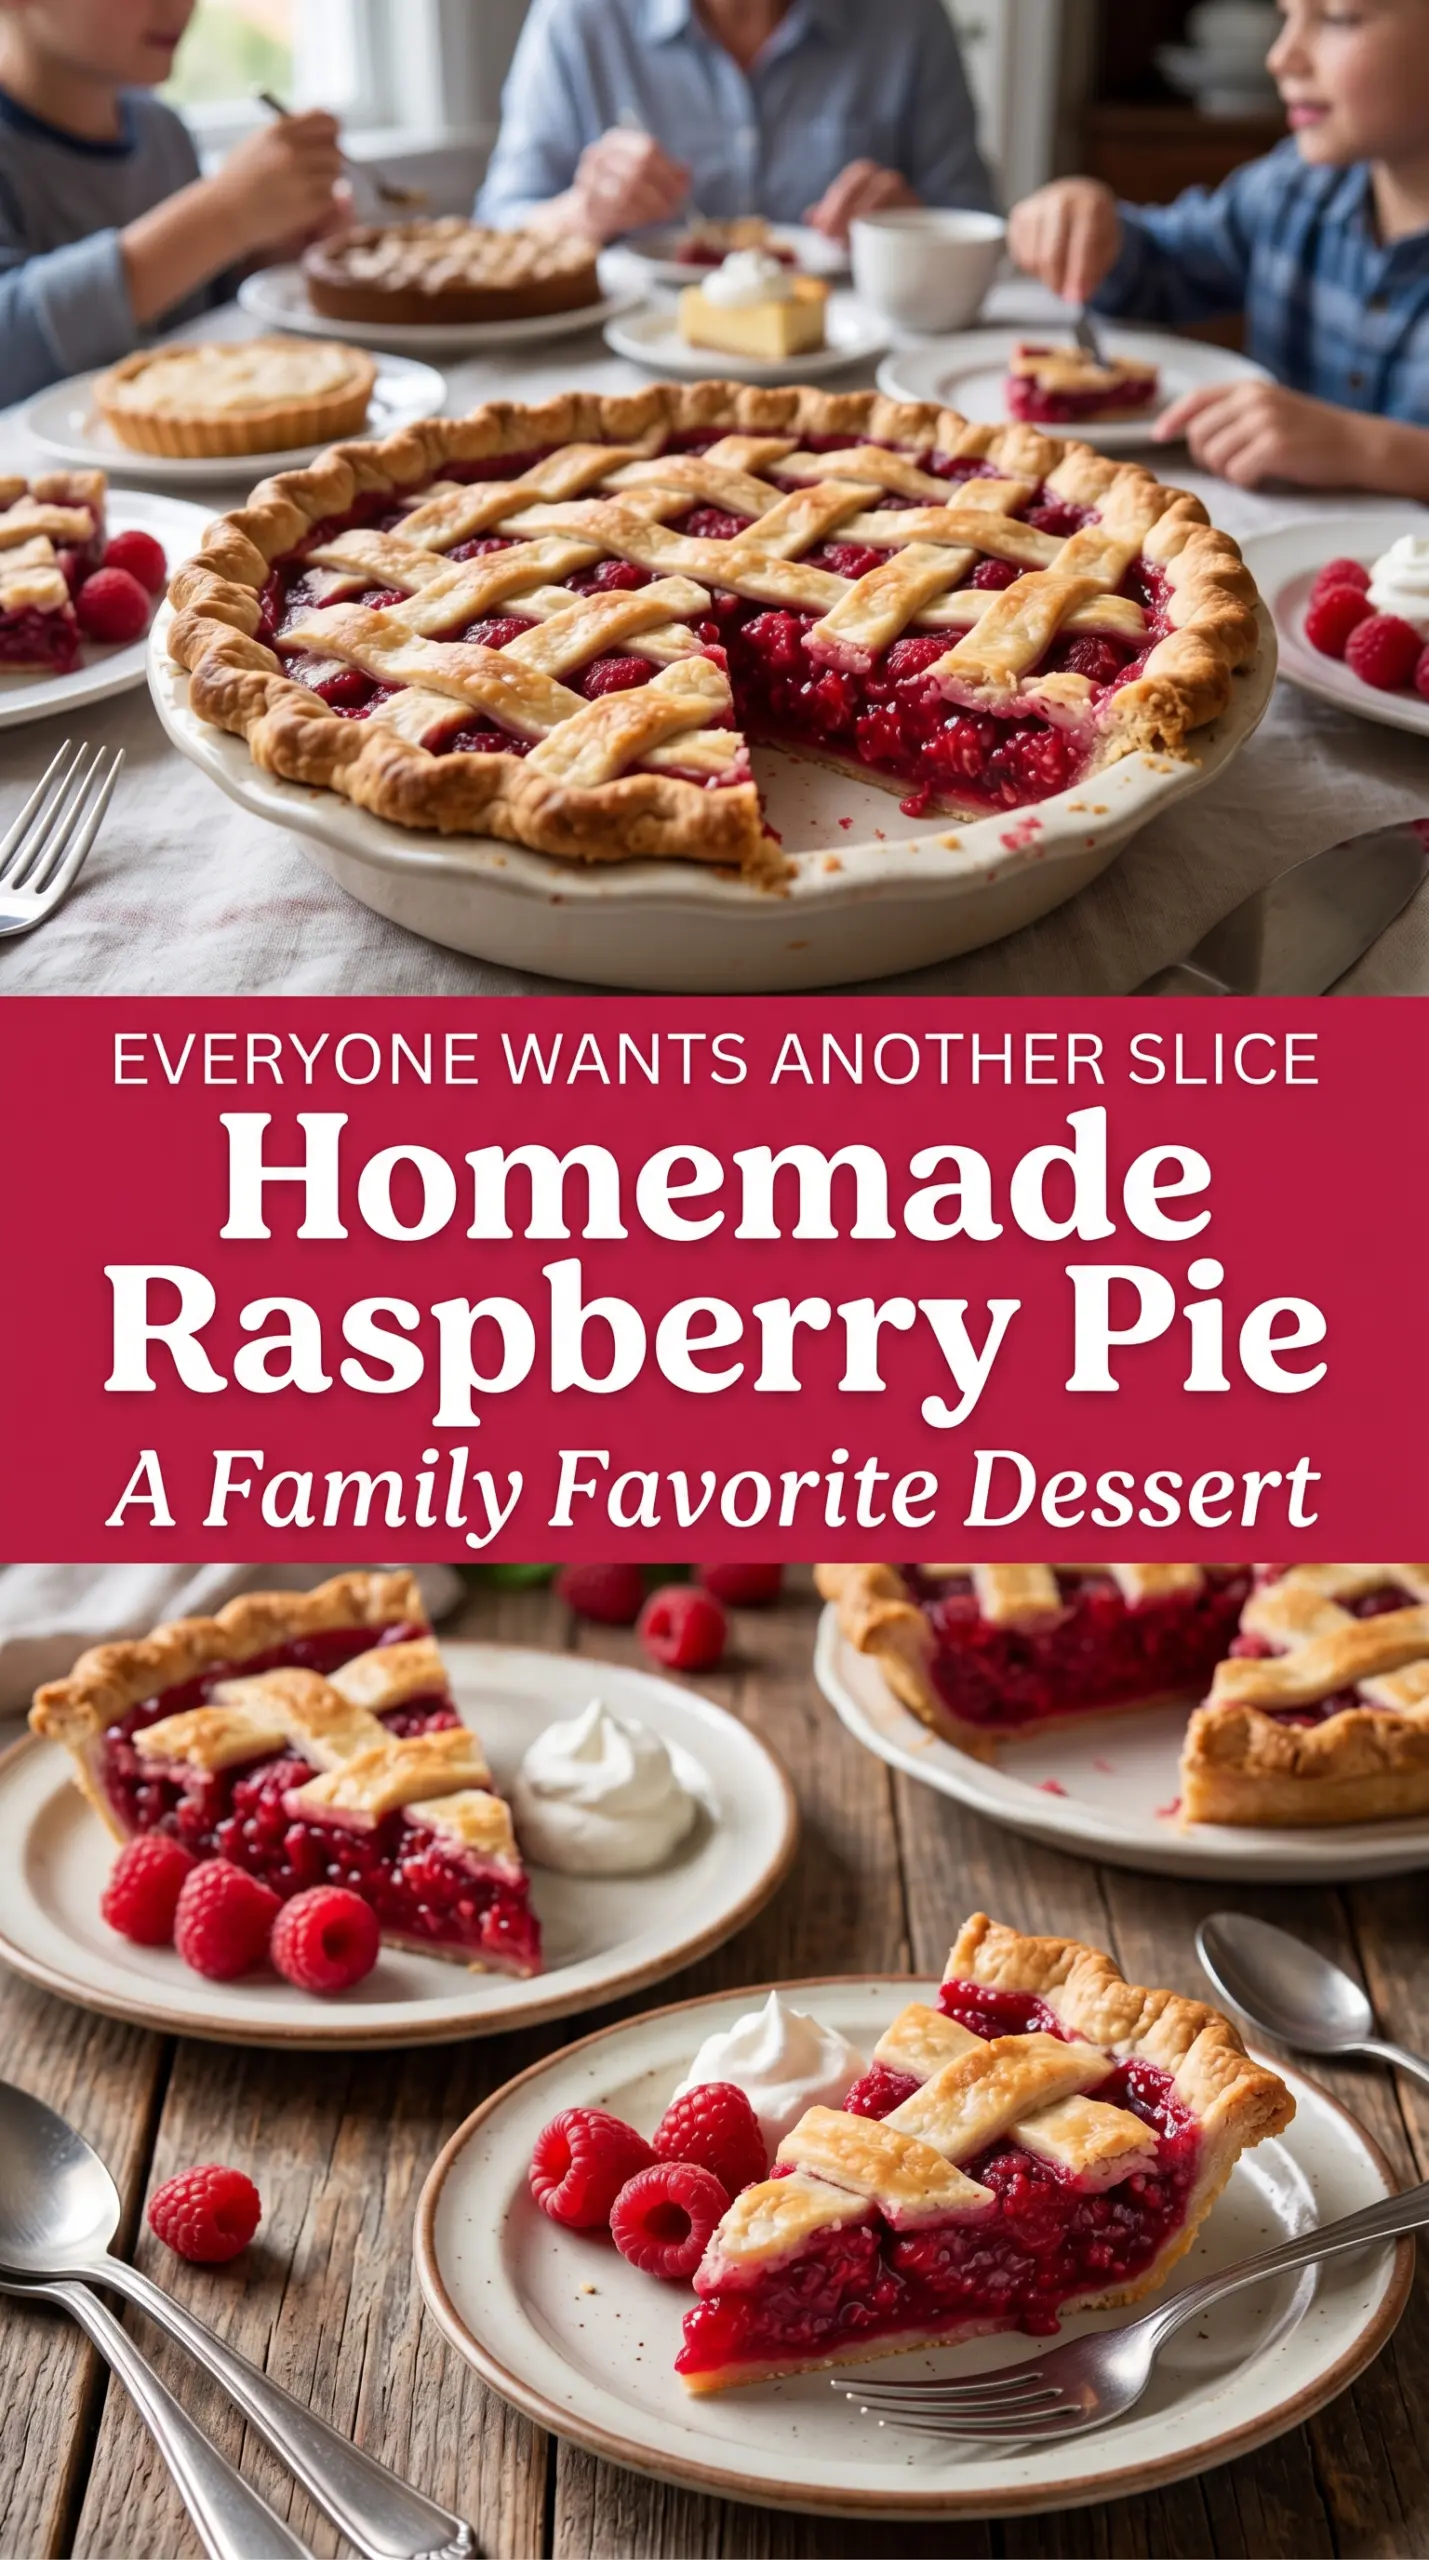
The filling set up beautifully after cooling, and the raspberries stayed bright instead of turning muddy. I used the lattice top and it baked evenly with no soggy bottom, which almost never happens with berry pie in my kitchen.
Save this Homemade Raspberry Pie for the moments when you want a jammy berry filling and a crisp, buttery crust that slices cleanly.
The Problem With Raspberry Pie Filling That Won’t Set
Berry pies fail in one of two ways: the filling turns runny, or the fruit cooks down into a loose puddle that never quite becomes a sliceable pie. Raspberries are especially tricky because they collapse quickly and release a lot of juice. That juice needs time with the starch to thicken, but it also needs enough heat to bubble all the way through or the filling stays loose after cooling.
That is why the pie bakes at a higher temperature first, then drops down to finish. The blast of heat helps the crust start setting and gets the filling moving. The lower temperature gives the juices time to thicken without burning the edges. If your pie still looks loose in the middle when it comes out, it usually needed a few more minutes in the oven, not a longer cooling time.
What Each Ingredient Is Doing in This Raspberry Pie
- Fresh raspberries — These are the whole point of the pie. Fresh berries give you the brightest flavor and the best texture; frozen berries can work, but they release more liquid and usually need an extra spoonful of cornstarch.
- Cornstarch — This is what turns the berry juices from thin and watery into a filling that holds its shape. Stir it in with the sugar before adding it to the berries so it disperses evenly and doesn’t clump.
- Lemon juice — A small amount wakes up the berries and keeps the filling from tasting one-note. Bottled lemon juice works in a pinch, but fresh tastes cleaner here.
- Vanilla extract — Raspberry and vanilla work together better than most people expect. The vanilla smooths out the sharpness of the berries without making the pie taste like dessert filler.
- Pie crust — A refrigerated crust is fine if it bakes up cold and you handle it gently. Homemade crust gives you a little more flavor and better flake, but the most important thing is keeping it chilled so it doesn’t shrink.
- Egg wash and coarse sugar — The egg wash gives the top crust color and helps the sugar stick. Coarse sugar adds a light crunch that looks good and keeps the crust from tasting flat.
Building the Berry Filling So It Slices Cleanly
Mix the fruit gently
Combine the raspberries with the sugar, cornstarch, lemon juice, vanilla, and salt in a large bowl, then fold just until everything is evenly coated. Raspberries bruise fast, and aggressive stirring breaks them down before the pie ever hits the oven. You want the berries glossy and lightly coated, not mashed into a sauce.
Fill the crust without packing it down
Spoon the filling into the crust and let it settle naturally. If you press it down hard, the fruit compacts and the center can bake up dense while the top stays uneven. A little mound in the center is normal because the berries collapse as they bake.
Bake until the center is actively bubbling
The pie is done when the crust is deep golden and you can see thick bubbles coming through the vents or lattice in the center, not just around the edges. Those bubbles are your proof that the starch has cooked through. If the top browns too quickly, tent it loosely with foil and keep baking until the filling looks thick and active.
Let it cool all the way
Cooling isn’t optional here. The filling finishes setting as it drops to room temperature, and cutting too early turns the pie into a spill. Give it several hours if you want neat slices with a jammy, stable center.
How to Adapt This Pie When You Need a Different Route
Frozen Raspberry Pie
Frozen raspberries work, but don’t thaw them first or you’ll end up with a much wetter filling. Toss them with the sugar and cornstarch straight from frozen, then add 1 extra tablespoon cornstarch so the filling has enough structure after baking.
Gluten-Free Crust Swap
Use a gluten-free pie crust with the same filling and bake until the center bubbles. Gluten-free dough tends to brown faster, so watch the edges closely and cover them with foil if they darken before the filling is ready.
Strawberry-Raspberry Version
Replacing one-third of the raspberries with sliced strawberries gives you a softer, sweeter filling with a little less tartness. Strawberries hold their shape better than raspberries, so the pie slices nicely, but the flavor is less intense and a bit less jammy.
Make-Ahead Storage
- Refrigerator: Store covered for up to 4 days. The crust softens a little by day two, but the filling stays flavorful.
- Freezer: Bake, cool completely, wrap tightly, and freeze for up to 2 months. Thaw overnight in the refrigerator; freezing works better than freezing the unbaked pie because the berries release too much liquid.
- Reheating: Warm slices in a 300°F oven for 10 to 12 minutes. The oven keeps the crust crisp; the microwave makes it soggy and makes the filling weep.
Questions I Get Asked About This Pie

Homemade Raspberry Pie
Ingredients
Equipment
Method
- Preheat oven to 400°F (200°C). Set a sheet pan on the middle rack so the crust bakes evenly.
- Fit one pie crust into a 9-inch pie plate. Press gently into the bottom and up the sides with no stretching.
- In a large bowl, gently combine raspberries, granulated sugar, cornstarch, lemon juice, vanilla extract, and salt. Stir just until the berries are coated and the cornstarch is evenly distributed.
- Transfer the filling into the prepared crust. Spread the berries into an even layer so they bake consistently.
- Place the second crust over the filling or create a lattice design. Leave small openings if using a lattice so steam can escape and help prevent bubbling over.
- Trim and crimp the edges. Seal well to keep the filling from leaking during baking.
- Whisk together the egg and water. Brush the mixture over the crust for a glossy, golden finish.
- Sprinkle the crust with coarse sugar. Aim for an even coating so you get crunchy sparkle spots.
- Bake for 20 minutes at 400°F (200°C). Look for early browning along the edges and steady bubbling beginning through the vents or lattice.
- Reduce oven temperature to 375°F (190°C) and continue baking for 30–35 minutes. Bake until the filling is bubbling in the center and the crust is golden brown.
- Cool completely before slicing. Letting it set fully helps the filling thicken instead of running.
