

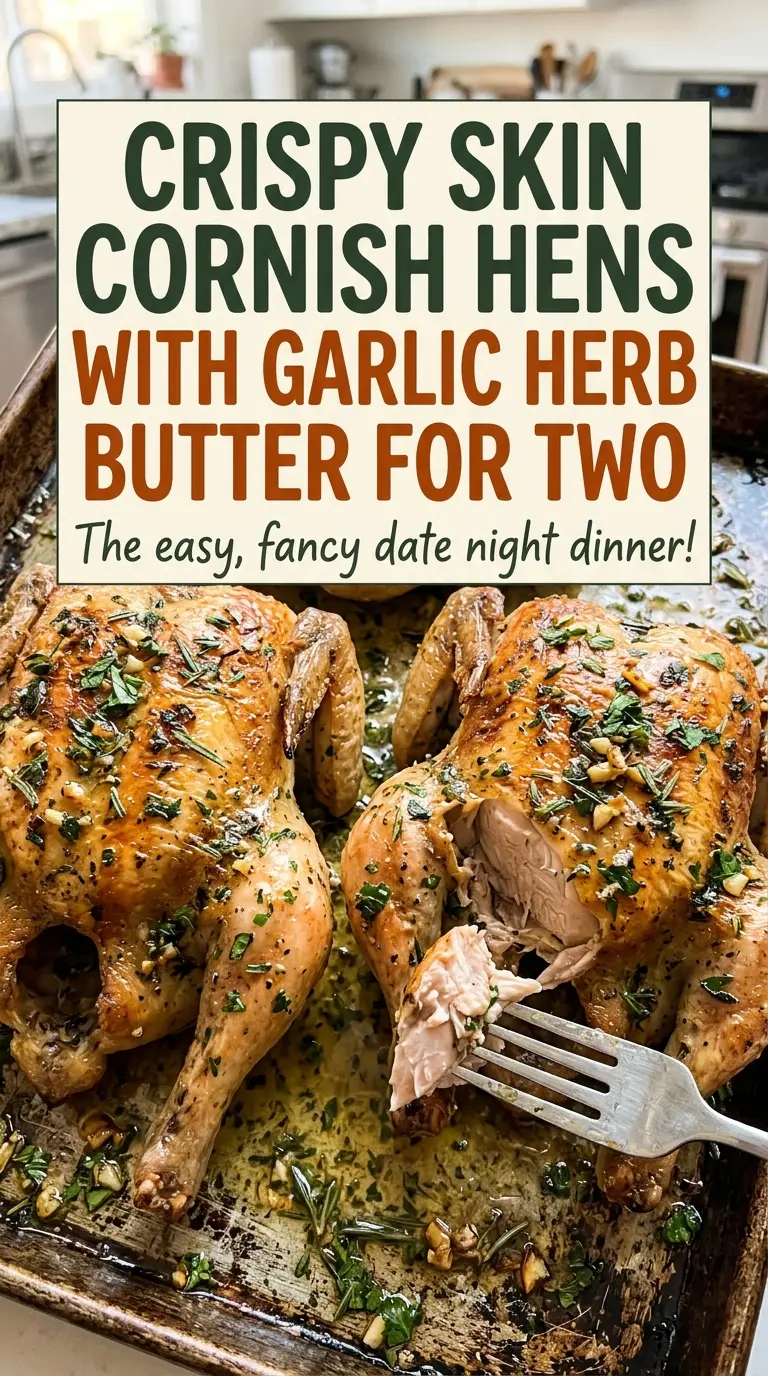
Crispy Skin Cornish Hens with Garlic Herb Butter for Two
The skin should crackle when you press it lightly, not bend like damp paper. With Cornish hens, that crisp finish comes down to a few small details: dry the skin…
Tip: save now, cook later.The skin should crackle when you press it lightly, not bend like damp paper. With Cornish hens, that crisp finish comes down to a few small details: dry the skin well, give the hot air room to circulate, and keep the garlic herb butter tucked beneath the skin instead of coating the outside. That’s how I make these crispy skin Cornish hens with garlic herb butter for two.
Each bird is small enough to serve as an individual main, and the butter seasons the breast and thighs while they roast. Fresh parsley, rosemary, and thyme keep the flavor savory and herbal without needing a long list of seasonings. I use a wire rack set inside a roasting pan so the hens roast above the pan rather than sitting in their juices.
The hands-on work is brief; the oven does the rest. Look for deeply golden skin, then check each hen with a thermometer before you let them rest uncovered. The result is crisp-skinned, tender meat with garlicky herbs tucked right beneath the surface.

Kitchen Note
Use butter that’s softened enough to spread, but not melted. It should slide beneath the skin in an even layer instead of running out before the hens reach the oven.
Save these crispy skin Cornish hens with garlic herb butter for a dinner for two with golden skin and fresh herbs tucked under every bite.
Why the Rack and Dry Skin Matter More Than Extra Butter
Crisp skin isn’t achieved by piling more fat on the outside. The butter belongs under the skin, where it can season the meat, while the olive oil lightly coats the skin itself. Starting with dry skin helps the outside roast rather than steam, and the wire rack gives hot air a path around the hens instead of leaving their undersides sitting against the pan.
That raised position matters because the birds release juices as they cook. If they’re sitting directly in those juices, the parts touching the pan won’t brown in the same way as the exposed surface. A rack set inside a 9×13-inch roasting pan catches the drips while keeping the hens elevated. Pat them thoroughly dry before adding the butter, salt, pepper, and oil; damp skin is the easiest way to lose the crisp finish you’re after.
Keep the birds breast side up as they roast. Their skin should turn deeply golden, and the thermometer—not color alone—tells you when both the breast and thigh are ready.
Fresh Herbs, Softened Butter, and Hens That Roast Evenly
- Unsalted butter — It gives the chopped herbs and garlic a soft, spreadable base beneath the skin. Using unsalted butter lets the kosher salt do the seasoning, and the softened texture matters more here than choosing a specialty butter.
- Fresh garlic and herbs — Minced garlic, parsley, rosemary, and thyme make the butter aromatic without needing a separate sauce. Fresh herbs are the right fit for this mixture; dried herbs have a different texture and won’t distribute through softened butter in quite the same way.
- Cornish game hens — Choose birds close to the listed size so they roast on a similar schedule. Remove giblets if they’re included, and dry the outside well before seasoning. Different-sized hens may finish at different times, so check each bird individually.
- Kosher salt and black pepper — Season both the cavities and the skin, rather than just dusting the outside. The cavity seasoning gives the inside of each bird a little flavor, while the salt on the skin seasons each bite.
- Olive oil — A thin rub over the skin helps it roast evenly. It goes on after the butter is under the skin, so the butter stays where it can flavor the meat instead of covering the exterior.
The Three Stages That Keep the Skin Crisp
Stir the Garlic Herb Butter Until It’s Even
Combine the softened butter with minced garlic, chopped parsley, rosemary, and thyme in a small bowl. Stir until the herbs and garlic are spread throughout, with no large clumps of garlic or herbs left in one spot. If the butter is too firm to mix smoothly, give it a little more time to soften; melting it makes it harder to keep in place beneath the skin.
Dry, Loosen, and Season the Hens
Heat the oven to 425°F with a rack in the center, and set a wire rack inside a 9×13-inch roasting pan. Pat each hen very dry with paper towels, then carefully loosen the skin over the breasts and thighs. Spread the herb butter beneath the skin, season the cavities and skin with kosher salt and black pepper, and rub olive oil over the outside. Work gently when separating the skin; if it tears, keep spreading the butter beneath the parts that remain attached rather than forcing it.
Roast Until Golden, Then Rest Uncovered
Set the hens breast side up on the rack and roast for 50 to 60 minutes. Look for crisp, deeply golden skin, and check the thickest part of each breast and thigh with a thermometer, keeping the tip away from bone. Each location should read 165°F; check both birds rather than assuming they’ll finish at precisely the same moment. Rest the hens uncovered for 10 minutes before serving so the skin doesn’t trap steam.
How to Change the Herb Butter Without Losing the Roast
Roast One Hen for a Smaller Meal
For one serving, roast a single hen and scale the garlic herb butter and seasonings down in proportion. Keep the oven temperature and rack setup the same, but rely on the thermometer rather than assuming a one-hen batch will take the full two-hen timing. The bird still needs to reach 165°F in the thickest part of both the breast and thigh.
Make the Herb Flavor Milder
If you prefer a gentler rosemary-and-thyme note, use less of those stronger herbs and lean more on the parsley already in the butter. Keep the garlic and butter in the mixture, then spread it beneath the skin as usual. You’ll get a softer herbal aroma without changing the crisp-skin roasting method.
Make It Dairy-Free with Olive Oil
For a dairy-free version, leave out the butter and combine the garlic and listed herbs with olive oil to spread beneath the skin. The result won’t have the same rich, cohesive layer as herb butter, but it keeps the garlic-herb flavor and works with the same roasting setup. Rub olive oil over the skin as well.
Storage and Reheating
- Refrigerator: Refrigerate leftovers within 2 hours and eat them within 3 to 4 days. The skin softens in the fridge.
- Freezer: Freeze carved meat in an airtight container for up to 3 months for best quality. Thaw it in the refrigerator before reheating; the skin won’t be as crisp as it was freshly roasted.
- Reheating: Reheat portions until they reach 165°F, checking the thickest pieces. Carving the meat first helps it warm evenly; covering it tightly traps steam and softens the skin further.
Questions That Come Up Before the Hens Go in the Oven
Crispy Skin Cornish Hens with Garlic Herb Butter for Two
Ingredients
Equipment
Method
- Stir the softened butter, minced garlic, chopped fresh parsley, chopped fresh rosemary, and fresh thyme leaves together in a small bowl until evenly combined.
- Heat the oven to 425°F with a rack in the center.
- Set a wire rack inside a 9x13-inch roasting pan.
- Pat the Cornish game hens very dry with paper towels.
- Carefully loosen the skin over the breasts and thighs.
- Spread the garlic herb butter under the skin.
- Season the cavities and skin with the kosher salt and black pepper.
- Rub the olive oil over the skin.
- Set the hens breast side up on the rack.
- Roast for 50 to 60 minutes, until the skin is crisp and deeply golden and a thermometer reads 165°F in the thickest part of each breast and thigh, away from bone.
- Rest the hens uncovered for 10 minutes before serving.
