

Crispy Air Fryer Chicken Tenders
When the panko hits a hot air fryer basket, the coating starts to toast before the chicken has time to dry out. That’s the payoff I want from these Crispy…
Tip: save now, cook later.When the panko hits a hot air fryer basket, the coating starts to toast before the chicken has time to dry out. That’s the payoff I want from these Crispy Air Fryer Chicken Tenders: a crisp, golden outside with tender chicken underneath, without a pot of frying oil on the stove.
The part that makes this method reliable is giving each tender a complete coating, then leaving room around it in the basket. I arrange them in one layer and cook in batches when needed, rather than squeezing in a few extras. A light spray of neutral oil helps the crumbs brown, and flipping halfway gives both sides a chance to crisp. The result is a straightforward dinner with a crunchy panko shell and a juicy center.

Kitchen Note
Give the tenders their full 3-minute rest before serving. The coating settles into a crisp shell, and the chicken stays hot while the first bite is less likely to send the crust sliding off.
Save these Crispy Air Fryer Chicken Tenders for a night when you want golden panko crunch without deep-frying.
Why a Full Panko Coat Matters More Than Extra Oil
Air-fried chicken gets its crunch from a dry, even layer of crumbs, not from a heavy coating of oil. Each part of the breading has a separate job: flour gives the egg something to cling to, beaten egg helps the panko stick, and the coarse crumbs form the crisp surface. When a patch is left bare, that spot won’t have the same toasted crunch as the rest of the tender.
Press the panko onto every side instead of giving the chicken a quick roll through the bowl. That small difference helps the coating stay put when you flip the tenders. Keep the layers distinct as you work, too. If flour clumps into the egg bowl or egg drips into the panko, the coating can turn uneven before it reaches the air fryer. The goal is a thin, continuous shell rather than a thick, doughy layer.
Oil still matters, but use it lightly. A thin spray over the top helps the crumbs color, while too much can weigh them down. The same light spray on the second side gives the flipped tenders a chance to brown evenly, without making the coating greasy.
What Panko and the Other Coating Ingredients Bring to These Tenders
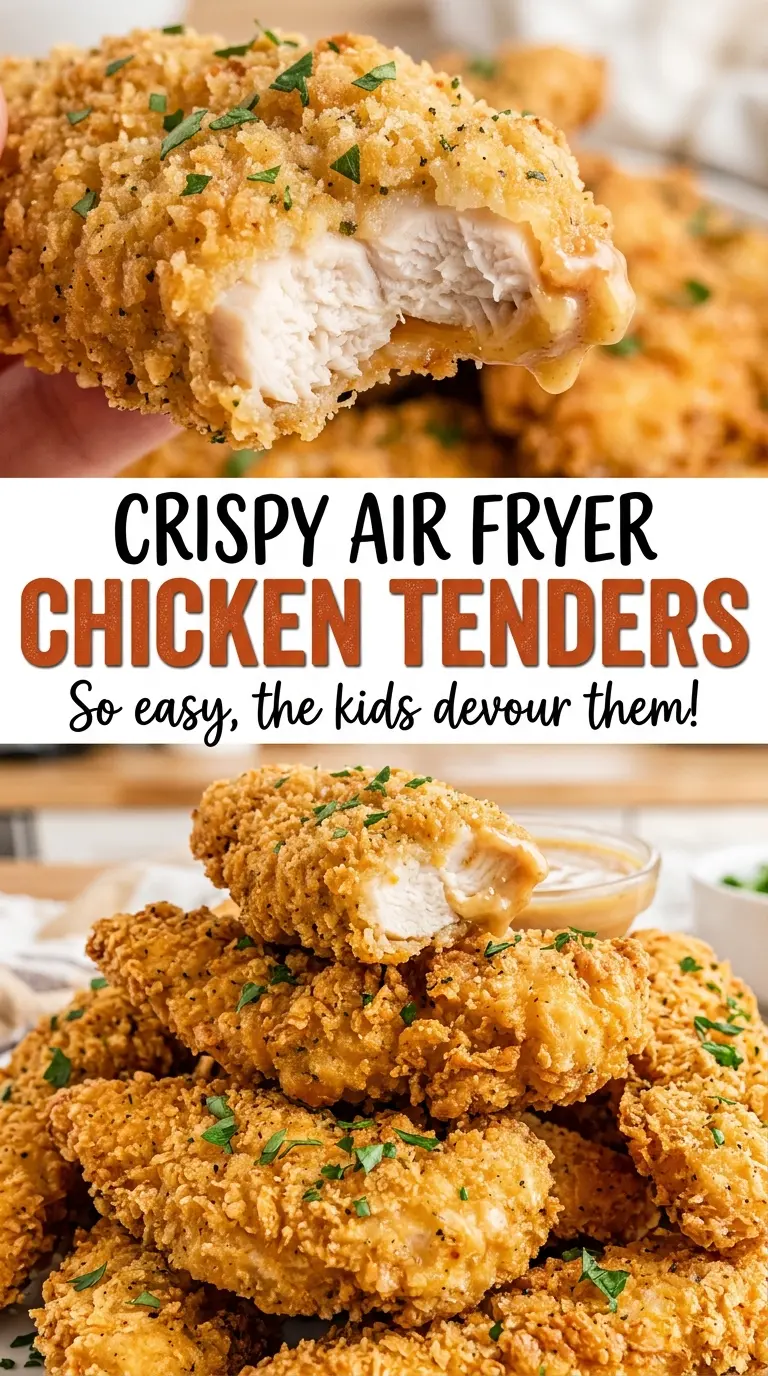
- Chicken tenderloins — Their naturally narrow shape makes them a practical fit for a quick air-fryer cook. Remove the tendon before breading; it can stay noticeably tough after the meat is cooked. Choose tenderloins that are similar in thickness when you can, since very different sizes won’t finish at the same pace.
- All-purpose flour and eggs — These are the middle layers that help the panko hold to the chicken. Regular all-purpose flour is right for the job; there’s no need for a specialty flour. Beat the eggs until the whites and yolks are fully combined so each dip coats consistently.
- Panko breadcrumbs — Panko’s larger, lighter flakes create the craggy surface that turns crisp in the air fryer. Break up any unusually large clumps with your fingers before coating, but don’t crush the crumbs into a fine powder. A fresh, dry package gives a better crunch than crumbs that have absorbed moisture in an open bag.
- Garlic powder, paprika, kosher salt, and black pepper — Mixing these seasonings directly into the panko distributes them across the coating, instead of leaving strong pockets in a few bites. Garlic powder and paprika are useful here because they cling to the crumbs without adding moisture. Check that the powders are free of hard clumps before stirring them through.
- Neutral oil — A light spray encourages browning without adding a strong flavor of its own. Use a neutral oil suitable for spraying; the point is a fine, light coat on the breaded surface, not a pour of oil into the basket.
The Coating and Air-Fryer Cues That Keep Each Tender Crisp
Set Up the Three Breading Bowls
Preheat the air fryer to 400°F for 3 minutes while you arrange the coating station. Put the flour in one shallow bowl, beat the eggs in a second, and mix the panko with the garlic powder, paprika, salt, and pepper in a third. Shallow bowls give the tenderloins enough room to turn without scraping off their coating. Keeping the bowls in that order makes it easier to move from flour to egg to panko without muddying the dry crumbs.
Coat Each Tender All the Way Around
Work with one tenderloin at a time: coat it in flour, dip it in egg, then press it into the seasoned panko. Turn it as needed so the top, bottom, and sides are covered. If you see a bare spot, press a little more panko onto that area before moving on. A complete coating now is easier than trying to patch a pale spot after cooking.
Air-Fry in a Single Layer
Arrange the coated tenders in one layer in the basket, leaving space rather than stacking or overlapping them. Lightly spray the first side, then air-fry at 400°F for 10–12 minutes, flipping halfway through. Spray the second side lightly after turning. Look for a golden, crisp exterior, and check that the thickest part reaches 165°F; the exact cook time may vary by air fryer.
Rest Before Serving
Move the cooked tenders out of the basket and let them rest for 3 minutes. Don’t pile the hot pieces in a deep stack, where trapped steam can soften the coating. The brief rest also gives you a moment to check that each batch is ready before bringing everything to the table. Serve while the crust is at its crispest.
Two Practical Ways to Adapt the Batch
Make Smaller, Nugget-Size Pieces
Cut the tenderloins into smaller pieces before setting up the coating bowls, then bread each piece using the same flour, egg, and panko sequence. The smaller format gives you more crisp edges in each serving, but the pieces may cook faster than whole tenderloins. Check the thickest piece for doneness rather than relying only on the original timing.
Scale the Batch to Your Air-Fryer Basket
For fewer servings, reduce each ingredient in the same proportion; for more, increase them proportionally. Keep the tenders in a single layer and work in batches if the basket won’t fit them with space around each piece. Scaling the coating together keeps the flour, egg, and seasoned panko in balance, while cooking in batches protects the crisp finish.
Storage and Reheating
- Refrigerator: Store leftovers in a covered container and refrigerate within 2 hours. They keep for 3–4 days; the coating softens as it sits.
- Freezer: Freeze cooked tenders in a single layer until firm, then transfer them to an airtight freezer container. For the best texture, use them within 2–3 months.
- Reheating: Reheat in the air fryer at 400°F in a single layer until hot throughout. Avoid stacking the tenders, which traps steam and makes the coating soft.
Questions That Come Up While Making Air Fryer Chicken Tenders
Crispy Air Fryer Chicken Tenders
Ingredients
Equipment
Method
- Preheat the air fryer to 400°F for 3 minutes.
- Put the flour in a shallow bowl and beat the eggs in a second shallow bowl. In a third shallow bowl, combine the panko, garlic powder, paprika, salt, and pepper.
- Coat each chicken tender in flour, dip it in egg, then press it into the panko mixture until coated on all sides.
- Arrange the tenders in a single layer in the air fryer basket, working in batches as needed, and lightly spray them with oil.
- Air-fry at 400°F for 10–12 minutes, flipping halfway and spraying the second side lightly, until golden and crisp and the thickest part reaches 165°F; cooking time may vary by air fryer.
- Rest the tenders for 3 minutes before serving.
