

Sweet Chili Lime Baked Chicken Thighs
Sweet chili lime baked chicken thighs come out with crisp, lacquered skin, juicy meat, and a sticky glaze that clings instead of sliding off the pan. The flavor lands in…
Tip: save now, cook later.Sweet chili lime baked chicken thighs come out with crisp, lacquered skin, juicy meat, and a sticky glaze that clings instead of sliding off the pan. The flavor lands in that sweet spot between tangy, garlicky, and just spicy enough to keep each bite interesting. It’s the kind of dinner that tastes like you did a lot more than you actually did.
The trick here is building flavor in layers. A dry seasoning rub goes on first so the chicken itself tastes good before the sauce ever hits the pan, and the glaze gets brushed on in two stages so it caramelizes without burning. Lime juice and zest keep the sauce bright, while honey and sweet chili sauce give it that glossy finish that turns sticky in the best way.
Below, I’ve laid out the few spots where people usually go wrong with glazed chicken thighs, plus the ingredient swaps that still keep the texture and balance intact. If you’ve ever ended up with pale skin or a sauce that tastes flat, the notes here will help.
The skin turned out lacquered and sticky instead of soggy, and the lime really kept the sauce from tasting too sweet. I brushed the second layer on halfway through like you said, and the chicken came out juicy with caramelized edges.
Like these sweet chili lime baked chicken thighs? Save them to Pinterest for a sticky, juicy chicken dinner with caramelized skin and bold citrus heat.

The Secret to Crisp Skin When the Sauce Comes Later
Glazed chicken thighs fail for one main reason: the sauce goes on too early and the skin never gets a chance to render. Chicken skin needs direct oven heat before it’s coated in anything wet. Once the glaze hits, it acts like a shield, which is great for flavor but bad for browning if you rush it.
That’s why the first bake is done with just the seasoned chicken. It gives the fat under the skin time to melt, tightens the surface, and starts the browning before the sweet chili mixture is added. When the second brush goes on, the sauce reduces on the chicken instead of steaming it.
- Bone-in, skin-on thighs — These stay juicy through the longer bake and give you the best texture for caramelizing. Boneless thighs cook faster, but they won’t hold the glaze the same way.
- Sweet chili sauce — This is the base of the glaze, and a good one already has garlic, sugar, and mild heat built in. If yours is very thick, whisk in the lime juice and soy sauce until it loosens into a brushable sauce.
- Fresh lime juice and zest — Bottled juice won’t give you the same clean brightness. The zest matters here because it adds lime aroma without extra liquid, which keeps the sauce glossy instead of thin.
- Honey — This deepens the caramelization and helps the sauce cling. You can reduce it slightly if your chili sauce is already sweet, but don’t leave it out or the glaze tastes flat.
- Butter — Just a little butter rounds out the sharp edges and gives the sauce a silkier finish. Olive oil won’t replace that same soft gloss.
Building the Glaze Without Burning the Chicken
Seasoning the Chicken Properly
Pat the thighs dry before anything else. If the skin is damp, it steams in the oven and you lose the crisp surface you’re after. The seasoning mix goes directly on both sides so the chicken tastes balanced even where the sauce doesn’t quite reach. Keep the layer even, but don’t pile it on; too much spice rub can taste dusty under a sweet glaze.
Whisking the Sauce Until It’s Brushable
Stir the sweet chili sauce, honey, lime juice, zest, garlic, soy sauce, sriracha, and melted butter until the mixture looks smooth and glossy. If the butter seizes a little, keep whisking and it comes back together. The sauce should coat the back of a spoon lightly. If it’s too thick, it won’t spread well; if it’s too thin, it runs off the chicken before it can caramelize.
The First Bake Sets Up the Skin
Arrange the thighs skin-side up and brush on only half the sauce. That first layer dries and starts to lacquer while the chicken cooks, which gives the final coat something to cling to. Bake until the skin is starting to turn deep gold and the fat around the edges is bubbling. If you see pale, soft skin at this stage, the pan is crowded or the oven hasn’t fully preheated.
The Final Coat and Broil Finish
Brush on the remaining sauce and return the pan to the oven until the chicken reaches 165°F and the glaze looks sticky and browned at the edges. A brief broil at the end is what gives you that little burnished finish, but it only takes a minute or two before sugar goes from caramelized to bitter. Stay close and watch for bubbling, darkened spots rather than waiting for a timer to tell you it’s done.
How to Adapt These Chicken Thighs for Your Kitchen
Make It Gluten-Free
Swap the soy sauce for gluten-free tamari or coconut aminos. Tamari keeps the savory depth closest to the original, while coconut aminos taste a little sweeter and softer, so you may want to reduce the honey by a teaspoon or two.
Dial Back the Heat
Leave out the sriracha and use a mild sweet chili sauce if you want more sweetness than spice. The chicken still caramelizes well, but the glaze reads more like citrus-honey lacquer with a gentle pepper finish.
Use Boneless Thighs or Chicken Breasts
Boneless thighs work if you want faster cooking, but start checking them early because they can dry out once the glaze tightens. Chicken breasts need more attention and a lower final temperature window; pull them as soon as they hit 165°F so they stay juicy.
Storage and Reheating
- Refrigerator: Store leftovers in an airtight container for up to 4 days. The skin softens, but the flavor deepens overnight.
- Freezer: These freeze well for up to 2 months, though the skin won’t stay crisp. Freeze the chicken and sauce together, wrapped well, then thaw in the fridge before reheating.
- Reheating: Warm in a 350°F oven, uncovered, until hot through. The common mistake is using the microwave, which turns the glaze tacky and the skin rubbery.
Questions I Get Asked About This Recipe
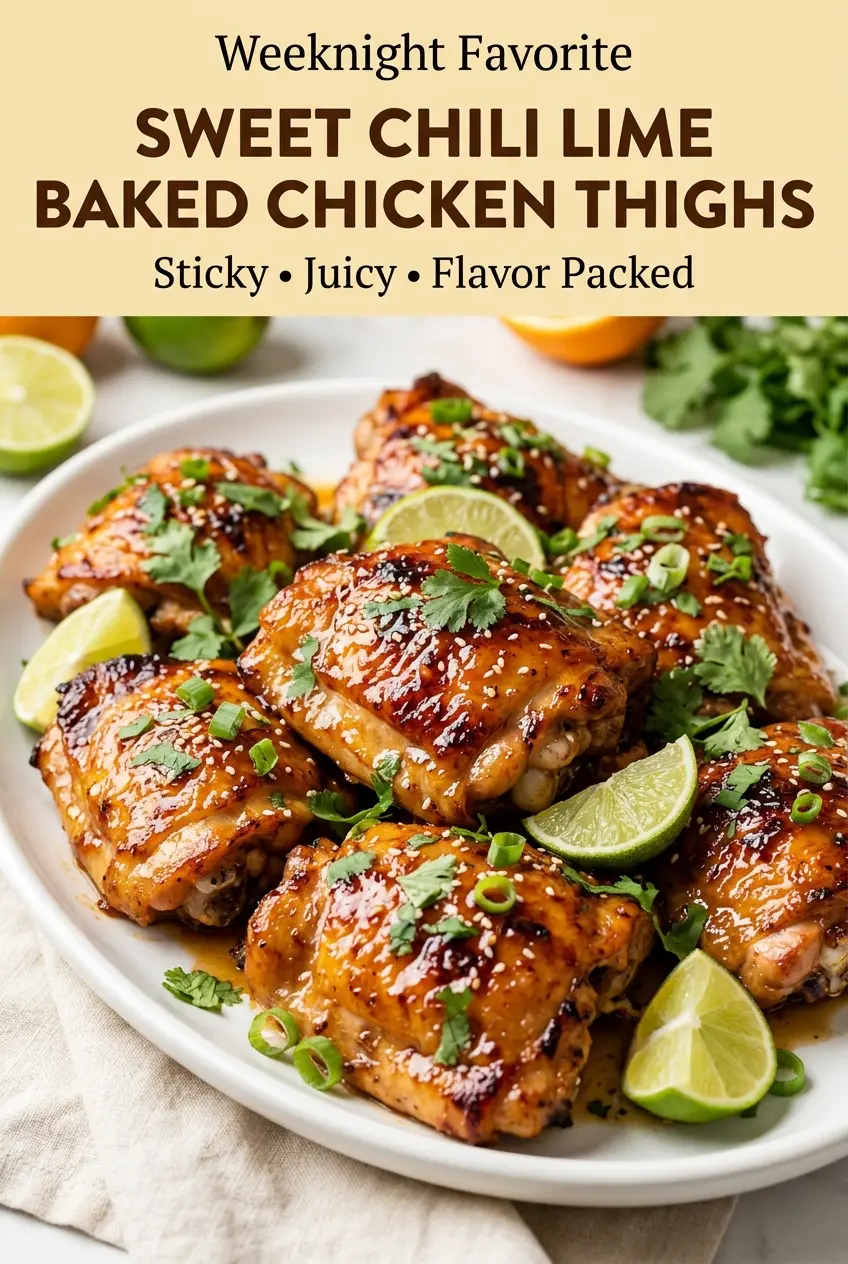
Sweet Chili Lime Baked Chicken Thighs
Ingredients
Equipment
Method
- Preheat the oven to 400°F (200°C) and lightly grease or line a large baking dish or sheet pan with parchment paper.
- Pat the chicken thighs dry with paper towels, then drizzle or rub with olive oil.
- In a small bowl, combine kosher salt, black pepper, smoked paprika, garlic powder, and onion powder, then rub the seasoning evenly over both sides of the chicken.
- In a separate bowl, whisk together sweet chili sauce, honey, fresh lime juice, lime zest, minced garlic, soy sauce, sriracha, and melted butter until smooth.
- Arrange the chicken thighs skin-side up on the prepared baking dish, then brush generously with half of the sweet chili lime sauce.
- Bake at 400°F (200°C) for 25 minutes.
- Remove the pan from the oven, brush with the remaining sauce, and return to the oven.
- Bake at 400°F (200°C) for 15–20 minutes, or until the chicken reaches an internal temperature of 165°F (74°C) and the skin is caramelized.
- For extra caramelization, broil for 2–3 minutes, watching closely to prevent burning.
- Let the chicken rest for 5 minutes before garnishing with cilantro, green onions, sesame seeds, and fresh lime wedges.
