
Red, White and Blue Mixed Berry Yum Yum
Red, White and Blue Mixed Berry Yum Yum lands in that sweet spot between dessert and showpiece: a buttery graham crust, a cool cream cheese layer, and a pile of…
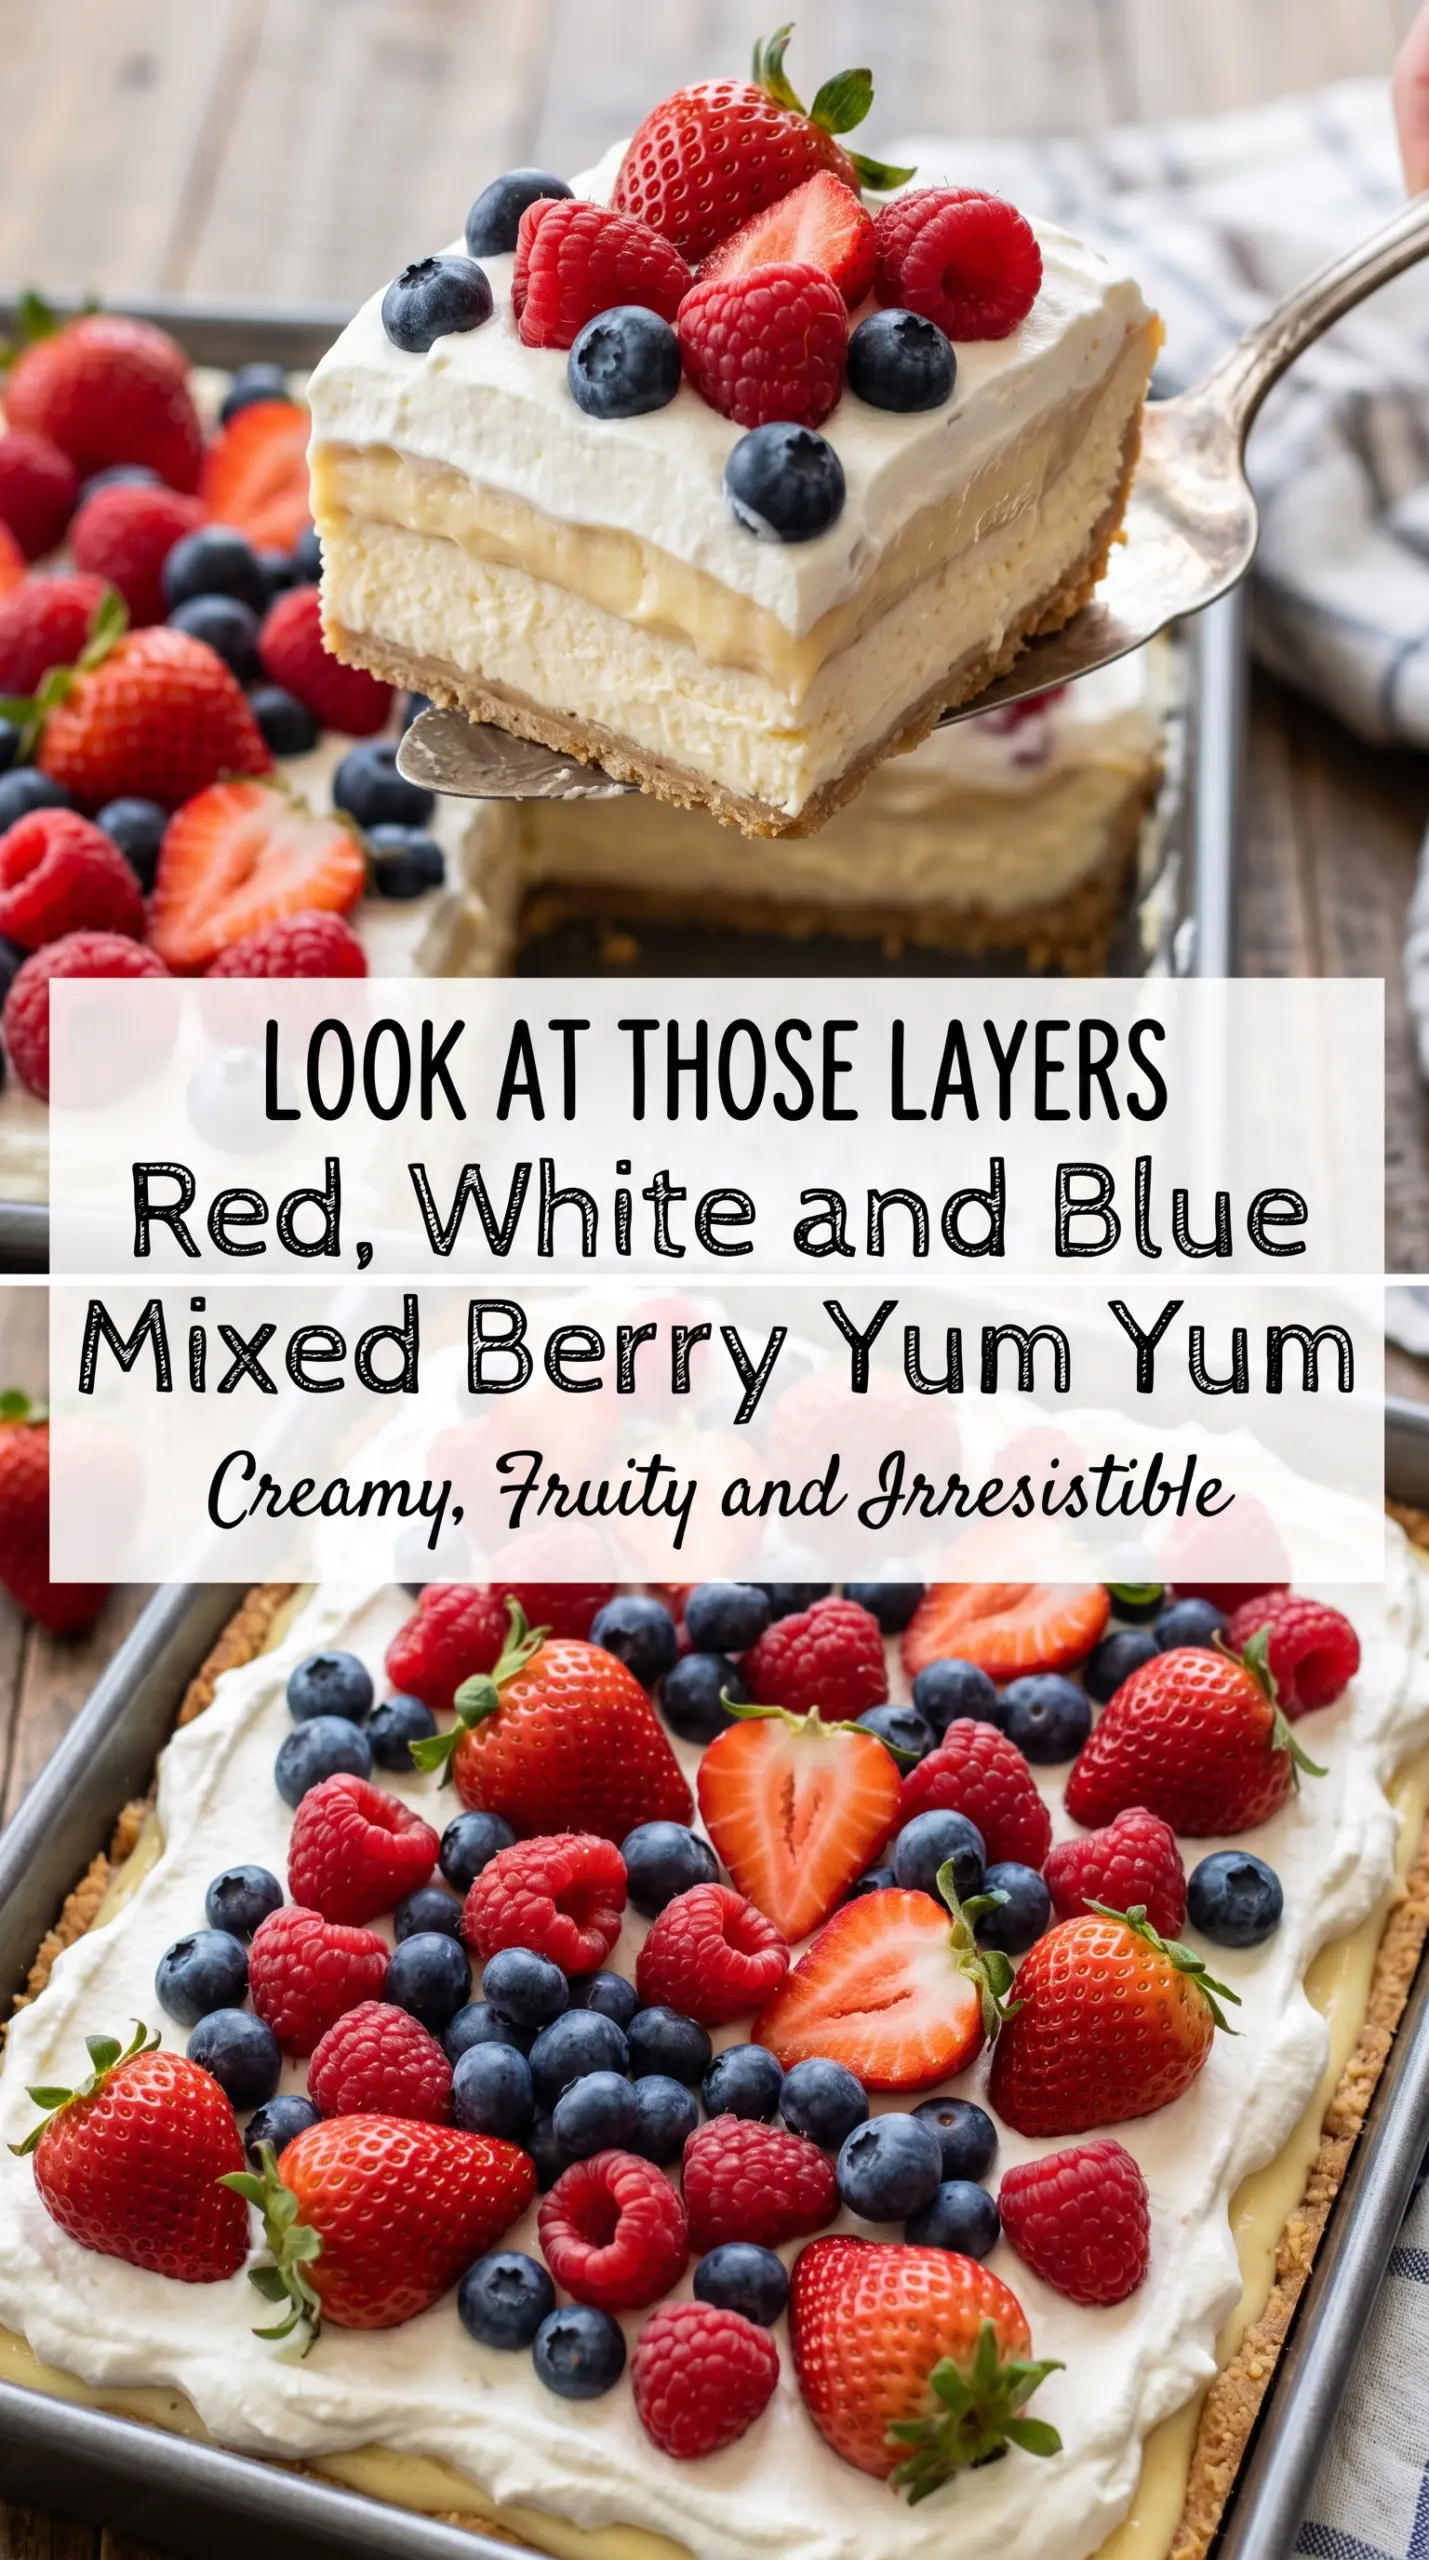
Tip: save now, cook later.Red, White and Blue Mixed Berry Yum Yum lands in that sweet spot between dessert and showpiece: a buttery graham crust, a cool cream cheese layer, and a pile of juicy berries that keeps every bite bright instead of heavy. It slices cleanly after chilling, but the filling stays soft enough to feel plush on the fork. That contrast is what makes people keep going back for “just one more” square.
The trick is keeping each layer distinct. A short chill on the crust helps it set before the cream layer goes on, and beating the cream cheese until it’s completely smooth keeps the filling from turning grainy. Tossing the berries with a little sugar and lemon juice pulls out their juices just enough to make them glossy without turning the whole dessert watery.
Below, I’ve included the small things that matter here: how to keep the crust firm, when to add the berries, and what to do if you need to make it ahead for a crowd.
The berries stayed bright and the cream layer held its shape even after sitting on the table for a while. I loved that the crust didn’t get soggy, and my daughter asked for the last square before dinner was even over.
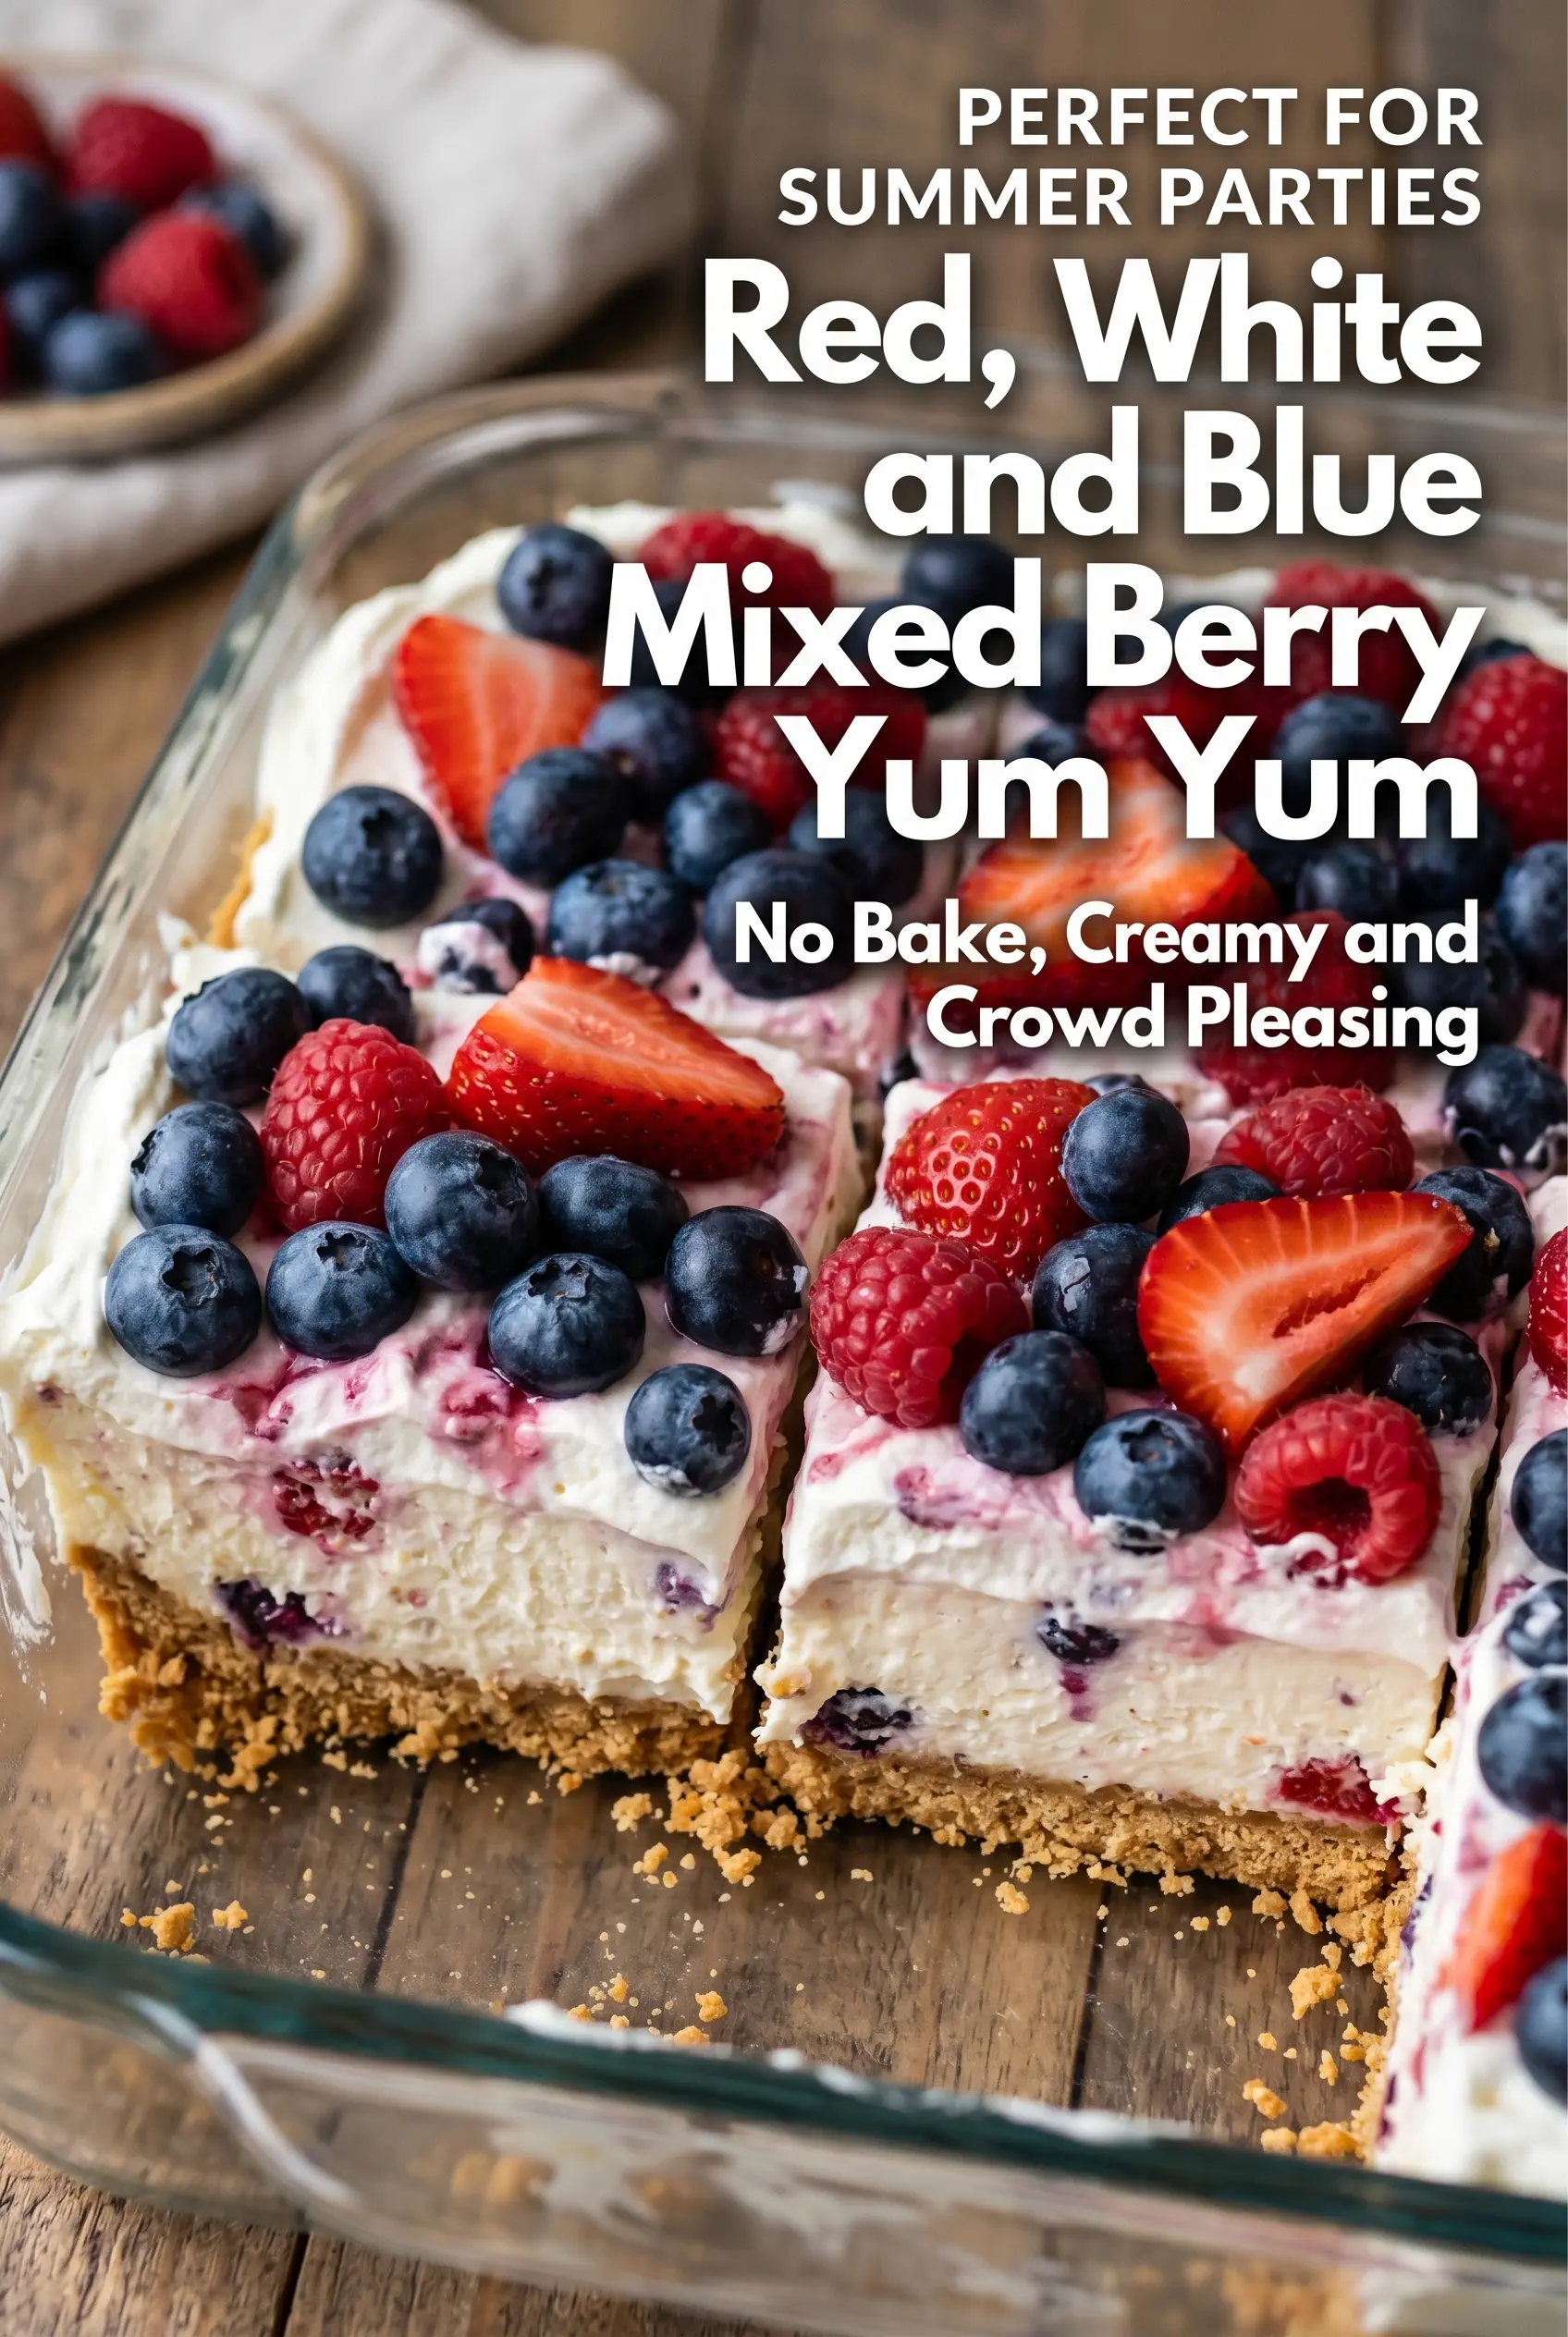
Save this berry-packed no-bake dessert for the next holiday table when you want clean slices, cool creaminess, and patriotic color in every layer.
The Crust Needs a Real Chill Before the Cream Goes On
The biggest mistake with a dessert like this is rushing the base. If the graham crust is still loose when the cream layer hits it, the filling starts sinking into the crumbs and the bottom turns pasty instead of firm. A quick 20-minute chill gives the butter time to set so the layers stay separate.
Press the crust down hard enough that it feels packed, especially around the edges. A measuring cup or flat-bottomed glass works well here because it gives you even pressure without overworking the crumbs. The goal is a base that holds together when sliced, not one that crumbles off the plate.
- Graham cracker crumbs — Fresh crumbs from whole crackers work best, but store-bought crumbs are fine if that’s what you have. You want fine, even crumbs so the crust packs tightly instead of feeling sandy.
- Unsalted butter — This is what binds the crust. If you use salted butter, the dessert still works; just skip any extra salt elsewhere since the filling and berries don’t need it.
- Cream cheese — Full-fat cream cheese gives the filling its body and tang. Let it soften on the counter so it beats smooth; cold cream cheese leaves little lumps that don’t disappear later.
- Whipped topping — This keeps the filling light and stable. Homemade whipped cream can be used, but it won’t hold as long in the fridge, so the dessert is best served the same day.
- Fresh berries — Fresh fruit matters here because frozen berries release too much liquid and blur the layers. If you only have frozen berries, thaw them completely and drain them very well before using.
Building the Layers Without Making the Dessert Watery
Mixing the Cream Layer
Beat the cream cheese until it’s fully smooth before adding the powdered sugar and vanilla. If you add the sugar too soon, any little lumps in the cream cheese stick around and show up in the finished dessert. Fold in the whipped topping gently so you keep the filling airy instead of dense.
Keeping the Berry Juice in Check
Toss the strawberries, blueberries, and raspberries with just enough sugar and lemon juice to wake them up. The sugar draws out a little juice, which makes the berries glossy, but too much liquid will soak into the cream layer. Spoon the berries over the filling instead of dumping them on all at once so the surface stays even.
Finishing and Chilling
Spread the final whipped topping layer all the way to the edges, then add the extra berries for garnish. Cover the dish and chill it for at least 4 hours so the layers settle and the slices hold. If you cut it too early, the cream layer will slump and the crust won’t stay intact.
How to Adapt This for Different Eaters and Different Pans
Make it gluten-free with one crust swap
Use gluten-free graham-style crumbs in place of standard graham crackers. The texture stays nearly the same, and the dessert still slices cleanly as long as you keep the butter ratio the same.
Use homemade whipped cream for a less sweet finish
Swap the whipped topping for freshly whipped heavy cream if you want a lighter, less processed taste. The filling will be softer, so serve it the day you make it or keep it very well chilled.
Lean into a sweeter berry mix
If your berries are tart, add another teaspoon of sugar to the fruit layer. That keeps the dessert balanced without changing the texture, and it helps the berries look glossy instead of dull.
Make it ahead for a party
Assemble the crust and cream layer a day ahead, then add the berries a few hours before serving. That keeps the top from bleeding color into the cream and gives you the freshest-looking finish.
Storage and Reheating
- Refrigerator: Store covered for up to 3 days. The berries soften a bit, but the dessert still tastes great.
- Freezer: I don’t recommend freezing the finished dessert. The cream layer can turn grainy and the berries lose their fresh texture when thawed.
- Reheating: No reheating needed. Serve it straight from the fridge, and use a sharp knife wiped clean between cuts for the neatest slices.
Answers to the Questions Worth Asking
Red, White and Blue Mixed Berry Yum Yum
Ingredients
Method
- Combine graham cracker crumbs, melted butter, and sugar, stirring until the mixture looks evenly moistened and sandy.
- Press the mixture firmly into a 9×13-inch dish to compact it into an even layer.
- Refrigerate for 20 minutes to set the crust.
- Beat cream cheese until smooth, stopping to scrape down the sides for an even texture.
- Add powdered sugar and vanilla and beat until combined and creamy.
- Fold in whipped topping just until no streaks remain.
- Spread the cream cheese mixture evenly over the chilled crust.
- Toss strawberries with granulated sugar and lemon juice until the berries are glossy and juicy.
- Spoon the berries evenly over the cream cheese layer, distributing all visible juices.
- Spread the remaining whipped topping over the berries in a smooth layer.
- Decorate with extra strawberries, blueberries, and raspberries for garnish.
- Refrigerate for at least 4 hours before serving so the layers hold for slicing.
- Slice and serve chilled.
