

Holiday Cheese Ball Christmas Tree
The cream cheese needs to be soft before it goes into the bowl; otherwise, little lumps can hang on even after you add the cheddar. Once it’s smooth, this Holiday…
Tip: save now, cook later.The cream cheese needs to be soft before it goes into the bowl; otherwise, little lumps can hang on even after you add the cheddar. Once it’s smooth, this Holiday Cheese Ball Christmas Tree comes together with sharp cheddar, chives, and a few pantry seasonings. I chill the mixture before shaping so it’s firm enough to hold a tall cone on the serving platter.
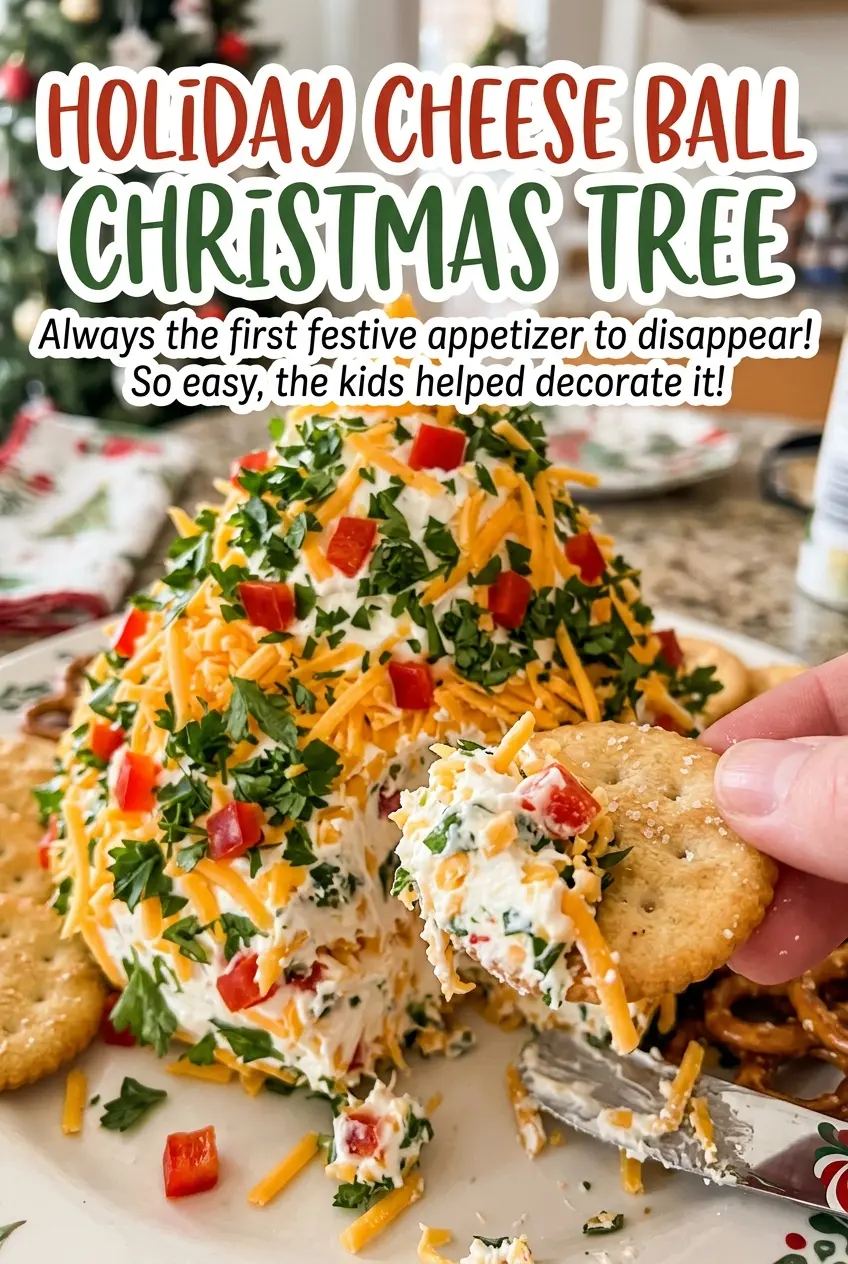
The decorations do more than make it look festive: parsley gives the tree its green base, sliced almonds make tidy rows of branches, and yellow bell pepper turns into the star and garland. Press everything in gently so the cheese keeps its shape. The finished tree is savory, creamy, and ready to share straight from the platter.
Kitchen Note
Cut the pepper star from one broad side of the yellow bell pepper, where you have enough flat flesh for a clear shape. It’ll sit more visibly at the top than a tiny star cut from a narrow edge.
Save this Holiday Cheese Ball Christmas Tree for a party platter with crisp almond branches and a bright pepper star.
Why the Cheese Mixture Needs to Be Firm Before You Build the Tree
A cheese ball can be soft and spreadable at the table, but a cone has to hold its outline before the decorations go on. That’s why the chill is part of the structure, not just a pause between mixing and serving. Cream cheese softens as it’s beaten, and the shredded cheddar adds body, but the mixture still needs time in the refrigerator to firm up.
Look for a mixture that holds together when you scoop it, rather than slumping back into a mound. If it’s too soft to shape cleanly, the cone will be harder to define and the decorations won’t have an even surface to sit on. The broad base and narrower top give the finished tree its familiar silhouette, so it’s worth waiting until the mixture feels workable before shaping it. A firm base also makes the decorating less fussy: you can place each layer without flattening the cheese beneath it.
What Gives This Cheese Tree Its Savory Center and Bright Finish

- Cream cheese — This is the smooth, rich base that lets the mixture hold together. Let it soften before mixing; cold cream cheese is much harder to beat evenly.
- Sharp cheddar — Its tang cuts through the creamy base and gives the cheese ball a more pronounced savory taste. Mild cheddar will work, but the finished mixture will taste gentler and less sharp.
- Chives, Worcestershire, garlic powder, and onion powder — Together, these season the center without competing with the cheddar. Fresh chives give the mixture little green flecks, while the Worcestershire adds a deeper savory note.
- Fresh parsley — Use fresh parsley for the leafy green coating; dried parsley won’t give the surface the same color or texture. Finely chopped pieces cling more neatly than large leaves.
- Sliced almonds — Their shape makes distinct branch-like rows and gives the outside a crisp contrast to the soft cheese. Choose slices that are intact enough to arrange in overlapping lines.
- Yellow bell pepper — The pepper provides the colorful star and garland. A firm pepper is easier to cut into clean strips than one that feels soft or wrinkled.
How to Shape and Decorate a Cheese Tree That Holds Its Lines
Beat the Cream Cheese Until Smooth
Start by beating the softened cream cheese in a large bowl until it looks smooth, with no visible lumps. Add the cheddar, chives, Worcestershire sauce, garlic powder, onion powder, and black pepper. Mix until the ingredients are evenly distributed; scrape the bowl as needed so the seasonings don’t stay tucked along the sides. If the cream cheese is still cold and firm, give it more time to soften rather than trying to beat out stubborn lumps.
Chill Until the Mixture Can Be Shaped
Cover the bowl and refrigerate the mixture for 1 hour. It should feel firm enough to gather and shape, not loose or glossy. This gives you a better chance of making a defined cone without the cheese spreading as you work. Keep the bowl covered during the chill so the surface doesn’t dry out.
Form the Cone and Add the Green Base
Transfer the chilled mixture to a serving platter and shape it into a cone about 6 inches tall. Build a broad bottom and taper it toward the top so the tree looks balanced. Chop the fresh parsley finely, then press it over the entire surface until the cheese is covered. If you leave bare patches, fill those before arranging the almonds so the green base looks even.
Arrange the Almond Branches and Pepper Garland
Arrange the sliced almonds in overlapping rows around the cone, pressing them lightly into the cheese so they stay in place without sinking out of sight. Cut a star from one side of the yellow bell pepper, then slice the remaining pepper into thin strips. Place the star at the top and arrange the strips around the tree as garland. A little space between the almond rows helps the green parsley show through.
Three Ways to Adapt the Tree for Your Table
Make It Nut-Free With a Parsley-Only Coating
Leave out the sliced almonds and keep the parsley coating as the full exterior. The tree will lose the raised branch texture, but it will still have a bright green surface for the pepper star and garland.
Turn It Into a Classic Round Cheese Ball
Shape the chilled mixture into a round ball instead of a cone, then coat it with parsley and arrange the almonds over the outside. You’ll keep the same savory center and crunchy finish without the tree silhouette or pepper garland.
Prepare the Cheese Mixture Ahead
Mix the cheese base, cover it, and refrigerate it overnight. Shape and decorate it closer to serving time so the parsley and pepper look fresh when the platter goes out.
Storage and Reheating
- Refrigerator: Cover leftovers and refrigerate for 3 to 4 days. The parsley may lose some freshness, and the pepper strips can soften.
- Freezer: Freezing isn’t recommended; cream cheese can become grainy or watery after thawing, and the decorated tree won’t keep its clean shape.
- Reheating: This cheese ball is served chilled, so don’t reheat it. Return leftovers to the refrigerator within 2 hours of setting out the platter.
Questions That Come Up When Making This Cheese Tree
Holiday Cheese Ball Christmas Tree
Ingredients
Equipment
Method
- In a large bowl, beat the cream cheese until smooth.
- Mix in the cheddar, chives, Worcestershire sauce, garlic powder, onion powder, and black pepper until evenly combined.
- Cover the mixture and refrigerate for 1 hour, until firm enough to shape.
- Transfer the mixture to a serving platter and shape it into a cone about 6 inches tall.
- Press the parsley over the entire surface of the cheese tree.
- Arrange the sliced almonds in overlapping rows around the tree, pressing them lightly into the cheese to resemble branches.
- Cut a star from one side of the bell pepper and cut the remaining pepper into thin strips.
- Place the star at the top of the tree and arrange the strips as garland around it.
