Winter Vanilla Snowflake Cake
Winter Vanilla Snowflake Cake is a delightful treat that's perfect for chilly days and festive gatherings. It’s a soft, fluffy vanilla cake layered with creamy frosting, and decorated with cute…
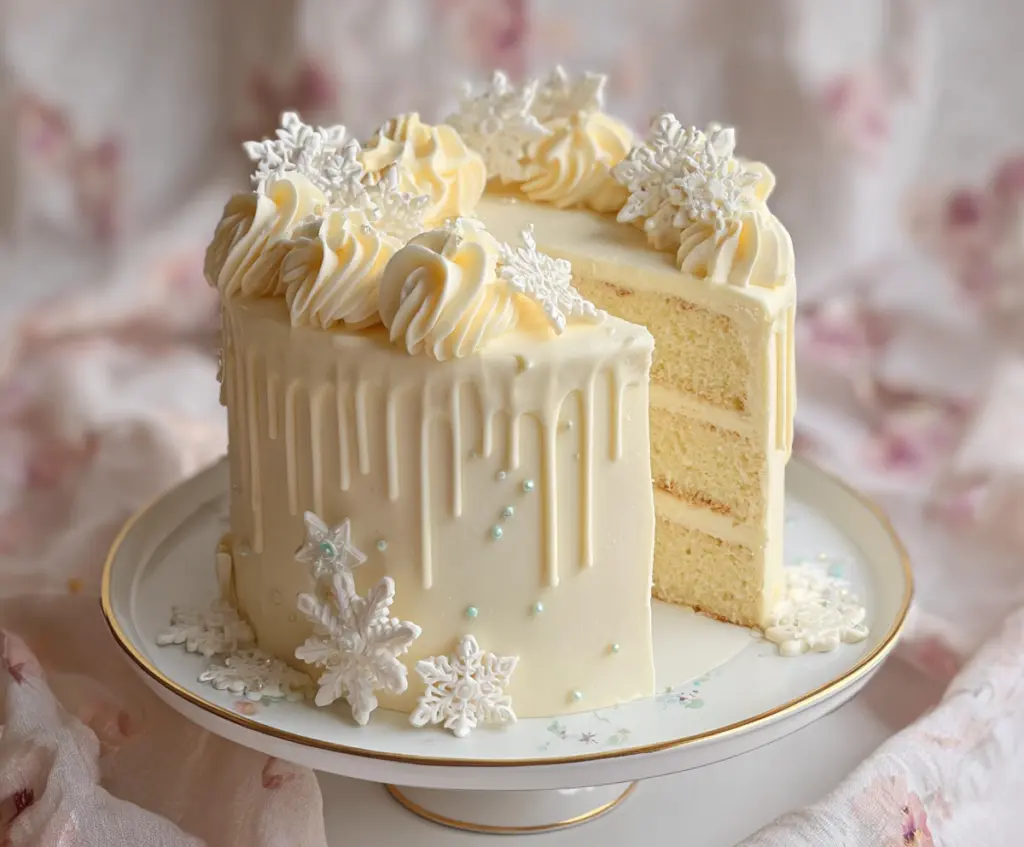
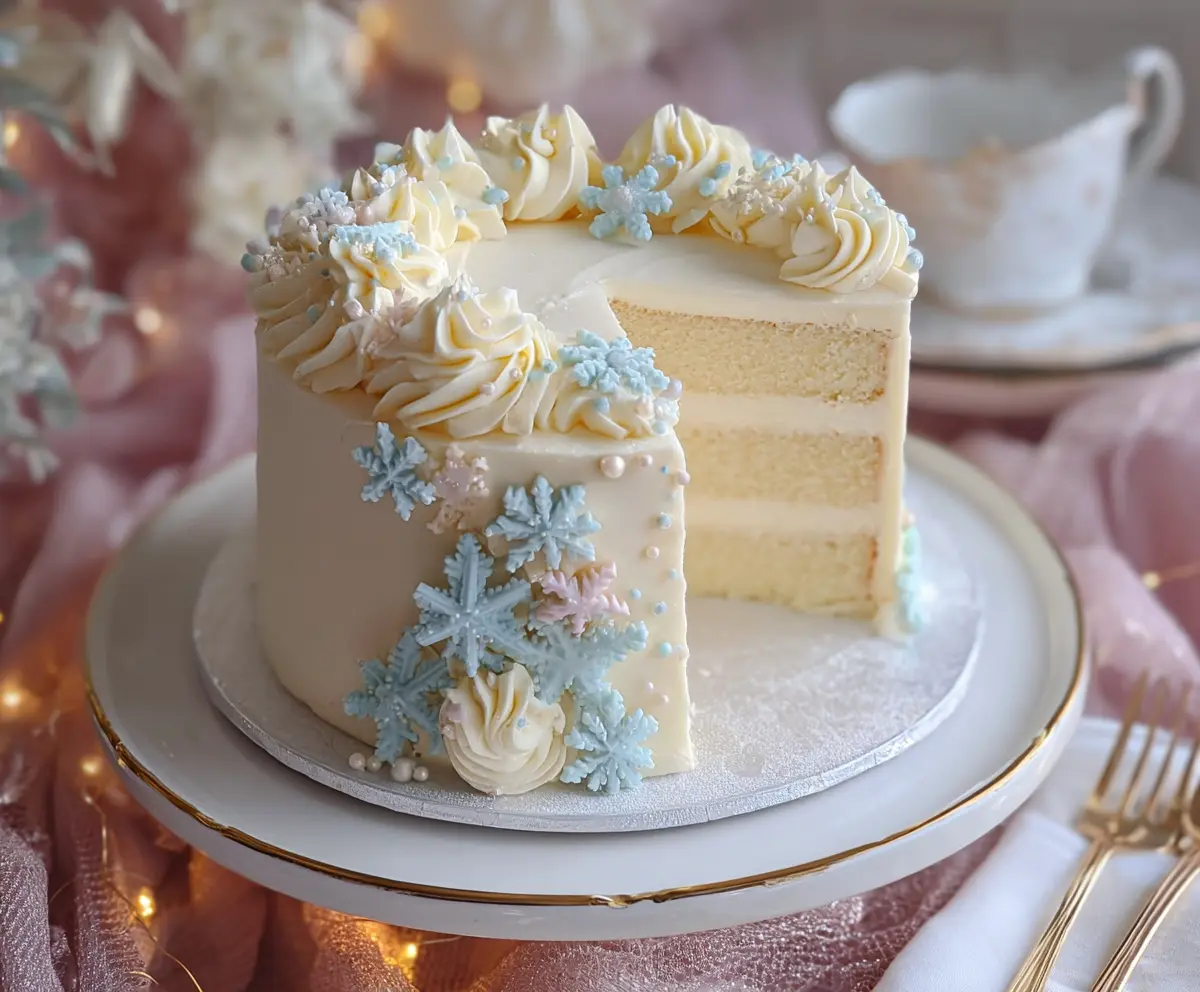
Tip: save now, cook later.Winter Vanilla Snowflake Cake is a delightful treat that’s perfect for chilly days and festive gatherings. It’s a soft, fluffy vanilla cake layered with creamy frosting, and decorated with cute snowflake shapes that make it feel like a little winter wonderland on your plate. The vanilla flavor is simple and comforting, while the snowflake designs add a fun, seasonal touch.
I love making this cake whenever the weather turns cold because it always brings a bit of magic to the kitchen. The best part is decorating it with snowflake patterns—you can keep it simple or go all out with icing and sprinkles. It feels like a small celebration each time I cut a slice, and everyone seems to enjoy the gentle sweetness without it being too heavy.
My favorite way to serve this cake is with a warm cup of tea or cocoa, especially on a cozy afternoon by the window watching the snow fall. It’s a lovely way to brighten up the winter days and share a moment with family or friends. This cake is the kind of dessert that feels special but still easy enough to enjoy anytime you want a little sweetness and a touch of winter cheer.
Key Ingredients & Substitutions
Vanilla Extract: This is the star for that classic vanilla flavor. Use pure vanilla extract for the best taste. If you’re out, almond extract is a nice alternative but use less—it’s stronger.
Butter: Unsalted butter keeps control over saltiness. Make sure it’s softened to room temperature for smooth mixing and fluffy cake texture. For a dairy-free option, try vegan butter sticks.
Milk: Whole milk gives the cake moisture and richness. You can swap it with any plant-based milk like almond or oat if you want a dairy-free version; just expect a slight flavor change.
Powdered Sugar: Essential for smooth buttercream. Sift it to avoid lumps. If you want a slightly lighter frosting, you can mix some powdered sugar with cornstarch to help with texture.
White Chocolate or Candy Melts: These create the beautiful drip effect. Use good-quality white chocolate for best flavor. If unavailable, white candy melts are easier to melt and drip but can be sweeter.
How Do I Get Smooth Buttercream and a Clean Cake Frosting?
Making silky buttercream and a neat cake finish can be tricky, but it’s all about technique and patience.
- Beat the butter well until creamy—this gives your frosting a light, fluffy base.
- Add powdered sugar slowly to avoid dust clouds and check consistency often.
- Use room-temperature butter and milk to prevent the frosting from curdling.
- Apply a thin crumb coat first to lock in crumbs. Chill the cake to set this layer before adding the final coat.
- Use a bench scraper or spatula, holding it steady and smoothing as you turn the cake.
- Chill the cake again if the frosting softens while decorating, then finish with piping and decorations.
With these steps, your frosting will be smooth and perfect for showing off the pretty snowflakes and drips!
Equipment You’ll Need
- Three 8-inch round cake pans – perfect for baking even, stacked layers.
- Electric mixer – makes beating butter and sugar easy and fluffy.
- Mixing bowls – for combining cake batter and frosting separately.
- Spatula – great for scraping bowls and smoothing frosting.
- Offset spatula – helps spread frosting smoothly on the cake sides and top.
- Piping bag and star tip – for creating elegant buttercream swirls on top.
- Double boiler or microwave-safe bowl – to gently melt white chocolate for drips.
- Cooling rack – lets cakes cool evenly and prevents sogginess.
Flavor Variations & Add-Ins
- Replace vanilla extract with almond or orange blossom extract for a unique floral or nutty twist.
- Add 1/2 cup finely grated white chocolate to the batter for extra sweetness and texture.
- Fold in 1/2 cup frozen or fresh berries for a fruity pop inside the layers.
- Mix cinnamon or cardamom (1 tsp) into the batter for a warm, cozy spice that’s great in winter.
Winter Vanilla Snowflake Cake
Ingredients You’ll Need:
For The Vanilla Cake:
- 2 3/4 cups (350g) all-purpose flour
- 2 1/2 tsp baking powder
- 1/2 tsp salt
- 1 cup (226g) unsalted butter, softened
- 2 cups (400g) granulated sugar
- 4 large eggs, at room temperature
- 1 tbsp pure vanilla extract
- 1 cup (240ml) whole milk, at room temperature
For The Vanilla Buttercream Frosting:
- 1 cup (226g) unsalted butter, softened
- 4 cups (480g) powdered sugar, sifted
- 1/4 cup (60ml) heavy cream or whole milk
- 2 tsp pure vanilla extract
- Pinch of salt
For Decoration:
- White chocolate or vanilla candy melts (for drips)
- Royal icing or fondant snowflakes (store-bought or homemade)
- Edible pearl sprinkles (light blue and white)
How Much Time Will You Need?
This recipe takes about 20 minutes to prep the batter and frosting, 25–30 minutes baking time, plus 30 minutes chilling for the crumb coat. Overall, you’ll want about 1.5 to 2 hours to complete the cake, including cooling and decorating.
Step-by-Step Instructions:
1. Prepare the Cake Layers:
Start by preheating your oven to 350°F (175°C). Grease and flour three 8-inch cake pans or line them with parchment paper. In a medium bowl, sift together flour, baking powder, and salt. In a large bowl, beat softened butter until creamy. Slowly add sugar and beat until fluffy. Add eggs one at a time, then stir in vanilla. Alternate adding dry ingredients and milk in three parts, mixing gently after each until just combined. Divide batter evenly into pans and bake for 25–30 minutes, or until a toothpick inserted in the center comes out clean. Let cool for 10 minutes in the pans; then transfer to cooling racks to cool completely.
2. Make the Vanilla Buttercream Frosting:
Beat softened butter on medium speed for about 2 minutes until creamy. Add powdered sugar gradually, mixing on low to avoid a sugar cloud. Then add vanilla, salt, and heavy cream (or milk) and beat on high for 3–4 minutes until fluffy. Adjust the consistency with more cream or sugar as needed so it’s easy to spread and pipe.
3. Assemble the Cake:
Place one cooled cake layer on your serving plate. Spread an even layer of frosting over it. Repeat for the second and third layers. Cover the entire cake with a thin crumb coat and refrigerate for about 30 minutes to set. Finally, add a smooth final coat of frosting all around the cake.
4. Add the White Chocolate Drip:
Melt white chocolate or vanilla candy melts gently in the microwave or double boiler until smooth. Let cool slightly until still pourable but not hot. Use a spoon or piping bag to carefully drip chocolate around the edges of the cake, creating pretty drips down the sides. Chill briefly to set the drips.
5. Decorate with Snowflakes and Pearls:
Arrange royal icing or fondant snowflakes on top and along the base of your cake. Pipe buttercream rosettes or swirls between snowflakes on top for extra charm. Finish decorating with edible pearl sprinkles to resemble sparkling snowflakes and winter magic.
6. Serve and Enjoy:
Let your cake rest at room temperature for about 30 minutes before slicing for the best texture. Cut into slices and enjoy the creamy, vanilla delight decorated like fresh winter snow.
Can I Use Frozen Cake Layers for This Recipe?
Yes! Just make sure to thaw frozen cake layers completely in the fridge overnight before frosting. Let them come to room temperature for about 30 minutes before assembling to avoid cracking or melting the buttercream.
What Can I Substitute for White Chocolate Drips?
If you don’t have white chocolate or candy melts, you can use vanilla-flavored glaze or a simple powdered sugar glaze tinted white. Melted marshmallows also work for a fun drip effect, but they have a different texture and sweetness.
How Should I Store Leftover Cake?
Store leftovers in an airtight container in the refrigerator for up to 4 days. Let the cake come to room temperature before serving to enjoy the frosting and cake at their best.
Is It Possible to Make the Cake Ahead?
Absolutely! You can bake the cake layers and prepare the frosting a day or two ahead. Keep layers tightly wrapped at room temperature, and store the frosting refrigerated. Assemble and decorate the day you plan to serve for fresh and beautiful results.
