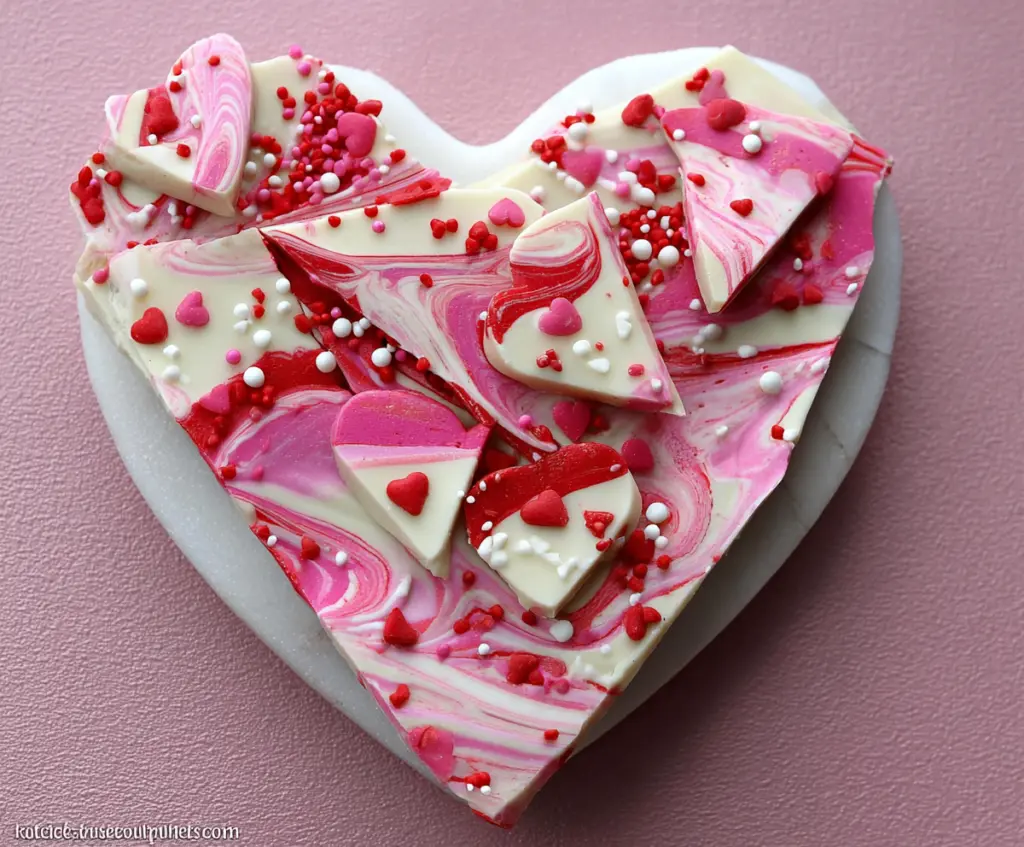
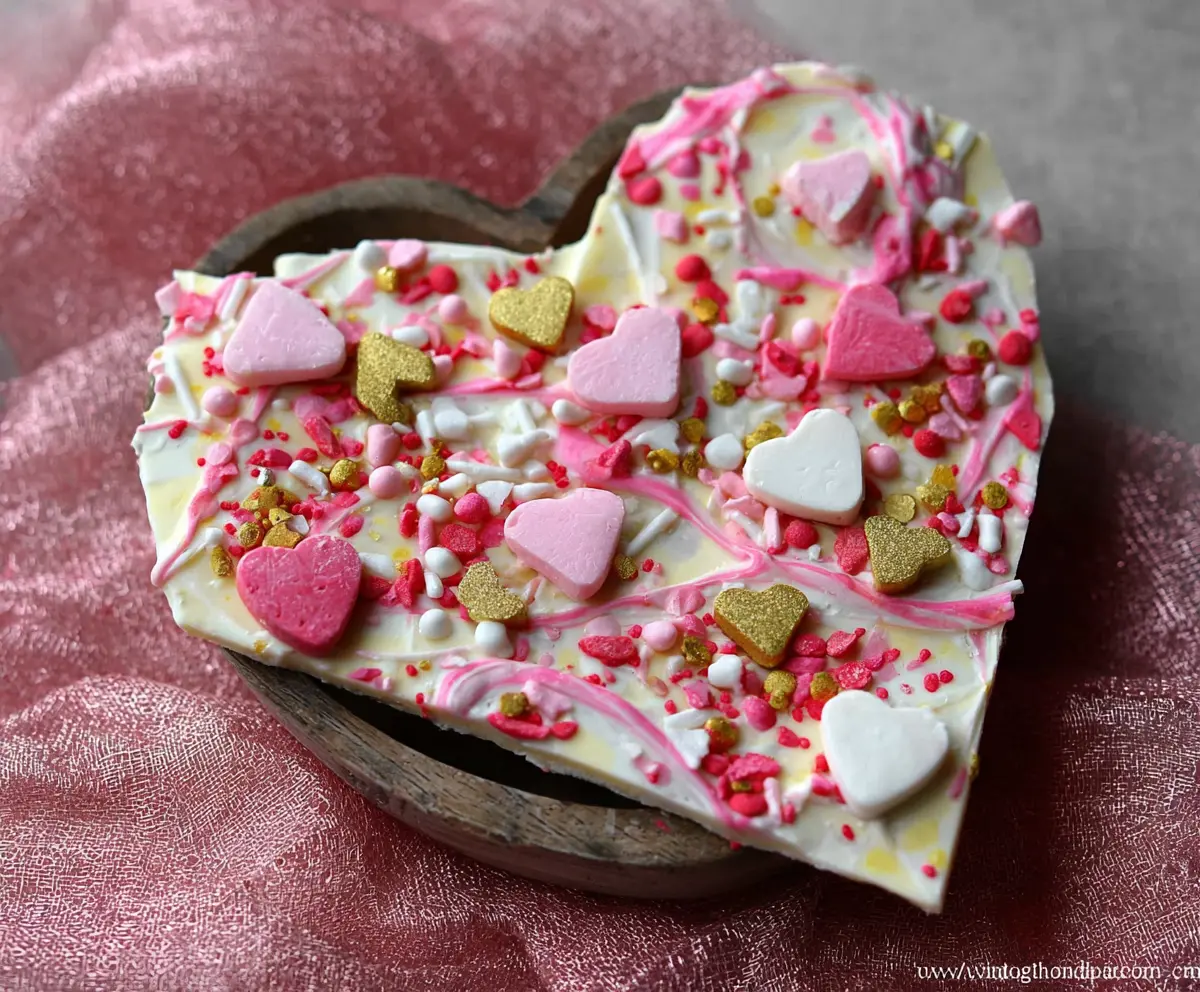
Valentine Bark
Valentine Bark is a sweet and simple treat that’s perfect for sharing with someone special or just enjoying a little self-love. It’s a colorful mix of chocolate, sprinkles, and festive…
Tip: save now, cook later.Valentine Bark is a sweet and simple treat that’s perfect for sharing with someone special or just enjoying a little self-love. It’s a colorful mix of chocolate, sprinkles, and festive toppings that come together in a crunchy, melt-in-your-mouth bark. The best part is how easy it is to make, yet it looks so cheerful and fun with all those little pinks, reds, and whites.
I love making Valentine Bark because it feels like a little gift you can create right in your own kitchen. I usually toss in some crushed candy canes or heart-shaped candies for extra crunch and sweetness. It’s my go-to when I want something special without a lot of fuss, and it’s perfect for getting the kids involved—they love decorating it almost as much as eating it!
One of my favorite ways to enjoy Valentine Bark is cutting it into bite-sized pieces and storing it in a jar to nibble on over the week. It’s the kind of treat that always brings a smile, whether it’s part of a cozy movie night or a sweet surprise in someone’s lunchbox. Plus, it’s a great little homemade gift that shows just a bit of extra care.
Key Ingredients & Substitutions
White Chocolate: I use white chocolate chips or melting wafers because they melt smoothly. If you need dairy-free, look for vegan white chocolate or use white candy melts instead.
Gel Food Coloring: Gel colors work best for swirling since they don’t thin the chocolate. Avoid liquid colors—they can make your chocolate seize and become grainy.
Valentine Sprinkles: Pick festive heart shapes and colors for the topping. You can use any fun sprinkles or even crushed freeze-dried raspberries for a natural twist.
How Do You Create the Perfect Marbled Swirl in Valentine Bark?
Getting that pretty swirl effect takes a gentle hand and the right timing. Here’s how:
- Pour the plain white chocolate first, spreading it evenly but not too thin.
- Add spoonfuls of your colored chocolates randomly on top.
- Use a skewer, toothpick, or knife tip to gently drag through the colors. Don’t over-mix—just a few swirls for a marbled look.
- Sprinkle toppings right after swirling, while the chocolate is still soft. This helps them stick well.
I like to work quickly so the chocolate doesn’t harden before I finish swirling and decorating. If your chocolate cools too fast, you can warm it gently again, but don’t overheat to avoid burning.
Equipment You’ll Need
- Microwave-safe bowls – these make melting chocolate easy and quick.
- Skewer or toothpick – perfect for creating those pretty swirls in the bark.
- Baking sheet – a flat surface to spread out your chocolate layer evenly.
- Parchment paper or silicone mat – stops the bark from sticking and helps with easy cleanup.
- Spatula – great for spreading the chocolate smoothly.
Flavor Variations & Add-Ins
- Swap white chocolate for dark or milk chocolate for a richer bark.
- Mix in crushed peppermint for a refreshing twist.
- Add chopped nuts like almonds or pistachios for extra crunch.
- Top with dried cranberries or freeze-dried strawberries for a fruity touch.
How to Make Valentine Bark?
Ingredients You’ll Need:
For The Bark:
- 12 oz white chocolate chips or white chocolate melting wafers
- ½ tsp red gel food coloring
- ½ tsp pink gel food coloring
- Valentine-themed sprinkles (heart shapes, red, pink, white confetti)
- Optional: additional heart-shaped candy melts or decorations for topping
How Much Time Will You Need?
This sweet recipe takes about 10-15 minutes for prep and melting, plus 20-30 minutes to let the bark set and harden. A quick and easy treat that’s ready in under an hour!
Step-by-Step Instructions:
1. Get Ready:
Start by lining a baking sheet with parchment paper or a silicone baking mat. This will stop the bark from sticking and make clean-up easier.
2. Melt the Chocolate:
Divide the white chocolate into three bowls—half in one, and split the other half into two smaller bowls. Melt each in the microwave, heating in 30-second bursts and stirring in between until smooth and creamy.
3. Color the Chocolate:
Add red gel food coloring to one small bowl and pink gel food coloring to the other. Mix well until you get bright, lovely colors. Avoid liquid food color to keep the chocolate smooth.
4. Make Your Bark:
Pour the plain white chocolate onto your lined baking sheet, spreading it out evenly. Drop spoonfuls of the red and pink chocolates randomly on top. Gently swirl the colors together using a skewer or knife tip to create a pretty marbled effect.
5. Decorate and Set:
Sprinkle Valentine-themed sprinkles over the bark while the chocolate is still soft. Press lightly so they stick. Add any extra candy decorations if you like. Let it harden at room temperature, or pop it in the fridge for a faster set time.
6. Break and Enjoy:
Once fully set, break the bark into fun pieces. Serve right away or store in an airtight container. It stays delicious for up to two weeks!
Can I Use Dark or Milk Chocolate Instead of White?
Absolutely! You can substitute white chocolate with dark or milk chocolate. Keep in mind the coloring may not show as vibrantly on darker chocolate, but it will still taste delicious.
How Should I Store Valentine Bark?
Store the bark in an airtight container at room temperature or in the fridge. It will stay fresh and tasty for up to two weeks. If storing at room temperature, keep it away from heat or direct sunlight to prevent melting.
Can I Make Valentine Bark Ahead of Time?
Yes! You can prepare the bark a few days in advance. Just keep it well sealed in an airtight container to maintain freshness and crispness.
What If I Don’t Have Gel Food Coloring?
If you don’t have gel food coloring, you can skip the colors or try using colored candy melts instead. Avoid liquid food coloring as it can cause the chocolate to seize and become grainy.
