No Bake Oreo Icebox Cake
No Bake Oreo Icebox Cake is a delightful and simple dessert that layers creamy filling with crunchy Oreo cookies for a fun, chilled treat. The magic happens as the cookies…
Tip: save now, cook later.No Bake Oreo Icebox Cake is a delightful and simple dessert that layers creamy filling with crunchy Oreo cookies for a fun, chilled treat. The magic happens as the cookies soften just enough while sitting in the fridge, creating a cake that’s rich, smooth, and full of chocolatey Oreo flavor without ever needing an oven.
I love making this cake because it’s so easy to put together, especially when you want something sweet but don’t want to heat up the kitchen. The longer it sits in the fridge, the better it tastes, so I usually make it a day ahead. It’s like the cookies and cream get to hang out and become best friends overnight.
This cake is perfect for warm days or when you need a dessert that’s crowd-pleasing and quick. I often serve it with a cold glass of milk or a fresh cup of coffee. It’s a favorite at gatherings because everyone loves that mix of creamy and crunchy textures and the familiar taste of Oreos in a totally new way.
Key Ingredients & Substitutions
Oreos: These are the star of the cake and give it that classic cookies-and-cream flavor. If you want to mix things up, try chocolate wafer cookies or sandwich cookies with different fillings.
Heavy Whipping Cream: It’s what makes the cake light and creamy. If you’re avoiding dairy, coconut cream whipped up can be a tasty alternative, though the flavor will change slightly.
Powdered Sugar: This sweetens the cream without leaving a grainy texture. You can swap it for icing sugar or a bit of honey, but adjust to taste since liquid sweeteners might change texture.
Vanilla Extract: A small touch that adds warmth and depth to the cream. If you don’t have vanilla, a bit of almond extract or even a pinch of cinnamon can work well.
How Do You Get the Perfect Creamy Layers Without Crumbling Cookies?
The trick is in the layering and chilling:
- Start with a thin layer of whipped cream: This helps the cookies stick and softens as it chills, preventing crumbles.
- Even cookie layers: Lay the Oreos in a single, mostly intact layer. Breaking some to fill gaps is good, but avoid smashing too much.
- Spread the whipped cream evenly: Gently smooth it over the cookies so each bite is balanced.
- Chill long enough: Refrigerate at least 6 hours, overnight is best. This resting time softens the cookies into a cake-like texture.
My tip: Use a flexible spatula to spread cream gently—press lightly so the cookies don’t break. Also, colder cream whips better, so chill your bowl and beaters before whipping if you can.
Equipment You’ll Need
- Electric mixer – makes whipping the cream quick and light without much effort.
- Large mixing bowl – roomy enough for whipping cream without splashing.
- Spatula – perfect for spreading cream evenly over the cookies without breaking them.
- Rectangular or square baking dish – helps build neat layers and fits well in the fridge.
- Plastic wrap – keeps the cake covered to prevent fridge odors and drying out.
Flavor Variations & Add-Ins
- Use chocolate sandwich cookies with mint filling for a refreshing twist.
- Add a layer of peanut butter or Nutella spread between Oreos for extra richness.
- Mix in crushed nuts like toasted pecans or almonds into the cream for crunch.
- Fold in mini chocolate chips or white chocolate chunks for added texture.
No Bake Oreo Icebox Cake
Ingredients You’ll Need:
Main Ingredients:
- 36 Oreo cookies (about 2 standard packages)
- 4 cups heavy whipping cream
- ½ cup powdered sugar
- 2 teaspoons vanilla extract
- Optional: crushed Oreos for garnish
How Much Time Will You Need?
This dessert takes about 15 minutes to prepare. However, it needs to chill in the fridge for at least 6 hours, or better yet, overnight to let the cookies soften and the flavors come together into a creamy, dreamy cake.
Step-by-Step Instructions:
1. Whip the Cream:
Using an electric mixer, beat the heavy whipping cream in a large bowl until it starts to thicken. Add the powdered sugar and vanilla extract, then continue whipping until stiff peaks form. This whipped cream will be the creamy layer that brings the whole cake together.
2. Assemble the Layers:
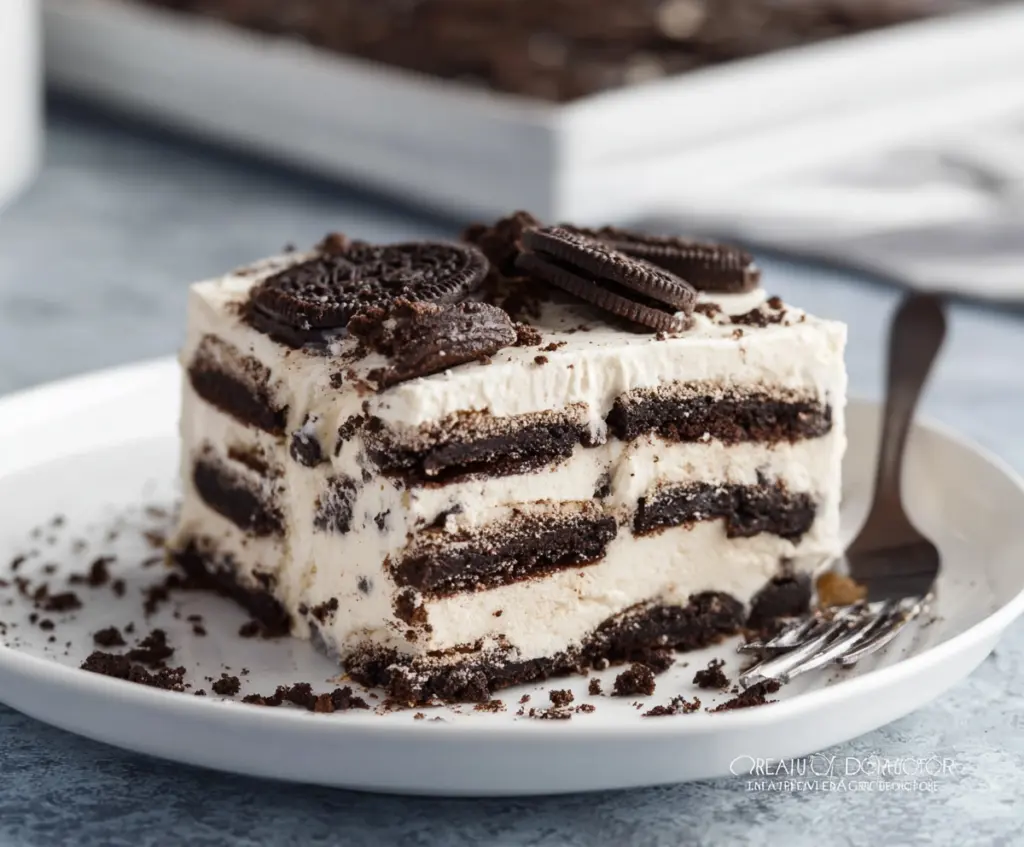
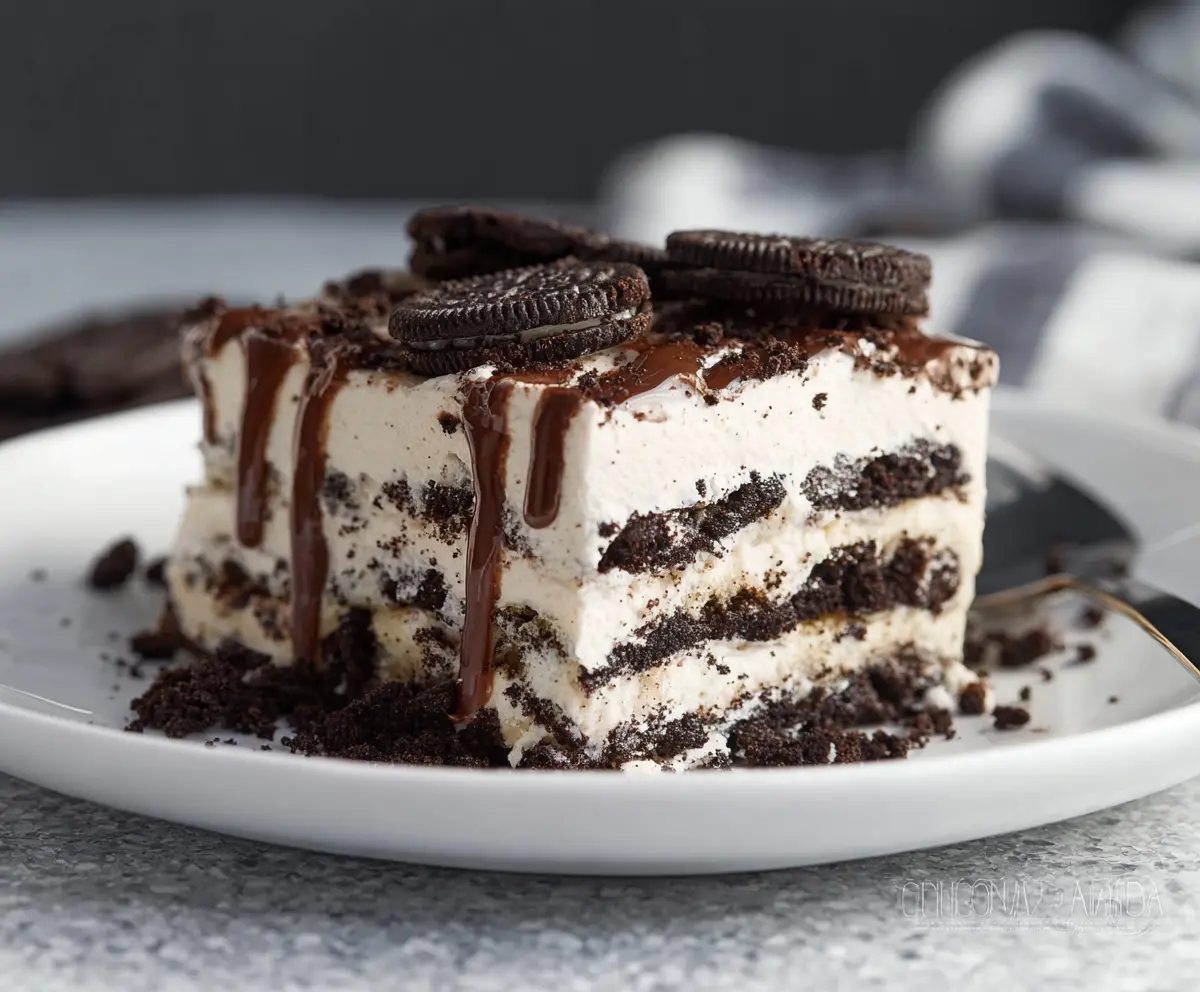
Spread a thin layer of whipped cream at the bottom of a rectangular or square baking dish. Arrange a single layer of Oreo cookies on top, breaking a few if needed so they cover the surface evenly. Then spread another layer of whipped cream over the cookies, smoothing it nicely. Repeat this until you finish with a top layer of whipped cream.
3. Chill and Serve:
Sprinkle crushed Oreos on top if you like for extra decoration and crunch. Cover the cake with plastic wrap and refrigerate for at least 6 hours, preferably overnight. When ready, slice into squares and enjoy your creamy, no-bake Oreo icebox cake chilled!
Can I Use Frozen Whipped Cream for This Recipe?
It’s best to use fresh heavy whipping cream for whipping. Frozen cream won’t whip properly and can affect the texture of the cake. If you only have frozen, thaw it slowly in the fridge and shake well before whipping, but results may vary.
Can I Make This Cake Ahead of Time?
Absolutely! In fact, making it the day before helps the cookies soften and flavors meld perfectly. Just keep it covered in the fridge until serving time.
How Should I Store Leftovers?
Store any leftovers covered tightly in the refrigerator for up to 3 days. The cake stays creamy and delicious but finishes best within a couple of days.
What Can I Use Instead of Oreos?
If you want to switch things up, chocolate wafer cookies or any sandwich cookies work well. Just pick crunchy cookies that soften nicely with chilling.
