Black Forest Cheesecake
Black Forest Cheesecake is a delightful twist on the classic Black Forest cake, blending rich, creamy cheesecake with the deep flavors of chocolate and cherries. You'll find a smooth, velvety…
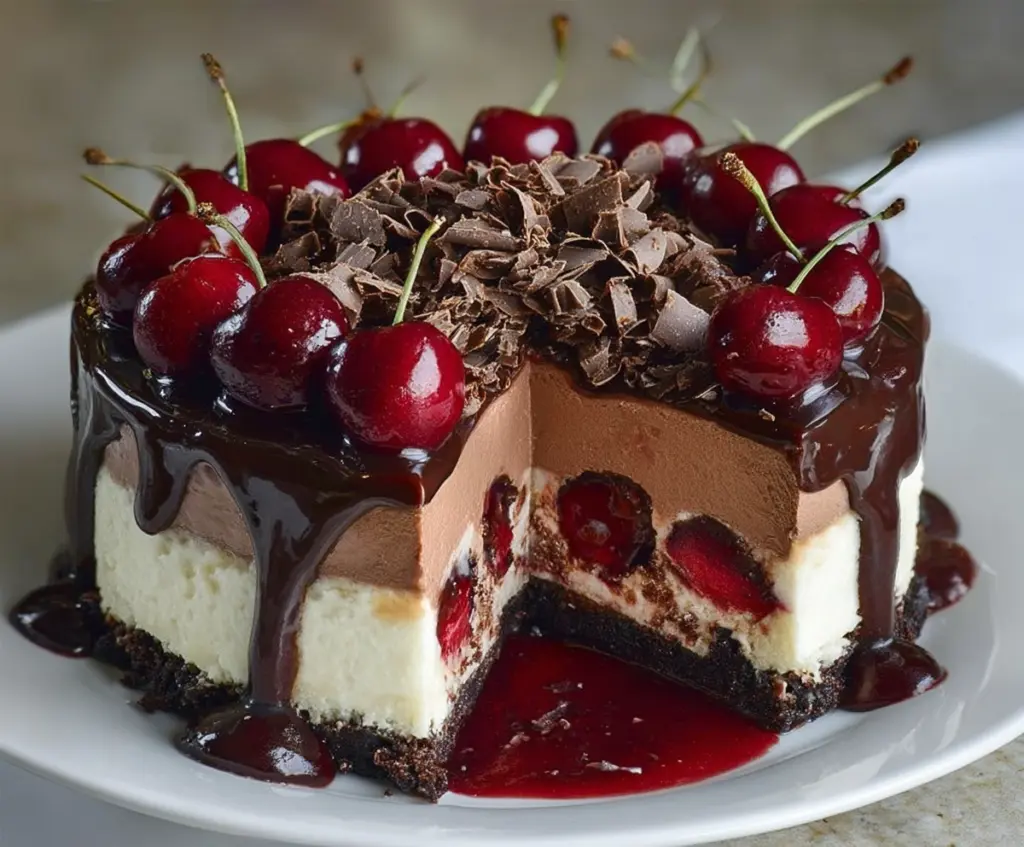
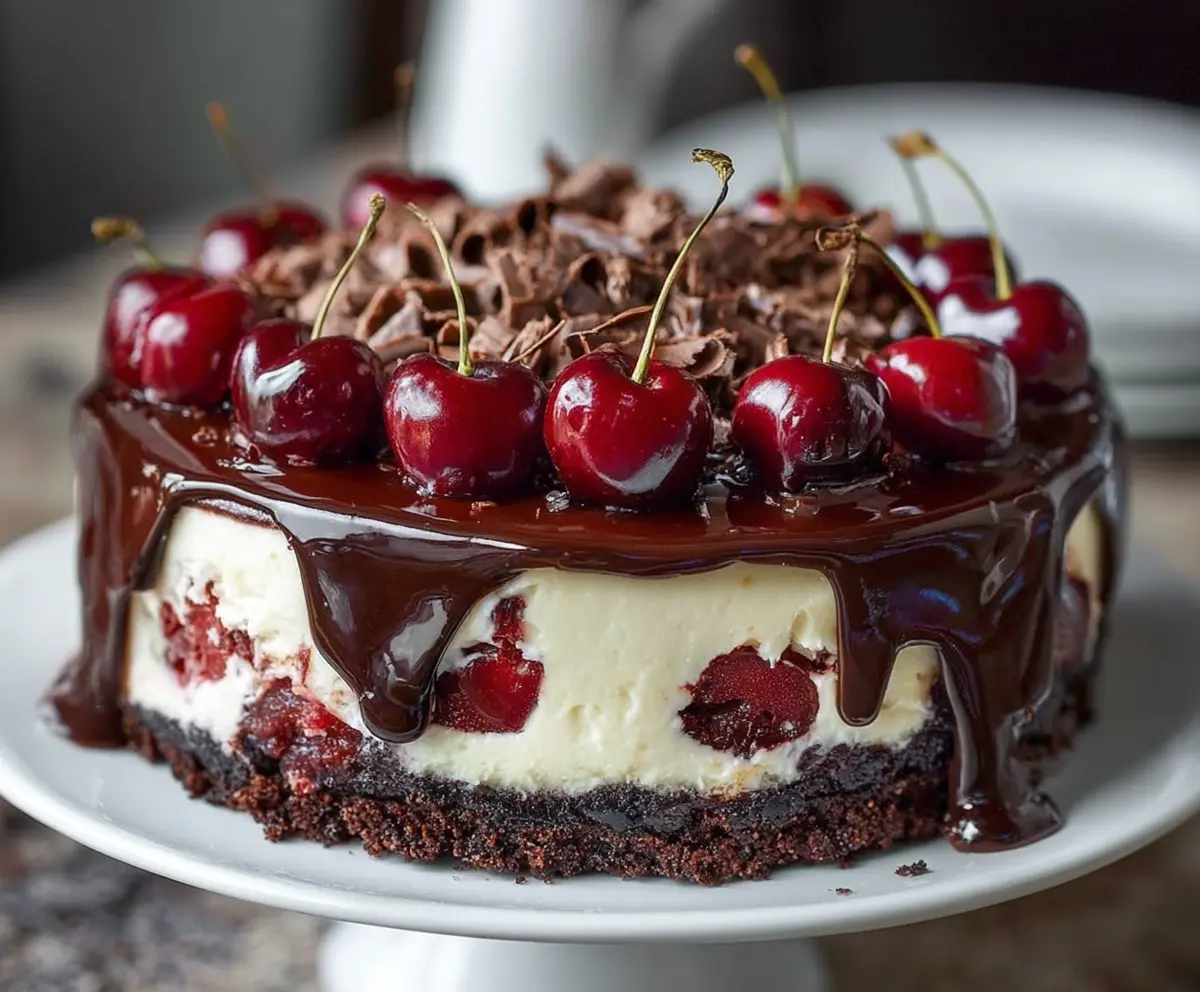
Tip: save now, cook later.Black Forest Cheesecake is a delightful twist on the classic Black Forest cake, blending rich, creamy cheesecake with the deep flavors of chocolate and cherries. You’ll find a smooth, velvety cheesecake topped with luscious cherry compote and a sprinkle of chocolate shavings or chunks that make every bite feel special. The chocolate crust adds a nice crunch and a little extra chocolate punch that ties everything together.
I love making this cheesecake when I want something that feels both fancy and comforting at the same time. The tartness of the cherries balances the sweetness of the cheesecake perfectly, and the chocolate brings a little indulgence without going over the top. If I’m honest, this dessert usually disappears quickly at gatherings because people just can’t resist picking at it!
One of my favorite ways to serve Black Forest Cheesecake is chilled, right out of the fridge, maybe with a dollop of whipped cream on top for some extra creaminess. It’s a great dessert for special occasions but also makes an amazing treat to enjoy with a cup of coffee or tea on a quiet afternoon. I always make sure to save a slice for myself because it’s just that good!
Key Ingredients & Substitutions
Chocolate cookie crumbs: These form the crunchy base. Oreos work great, but you can swap for any chocolate wafers or biscuits you like. For gluten-free, use gluten-free chocolate cookies.
Cream cheese: The heart of this cheesecake. Make sure it’s softened to mix smoothly. You can use Neufchâtel cheese for a lighter option, though it may change the texture slightly.
Cherries: Fresh or frozen pitted cherries work well here. If fresh aren’t available, frozen are a good substitute—just thaw first. Avoid canned cherries since they’re often too sweet and juicy.
Bittersweet chocolate: Adding depth to the chocolate layer. Feel free to adjust the chocolate intensity by using semi-sweet or dark chocolate based on your taste.
Heavy cream: Used both in the cheesecake and ganache for richness. For a lighter option, you can substitute with half-and-half in the cheesecake, but keep heavy cream for the ganache for smoothness.
How Can I Make Smooth, Crack-Free Cheesecake Layers?
Cheesecakes can crack or be uneven if not handled carefully. Here’s the key:
- Beat cream cheese until smooth and lump-free before adding other ingredients.
- Add eggs one at a time and mix gently. Over-mixing adds air, leading to cracks.
- Bake the cheesecake in a water bath. The moist heat helps it cook evenly and slowly, reducing cracks.
- Don’t open oven during baking. When done, let cheesecake cool gradually by leaving the oven door slightly open for 1 hour.
- Chill cheesecake for several hours or overnight to let it set fully and develop flavor.
Equipment You’ll Need
- 9-inch springform pan – makes removing the cheesecake easy without damaging it.
- Mixing bowls – at least two to separate the plain and chocolate batter.
- Electric mixer – helps beat cream cheese smooth and mix ingredients evenly.
- Small saucepan – for cooking cherry filling and warming cream for ganache.
- Baking pan for water bath – holds the springform pan and hot water to keep cheesecake moist.
- Rubber spatula – great for folding in melted chocolate without deflating batter.
Flavor Variations & Add-Ins
- Swap cherries for raspberries or mixed berries for a fresh twist with tartness.
- Use white chocolate instead of dark chocolate for a sweeter, milder top layer.
- Add a splash of Kirsch or cherry liqueur to the cherry filling for classic Black Forest flavor.
- Mix chopped toasted almonds or hazelnuts into the crust for extra crunch and nuttiness.
Black Forest Cheesecake
Ingredients You’ll Need:
For the Crust:
- 1 1/2 cups chocolate cookie crumbs (such as Oreos, finely crushed)
- 5 tbsp unsalted butter, melted
For the Cheesecake Layers:
- 24 oz (680g) cream cheese, softened
- 1 cup granulated sugar
- 1 tsp vanilla extract
- 3 large eggs
- 1 cup sour cream
- 1 cup heavy cream, divided
- 8 oz (225g) bittersweet or semisweet chocolate, melted and slightly cooled
For the Cherry Filling:
- 1 1/2 cups fresh or frozen pitted cherries
- 1/4 cup sugar
- 1 tbsp cornstarch
- 2 tbsp water
- 1 tsp lemon juice
For the Ganache:
- 1/2 cup heavy cream
- 4 oz (115g) dark chocolate, chopped
For Garnish:
- Fresh cherries with stems
- Chocolate shavings or curls
How Much Time Will You Need?
The entire process takes about 20 minutes to prepare, 50-60 minutes to bake, 1 hour to cool in the oven, and at least 4 hours to chill in the fridge, preferably overnight. Plan ahead so you have plenty of chilling time to let the cheesecake set properly—then the result is simply delicious!
Step-by-Step Instructions:
1. Prepare the Crust:
Preheat your oven to 325°F (160°C). Mix the chocolate cookie crumbs with melted butter until well combined. Press this mixture firmly into the bottom of a 9-inch springform pan. Bake for 10 minutes, then take it out to cool while you prepare the filling.
2. Make the Cherry Filling:
In a small saucepan, combine cherries, sugar, cornstarch, water, and lemon juice. Cook over medium heat, stirring constantly, until the mixture thickens and the cherries soften, about 5-7 minutes. Remove from heat and cool completely before using.
3. Prepare the Cheesecake Batter:
In a large bowl, beat the softened cream cheese until smooth and creamy. Gradually add sugar and continue beating until fully combined. Add vanilla extract and eggs one at a time, mixing well after each. Stir in sour cream until everything is well mixed.
4. Divide Batter and Add Chocolate:
Set aside about 2 cups of the plain cheesecake batter. In the remaining batter, gently fold in the melted chocolate until mixed in.
5. Assemble the Layers:
Pour the plain cheesecake batter over the cooled crust, spreading evenly. Drop spoonfuls of cherry filling over this layer and gently press some whole or halved cherries into the batter around it. Carefully pour the chocolate cheesecake batter on top, smoothing the surface nicely.
6. Bake the Cheesecake:
Place the springform pan inside a larger baking pan. Pour hot water into the larger pan until it reaches halfway up the sides of the springform pan (creating a water bath). Bake at 325°F (160°C) for about 50-60 minutes, until the edges are set but the center slightly jiggles. Turn off the oven, crack the door, and let the cheesecake cool inside for 1 hour.
7. Chill:
Remove the cheesecake from the oven and water bath. Chill it in the fridge for at least 4 hours, ideally overnight, so it sets perfectly.
8. Prepare Ganache and Decorate:
Heat 1/2 cup heavy cream in a small saucepan until it just starts to boil. Pour this over the chopped dark chocolate in a bowl. Let sit for 2 minutes and then stir until smooth. Allow ganache to cool slightly, then pour over your chilled cheesecake, letting it drip down the sides.
Decorate the top with fresh cherries around the rim and pile chocolate shavings or curls in the center. Serve chilled and enjoy the rich, creamy layers mingled with tart cherries and luscious chocolate!
Can I Use Frozen Cherries for the Cherry Filling?
Yes! Frozen cherries work perfectly—just thaw them completely and drain any excess juice before cooking the filling to avoid extra liquid in the cheesecake.
How Do I Store Leftover Cheesecake?
Store leftovers in an airtight container in the fridge for up to 4 days. For best taste, let the cheesecake come to room temperature for 15-20 minutes before serving.
Can I Make This Cheesecake Ahead of Time?
Absolutely! In fact, the cheesecake tastes even better after chilling overnight. Prepare it a day ahead to allow the flavors to meld and the texture to set perfectly.
What Should I Do If I Don’t Have a Springform Pan?
A springform pan makes removing the cheesecake easier, but if you don’t have one, use a regular cake pan lined with parchment paper and carefully invert the cake after chilling to remove it.
